This project marks a transition from shell-based automation to the use of a high-level, general-purpose programming language for complex system tasks. By completing this lab, you'll have demonstrated the ability to leverage Python's design philosophy—emphasizing code readability and modularity—to build scripts that are more scalable and maintainable than traditional shell scripts.
Cybrary is a well established and free IT training platform with several intuitive labs to explore
A paid subscription with more advanced labs is available as well outside the scope of this platform
Head to https://www.cybrary.it to create a free account for learning available on their platform
Head to Python Scripting Basics to complete it yourself or you can perform it on your homelab below
Quick Links:
Requirements:
• Windows PC w/ Internet Connection
• USB Flash Drives w/ at least 64GB Capacity
• 2 Unused PCs w/ at least 4GB of Memory
1. Python Overview
Python is a general-purpose programming language that was invented by Guido Van Rossum in the late 1980s.
While developing Python, Can Rossum was havily inspired by the ABC programming language. Unlike many other
programming languages of the era, ABC e,phasized readability and simplicity, and was intended for teaching
and prototyping, rather than actual systems programming. As a result, Python is also characterized by its
readability and simplicity, and today it is widely regarded as one of the most used programming lnaguages

Python is an interpreted high-level programming language. Code is created using a human-readable syntax
and then converted into machine code, line by line, on the fly. There is no need to formally compile and
link code as required for languages like C or C++. Python Shares many of the same core concepts as other
popular multi-paradigm programming languages like Java or C++. While this lab is not intended to be a full
comprehensive introduction to programming, there's simply too much to discuss, we will briefly review some
of the core concepts used heavily in the upcomming lesson as a baseline and a refresher on the subject
• Variables - Variables are containers (reserved memory locations) for storing data, like strings and
integers. For example, x = 1 stores the integer 1 in the container x.
• Types - All data stored in memory has a type. Standard data types include numbers,strings, lists,
tuples, and dictionaries. For example, if we code name = "John", the variable name would be type string.
If we code age = 20, the variable age is type integer. While you can assign a variable type - for example,
x = int(10) or name = str("John") - this is seldom necessary, as Python can typically guess the type of
the variable for you
• Operators - Operators are used to perform actions on variables. The most commonly used operators are
arithmetic (add, subtract, divide, multiply, etc.), assignment operators (x = "cow", y = 1.234, etc.),
comparison operators (equals, not equals, greater than, less than), and membership operators (is x in y)
• Functions - A function is a named block of code from which you can pass data to get data returned
Once a function is created, it can be used, or "called", as often as needed.
• Methods - Methods are special types of functions associated with an object. You can think of a method
as a built-in function. For example when you create a string (name = "John"), the new string object has
built-in functions to make all the letters uppercase ("JOHN"), or lowercase ("john"), or even the reverse
case ("jOHN").
• Loops - Loops repeat a task until some criteria are met. For example, open a file and read each line
of text or iterate through all data stored in a list.
• If / Else Conditions - If / Else statements allow a program to make decisions based on the result of
a test. For example, you may want to add 1 to variable x until x is 10, or you may want to loop through a
list of names until the name "John" is found.
Python is remarkably popular. Let's briefly review some of the most common applications which use Python
• Web Developement - Python offers many frameworks for web developement, including Flask and Django
These frameworks allow for rapid yet stable web application developement. Python also has many powerful
libraries like Scrapy and BeautifulSoup for web crawling.
• Data Science - Alongside R, Python is the go-to language for data science. Python has a number of
libraries for numerical computations (Tensorflow, NumPy), data analysis (Pandas), data visualizations
(Matplotlib), and image processing (SciPy).
• AI / Machine Learning - Python excels at managing and manipulating massive data sets, making Python
a key tool for machine learning (ML), large language models (LLS) and Artifician Intelligence (AI) research
Most libraries noted above are also used for ML/LLM/AI (for example, NumPy, SciPy, Pandas, and Tensorflow)
There are also ML-specific libraries like Scikit Learn. Scikit Learn leverages tools like NumPy and SciPy
to support supervised and unsupervised learning.
• Cybersecurity - Offensive and defensive security practitioners use Python in every phase of the
cybersecurity lifecycle. With Python, you can scan networks, scrape web pages, create fuzzers and payloads
, decode packets, conduct targeted vulnerability assessments, and automate reconnaissance.
Python has two modes of operation: script and interactive. The interactive shell is called REPL (Read Eval
Print Loop). Each line of code is Read, then Evaluated, and any return vaules are Printed. In script mode,
a complete program is written in an editor and then passed to the Python interpreter in it entirety. You
will have an opportunity to practice with both in the upcoming lab. In the next lesson, you will practice
using some of the fundamental Python concepts discussed above. Following this, we will switch gears and
practice writing several Python scripts using Visual Basic Studio code editor, but first we need our OS
2. Install Nix OS
Nix OS is a Linux Distribution built on top of the Nix package manager. Unlike traditional distros like
Debian or Arch, NixOS is declarative and immutable, meaning many program package versions can co-exist
Because Nix OS isolates dependencies, it's ideal for testing software which requires specific packages
Because of these and many other features, Nix OS has now established itself as the ideal flavor of Linux
for software developers. Nix provides developers with a complete and consistent developement environment
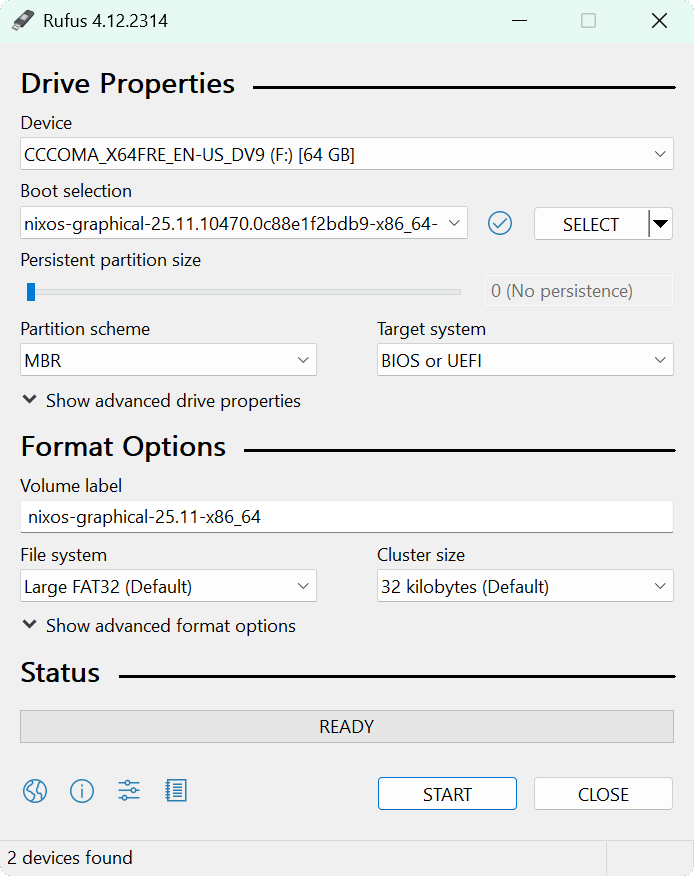
Download Nix OS Iso: latest-nixos-graphical-x86_64-linux.iso
Download Rufus Disk Imaging Software: Rufus Official Download
Insert USB Flash Drive, run rufus.exe, select target drive, select the Nix OS Image file, then click start
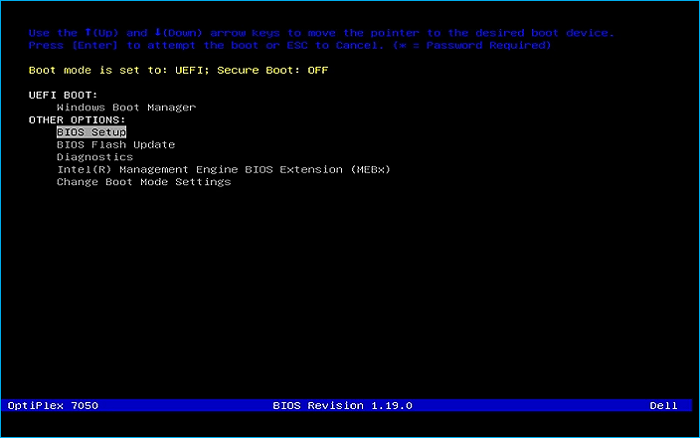
Remove the USB Flash Drive and Insert into unused PC. Start PC and press the hotboot key at the startup:
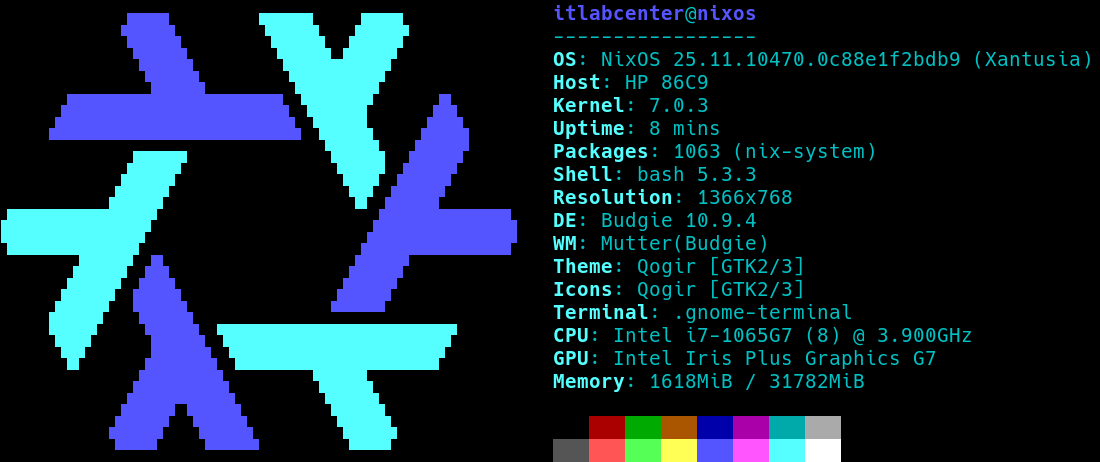
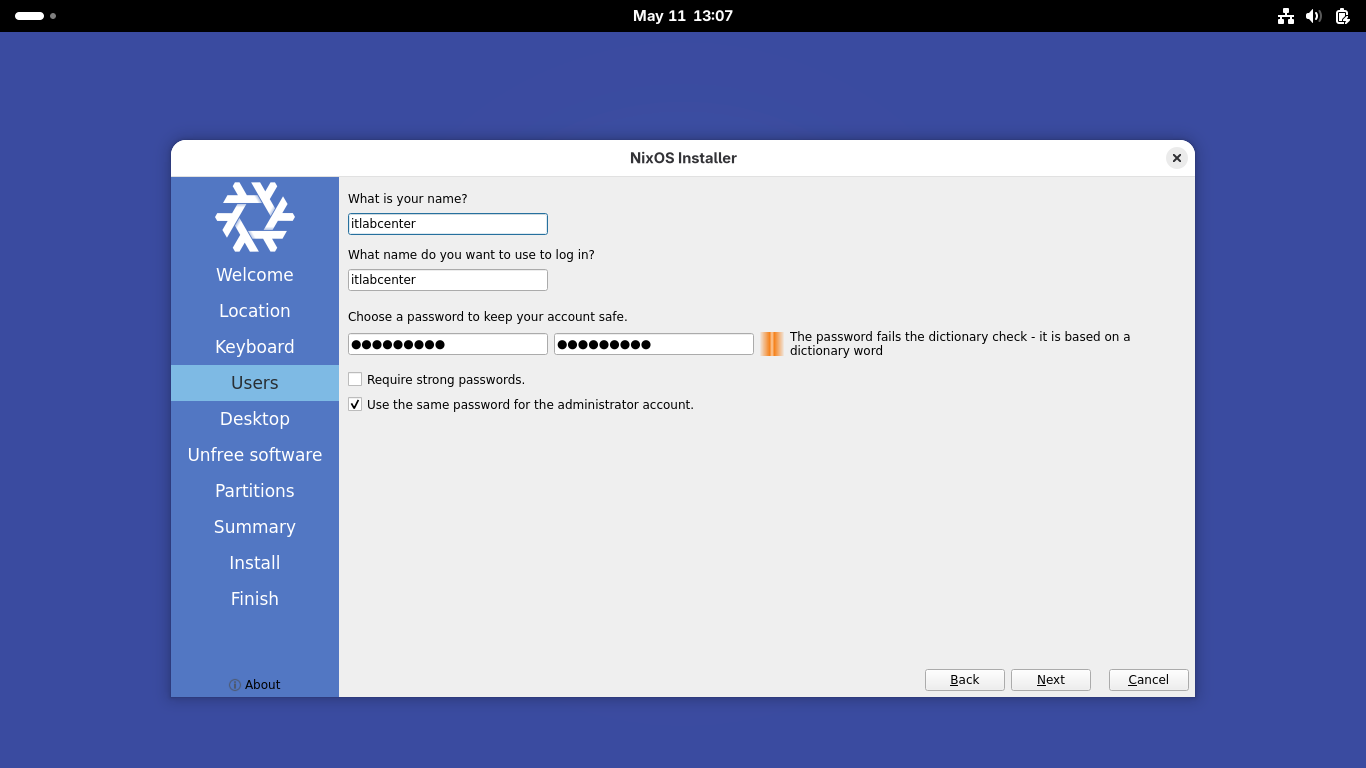
Once our live operating system boots we will be taken to the GNOME pre-installation desktop environment
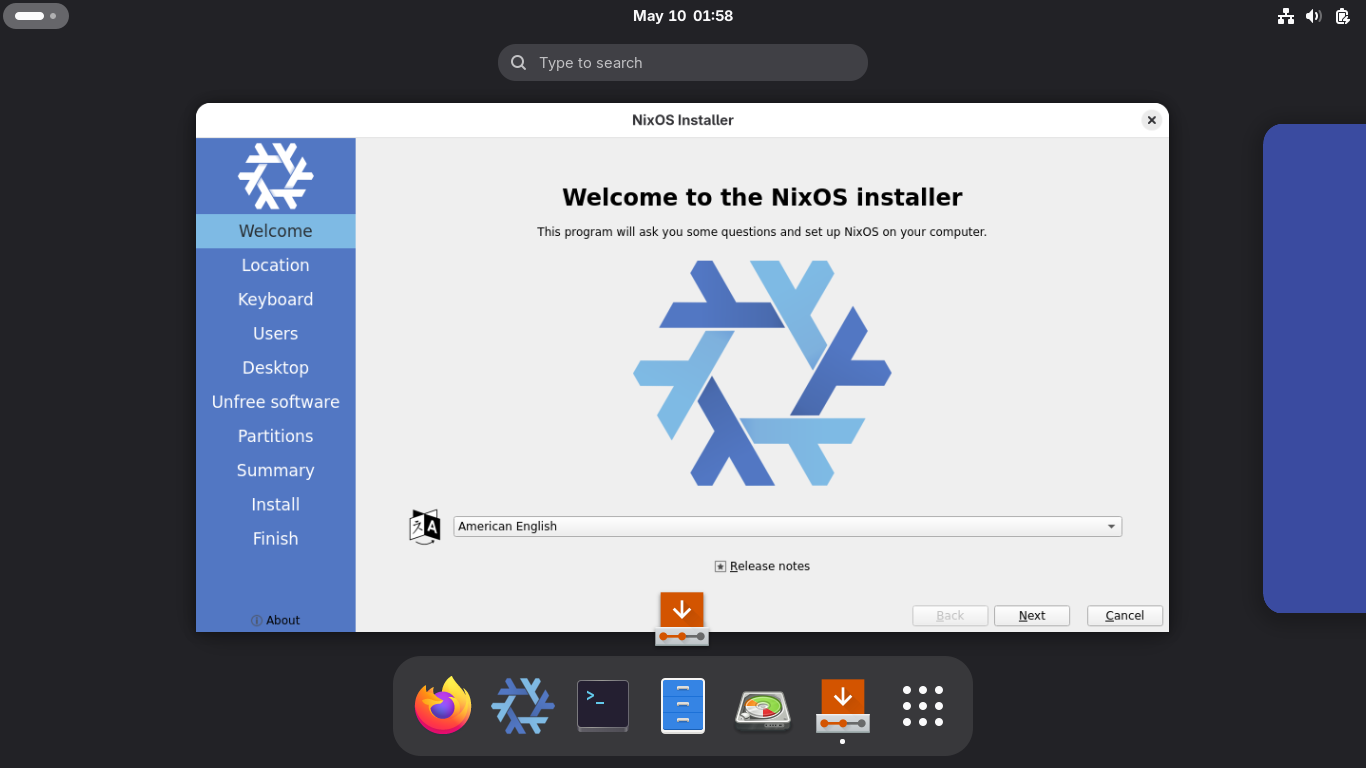
Click the installer window > Next > Next > Next and fill in the password and the username as itlabcenter
Now hit Next > Budgie > Next > then check the box to Allow unfree software > Next. Now we must partition
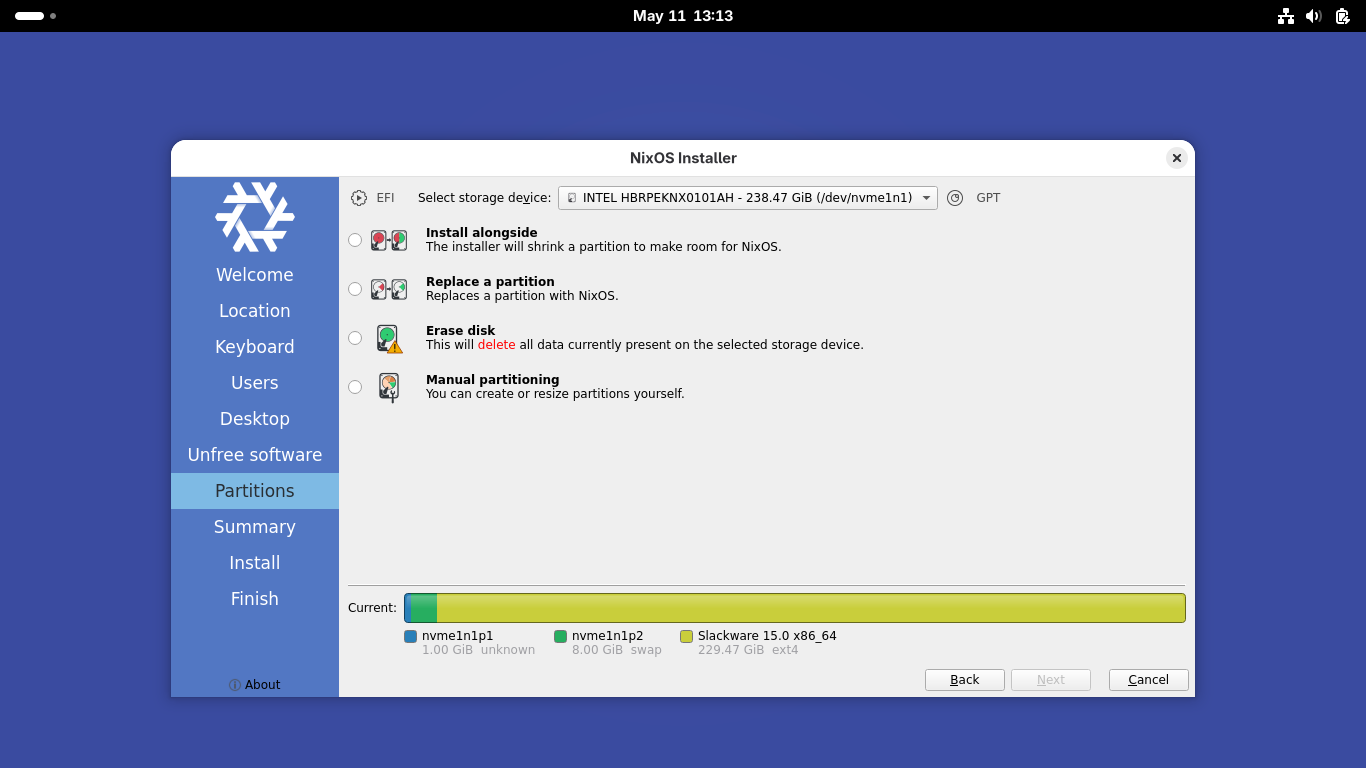
Use the dropdown at the top to select your drive and check Erase Disk > Swap (no Hibernate), and hit Next
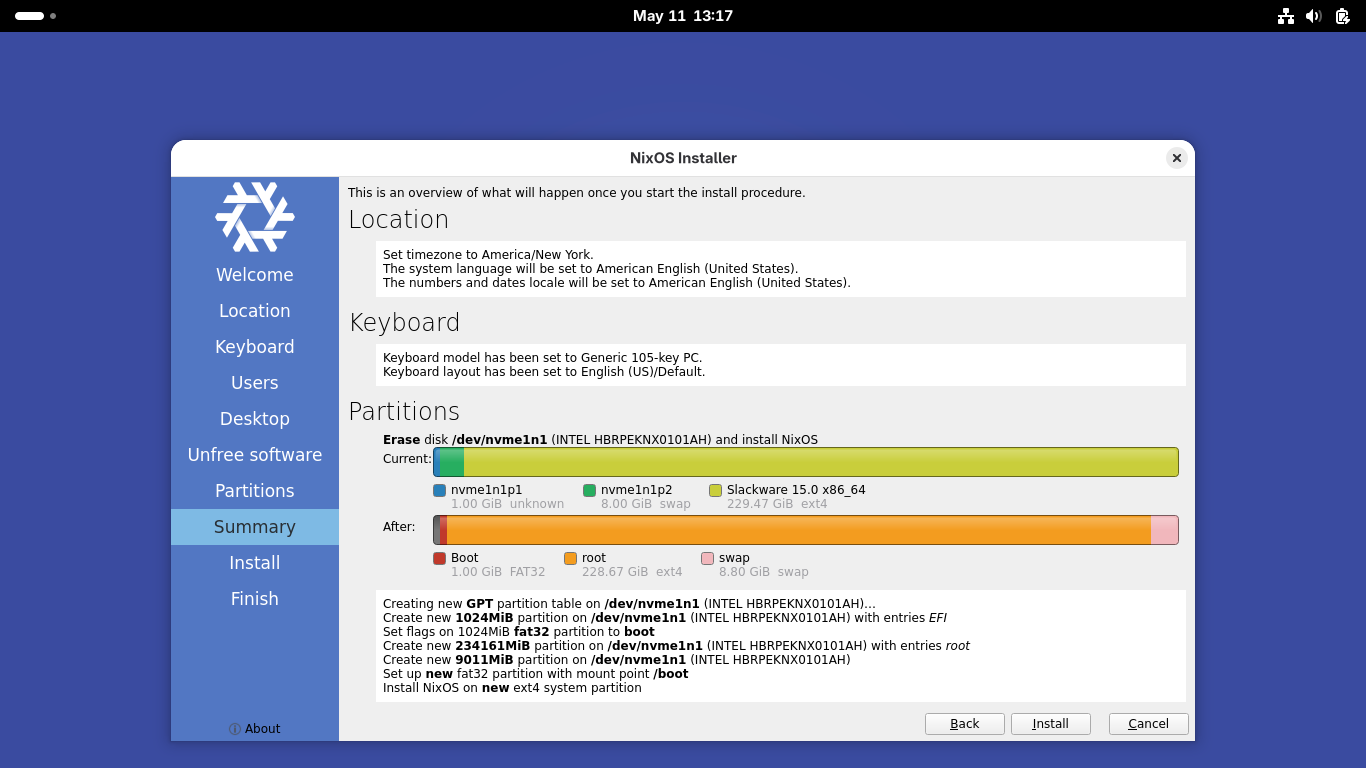
At the summary, click Install. This will begin the installation which may take some time to fully complete
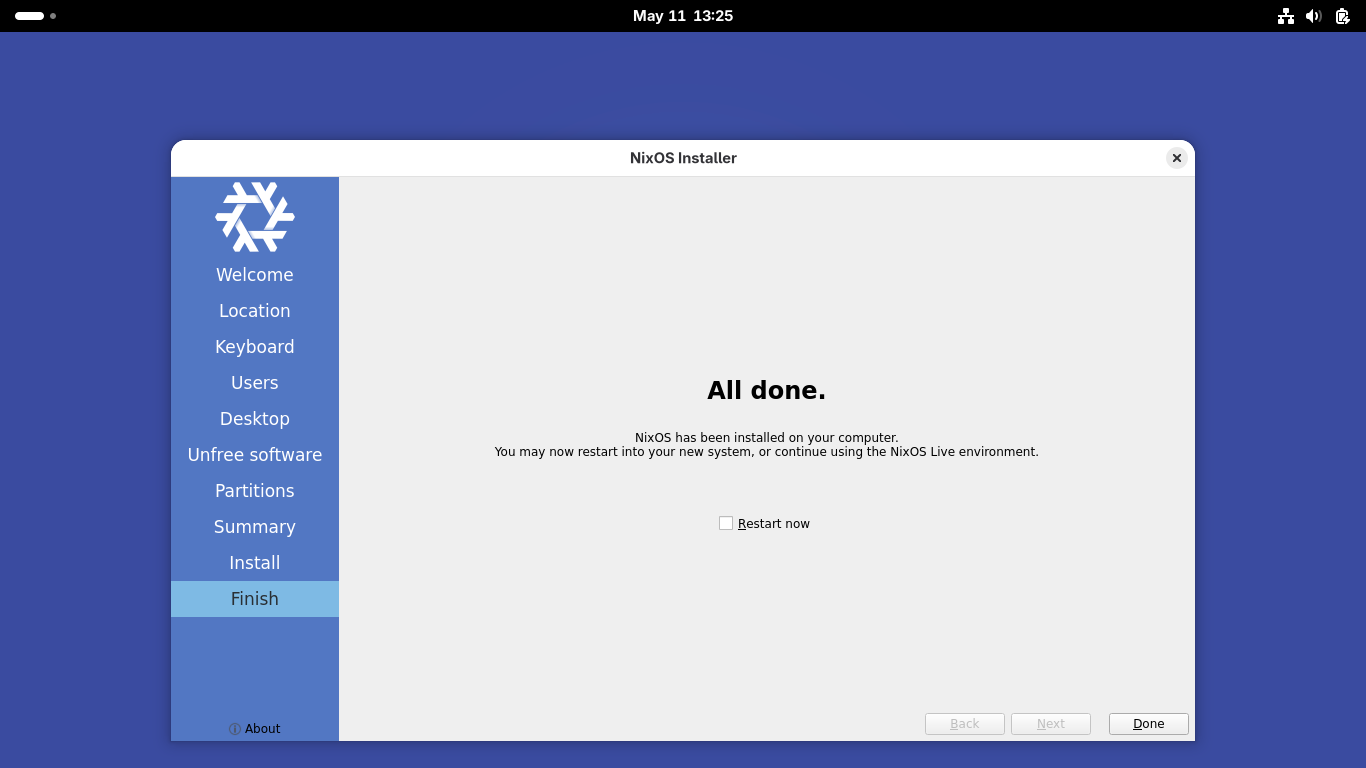
Once complete check the box to restart now and hit Done. Our system will now boot to Desktop Environment

With our Operating System installed and booted up to the desktop environment, we are ready to begin coding
3. Python Basics w/ REPL
In the first part of this lab, we will practive using several of the key Python concepts convered in the
overview section. We will begin by launching REPL - the python3 interactive shell. Hit the none dots in
the lower-left had corner of the desktop and select Terminal. This will launch our Terminal Application
We will work primarily from this terminal for the remainder of this lab on Python so keep this window open
Run the following command from the Nix OS Terminal to edit the package manager build configuration file
[itlabcenter@nixos:~]$ sudo nano /etc/nixos/configuration.nix
Now scroll down to the following section and add python3. Hit CTRL+O to save changes and CTRL+X to exit
environment.systemPackages = with pkgs; [
python3
];
Run the following command from the Nix OS Terminal to apply the configuration and rebuild the packages
[itlabcenter@nixos:~]$ sudo nixos-rebuild switch
Run the following command from the Nix OS Terminal to launch the python3 interactive shell application
[itlabcenter@nixos:~]$ python3
Resulting Output:

Run the Python Statements from the REPL Terminal to assign a value to a variable and print the variable
>>> my_integer = 1
>>> my_integer
Resulting Output:

You should see that REPL prints the current value of my_integer to the screen. Note that variable=integer
and variable = integer are the same in Python. However, variable = integer is preferred and easier to read
Execute the following statements from the REPL Terminal to perform arithmetic operations on our variable
>>> my_integer * 10
>>> my_integer + my_integer
>>> my_integer ** 3
Resulting Output:

Note that in the above operations the value of my_integer does not change, only the statements output does
Execute the following statesments from the REPL Terminal to reassign our variables value and print it out
>>> my_integer = my_integer * 10
>>> my_integer
Resulting Output:

Execute the following statement from the REPL Terminal to use Python's type() function on our variable
>>> type(my_integer)
Resulting Output:

The type() function reports what a variable is. We see that my_integer is, in fact, "class int", integer
Execute the following statements from the REPL Terminal to update the value of my_integer and print it
>>> my_integer = 1.234
>>> my_integer
Resulting Output:

Execute the following statement from the REPL Terminal to use Python's type() function on our variable
>>> type(my_integer)
Resulting Output:

Notice that the type has changed to float. You may recall that integers are whole numbers, no decimals
A float is a floating point number, meaning it had decimals. The lesson here is that Python is dynamically
typed. Variables are assigned their type at runtime. We do not need to assign variable types in advance
Execute the following statements from the REPL Terminal to compare our variable to two different values
>>> my_integer == 1
>>> my_integer == 1.234
Resulting Output:

Because 1 does not equal 1.234, Python reports back False. When we compare the variable to 1.234 its True
As discussed in the previous lesson, the symbols we use on variables (+, **, =, ==, etc.) are referred to
as operators. Python operators are used for arithmetic, assignment, comparison and membership functions
| Arithmetic | Meaning | Example |
| + | Add | x + y |
| - | Subtract | x - y |
| * | Multiply | x * y |
| / | Divide | x / y |
| ** | Exponent | x ** y |
| Comparison | Meaning | Example |
| == | Equals | x == y |
| != | Not Equals | x != y |
| > | Greater Than | x > y |
| < | Less Than | x < y |
| Assignment | Meaning | Example |
| = | Assign | x = y |
| += | Increment | x += 1 |
| -= | Decrement | x -= 1 |
| Membership | Meaning | Example |
| in | Contains | if x in y: |
| not in | Does not Contain | if x not in y: |
Execute the following statements in the REPL Terminal to create a string and print the strings value out
>>> my_string = "Happy Puppy"
>>> my_string
Resulting Output:

In Python, a string is a character list. Each letter is placed into a special container called a list. We
can access every element of a list by calling its index number. Here is an example of the my_string list
| 0 | 1 | 2 | 3 | 4 | 5 | 6 | 7 | 8 | 9 | 10 |
| H | a | p | p | y | P | u | p | p | y |
In my_string above, there are 11 elements starting at index 0. Execute the following statement from REPL
>>> my_string[0]
Resulting Output:

Execute the following statements from the REPL Terminal to print multiple of this strings index values
>>> my_string[1]
>>> my_string[4]
>>> my_string[10]
Resulting Output:

Execute the following statement from the REPL Terminal, notice you get an error since there is no Index 11
>>> my_string[11]
Resulting Output:

When working with strings and other lists, it's good to find the length of the string to avoid errors like
the one above. Python provides a function for this. Execute the following statement from the REPL Terminal
>>> len(my_string)
Resulting Output:

Remember, 11 means 0 to 10! Because strings are lists in Python, they can be chopped into other elements.
Python provides a neat tool for chipping strings called slicing. Execute the following statement from REPL
>>> my_string[0:5:1]
Resulting Output:

The statement we executed above intructs Python to slice the my_string variable using these parameters:
• Start at Index 0
• Advance to element 4 (slices are always index number -1)
• Advance one element at a time
Typically this is written as my_string[0:5], there is no need to specify the advance number if you want to
the default of 1. Execute the following statements from the REPL Terminal to experiment with more slices
>>> my_string[1:5]
>>> my_string[6:11]
Resulting Output:

Did the second slice confuse you? There is no 11th element! Why did we not get an error? When slicing, we
have to reference what we want plus one. Thus, if we want to see the 10th element, we must ask for the 11th
There is likely a reasonable explanation for this silliness, but sometimes you just have to accept the made
rules, even arbitrary ones, to get a program to do what you want. Execute the following statements from REPL
>>> new_string = "I am a happy sailor."
>>> new_string.find("sailor")
>>> new_string[13:19]
Resulting Output:

The .find() method tells us where the start of "sailor" is in the string. Press CTRL+L to clear the screen
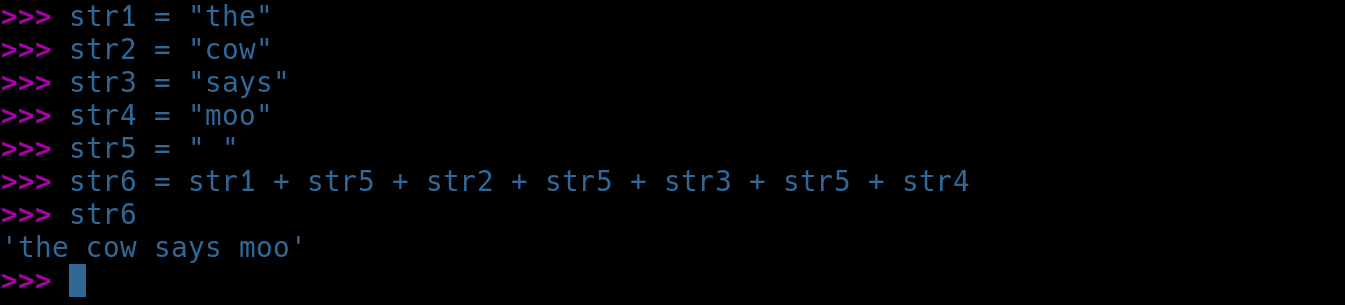
Then execute the following statements from the REPL Terminal to create and concatenate strings together
>>> str1 = "the"
>>> str2 = "cow"
>>> str3 = "says"
>>> str4 = "moo"
>>> str5 = " "
>>> str6 = str1 + str5 + str2 + str5 + str3 + str5 + str4
>>> str6
Resulting Output:
Execute the following statements from the REPL Terminal to create and add string numeral variables together
>>> var1 = "1"
>>> var2 = "2"
>>> var3 = "3"
>>> var4 = var1 + var2 + var3
>>> var4
Resulting Output:

Did you expect var4 to be 6? What type of variable is var1, var2, and var3? Are we dealing with addition
(integers) or concatenation (strings)? Because the variables are characters (assign as "1" rather than 1)
Python will concatenate them, not add them. Now execute the following statements from the REPL Terminal
>>> str1 = "Pepper"
>>> str2 = "pepper"
>>> str1 == str2
Resulting Output:

In Python, you can compare strings like you can numbers. Are the two strings above equal? When comparing
strings, know that Python is case-sensitive. Now execute the following statement from the REPL Terminal
>>> str1.lower() == str2.lower()
Resulting Output:

In the example above, we access the .lower() method of the string object to make str1 and str2 lowercase
for the comparison operator. Note that the value of str1 does not change when we access a method. If we
wanted to change str1, we would use str1 = str1.lower(). We have already explored lists, also known as
when we discussed strings. Let's learn more about lists and explore the program login known as a loop
Execute the following statements from the REPL Terminal to create a list and print out the total length
>>> my_list = ["cat","dog","cow","pig","bunny","horse"]
>>> my_list
>>> my_list[0]
>>> my_list[1]
>>> len(my_list)
Resulting Output:
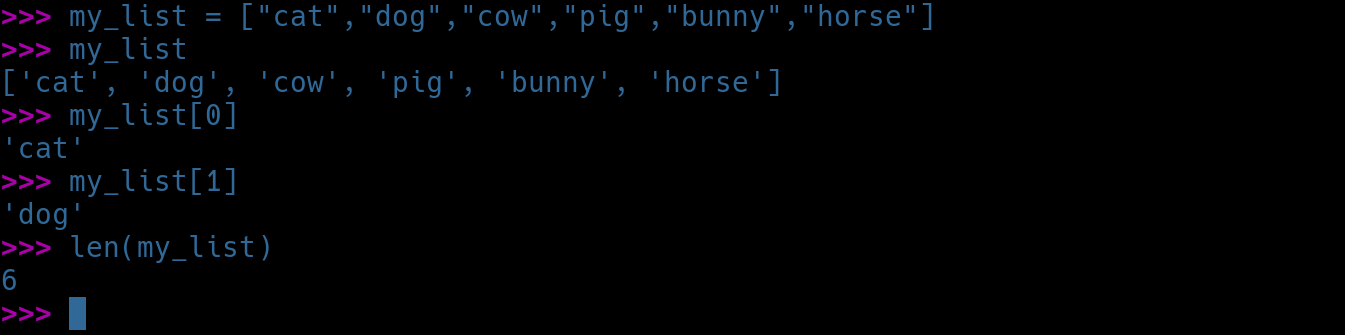
How many elements are in my_list according to len()? Next, let's loop through my_list using a for loop
Don;t confuse a string (list of characters) with a list of strings. In a list of strings, each string is
an element. In a string, each character is an element. Run the following statement from the REPL Terminal
>>> for animal in my_list:
Resulting Output:

Notice the change in prompt. REPL is waiting for more instructions. Indent two spaces, then run the below
... print(animal)
...
Press Enter twice. Pressing Enter at ... tells REPL we are done typing commands and to execute the code
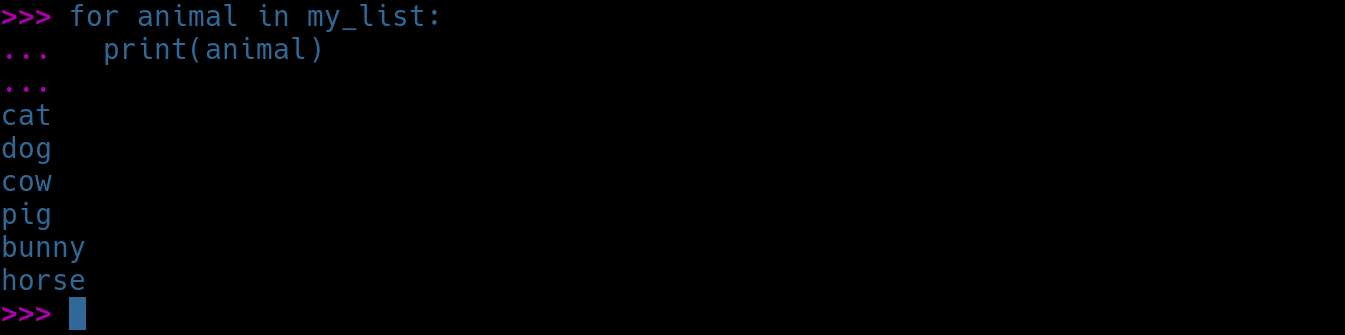
In the example above, the for loop creates an animal variable, then steps through each element of the list
and places that element into animal (one at a time). The loop then prints animal to the screen each element
Execute the following statements from the REPL Terminal to incorporate conditionals into our looping logic
>>> car_makers = ["Ford","Chevy","BMW","Volkswagen","KIA","Volvo"]
>>> for car_maker in car_makers:
... if car_maker == "BMW":
... print("Better make way!")
... else:
... print("Here comes a " + car_maker)
...
Resulting Output:
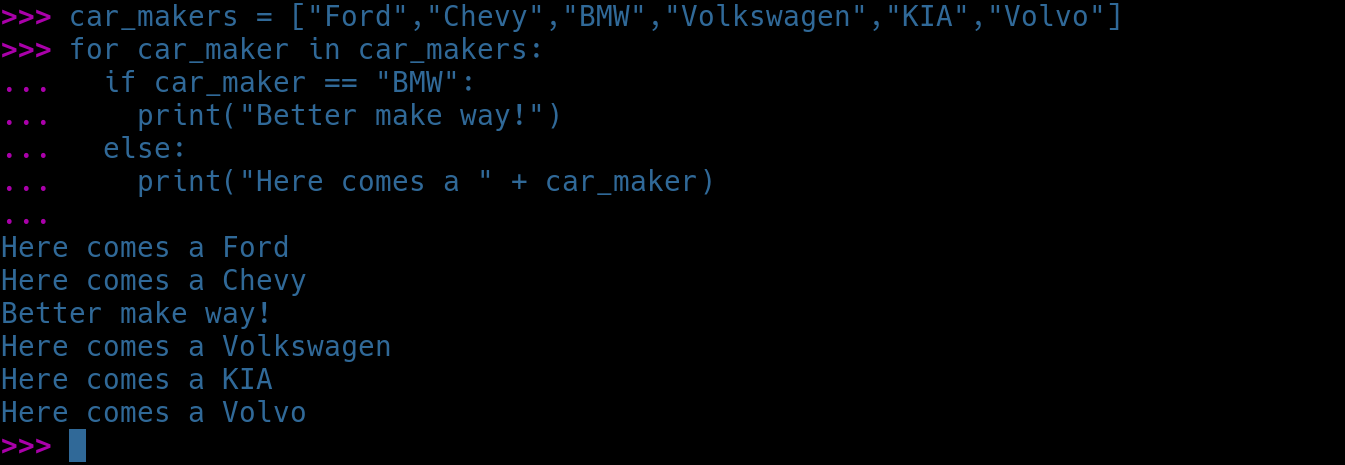
Note there are two spaces before if and else and four spaces before the print statements. Using the proper
indentation is critical in Python. Refer to the screenshot above to validate your input. The code above
introduces a new logic element: the if / else condition. We test the current value of car_maker against
the string "BMW". IF there is a match, we print "Better make way!" ELSE, we concatenate "Here comes a"
with the current string in the variable car_maker. You will see this pattern repeatedly in programming:
"for apple in apples", "for cow in cows", "for people in list_of_people", etc. While "for x in y" would
work just as well, it conveys no meaning to the reader. It's always best to use meaningful variable names
Execute the statement exit() from the REPL Terminal to leave the interactive Python Terminal Application
4. Python Scripting w/ VS Code
While working with REPL interactively is great for testing syntax and quick prototyping, writing anything
beyond a few lines becomes cumbersome and error-prone. You may have already discovered how easy it is to
make a typo and have to start over. In the next part of this lab exercise, we will work with Microsoft's
Visual Studio Code (VS Code) integrated development environment (IDE) to make our lives so much easier

Execute the following command from the Nix OS Terminal to edit the package manager build configuration
[itlabcenter@nixos:~]$ sudo nano /etc/nixos/configuration.nix
Noe add the following line anywhere inside the main bracket to enable packages with non-free licenses
nixpkgs.config.allowUnfree = true;
Now scroll down to the following section and add vscode. Hit CTRL+O to save changes and CTRL+X to exit
environment.systemPackages = with pkgs; [
vscode
];
Run the following command from the Nix OS Terminal to apply the configuration and rebuild the packages
[itlabcenter@nixos:~]$ sudo nixos-rebuild switch
Execute the following command from the Nix OS Terminal to launch the Visual Basic Studio Code Editor app
[itlabcenter@nixos:~]$ code
Resulting Output:
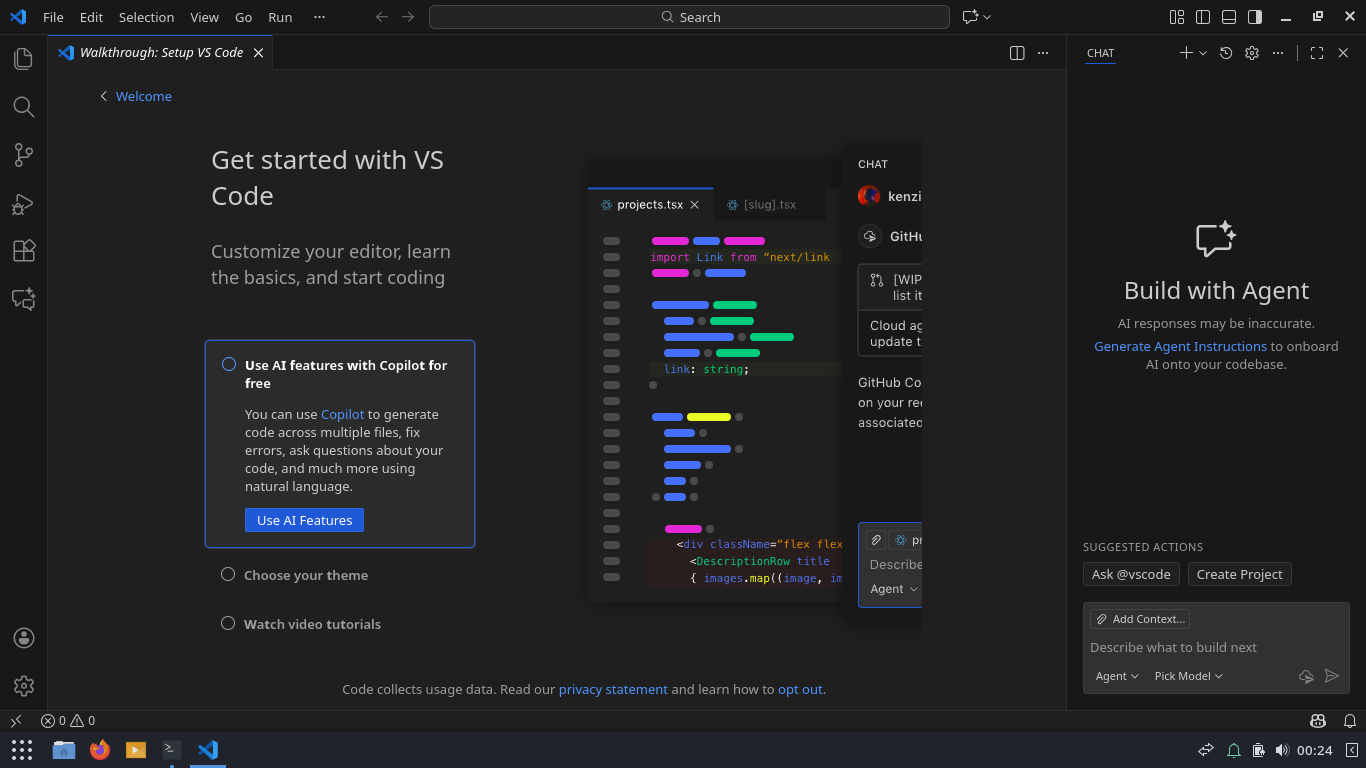
From the VS Code menu bar, select File > New File... name our new file names.py > Built-in > Create File
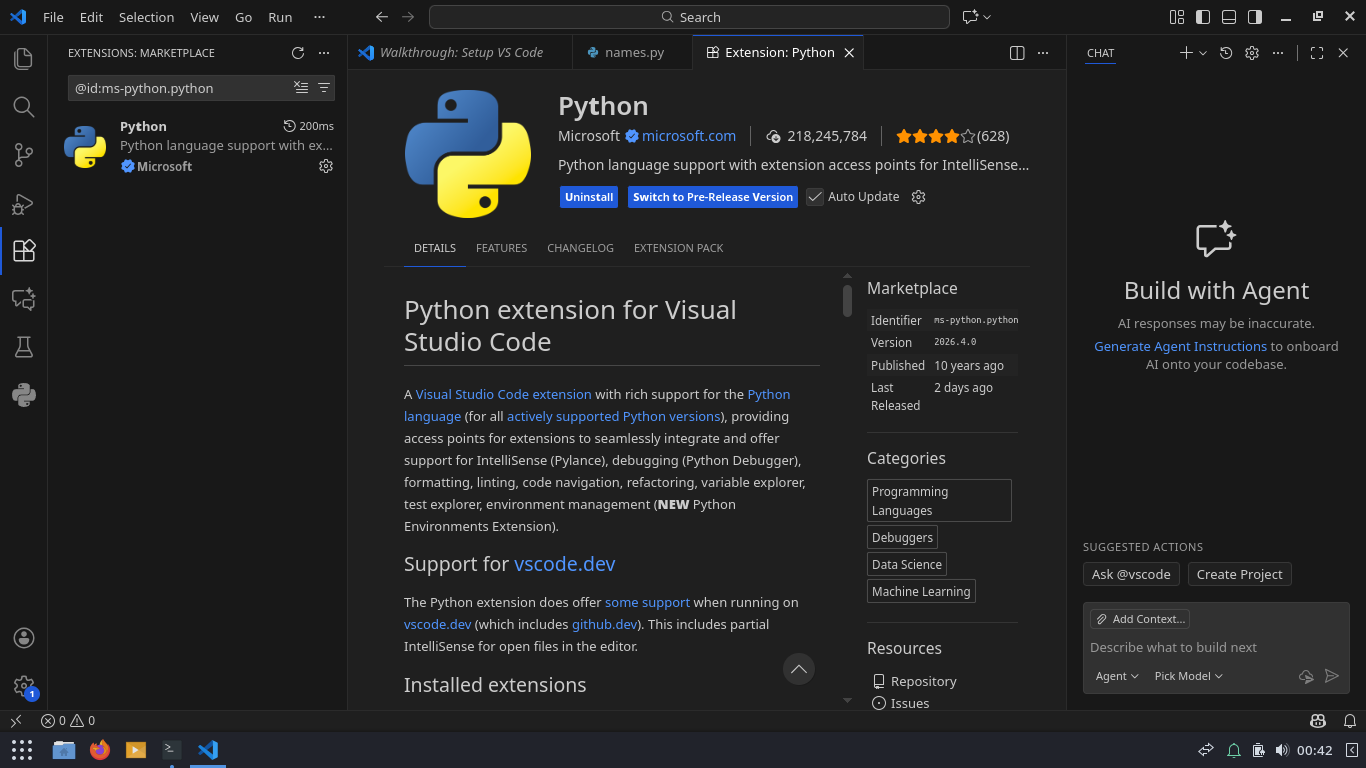
You will receive a notification at the bottom-right hand corner prompting you to install Python, click it
Now head back to our names.py file tab and type out the following script, be sure to include indentation
names = ["Jane","Sally","June","Mary","Karen","Liz","Tara","Maddy","Lynne"]
name_requested = input("What name can I find for you: ")
for name in names:
if name == name_requested:
print("I have found " + name + " in my list.")
In the names.py script, we see a list called names with names in it. We then see something new: the input()
function. The input() function will prompt the user for input and then place that input into a variable.
Finally, we see the now familiar for loop and if condition, used to test is name_requested matches any of
the names in the list. In the upper-right hand corner, click the Run icon (triangle) to test the program
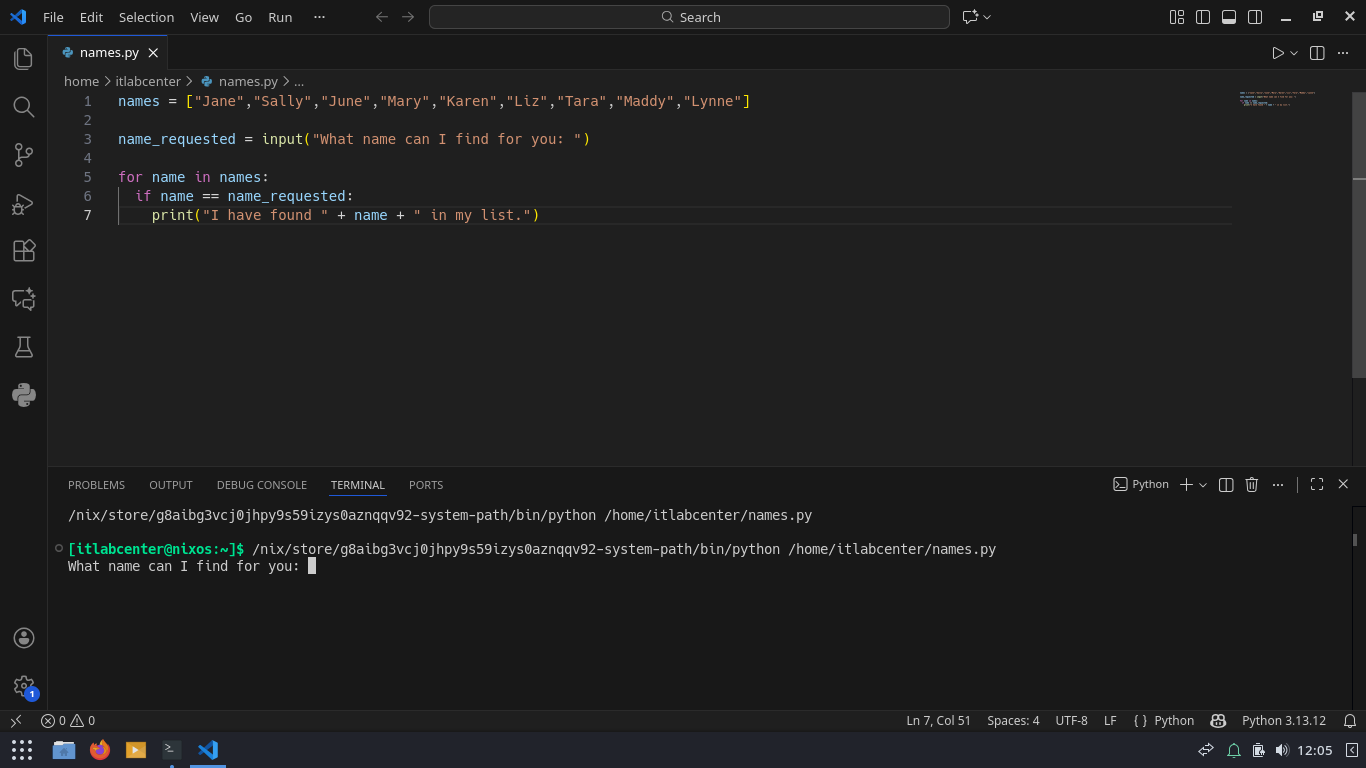
A new terminal window will open in the bottom half of VS Code. Type Karen and press Enter at the prompt
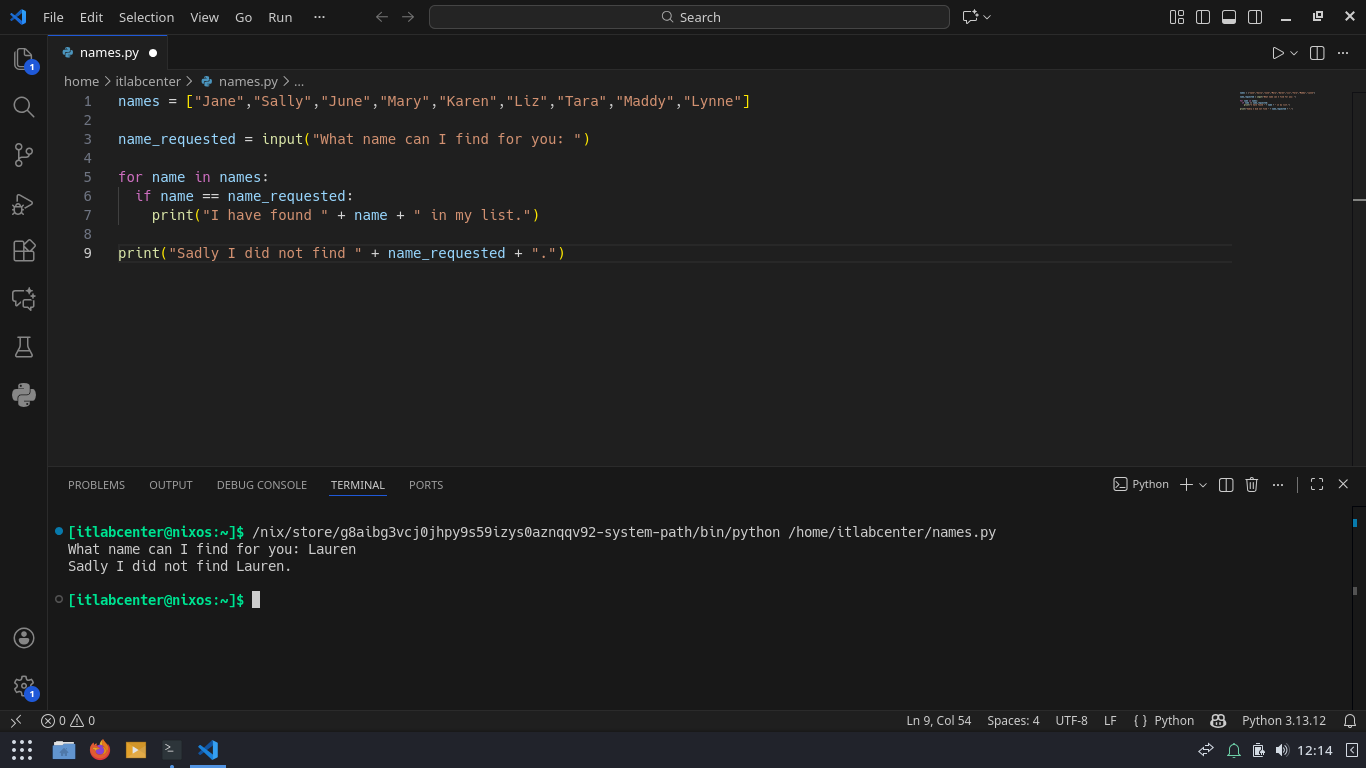
Click the Run icon to re-run the script. This time, type in Lauren and press Enter at the prompt for name

You should see that nothing happens. There's nothing in the script to handle a situation when a name is
not found. Let's change that. Alter the script by adding the following line of code to the bottom of it
print("Sadly I did not find " + name_requested + ".")
Press CTRL+S to save, then click the Run icon to re-run the script. Once again, type Lauren and hit Enter
That seems okay, but let's try the script with a name in the list. Click Run and type Mary and hit Enter

Our script is giving us conflicting messages. There are several possible solutions, but the simplest would
be to end the script is a name is found. To implement this change add exit() to the if condition like below
names = ["Jane","Sally","June","Mary","Karen","Liz","Tara","Maddy","Lynne"]
name_requested = input("What name can I find for you: ")
for name in names:
if name == name_requested:
print("I have found " + name + " in my list.")
exit()
print("Sadly I did not find " + name_requested + ".")
Press CTRL+S to save, then use the run icon to re-run the script. Try using both the Karen and Lauren names

Great, but what if the user is lazy and does not want to capitalize the first letter in a name? Try karen

Recall that we can use the .lower() method on strings to make them all lowercase for testing. Alter the
script by adding the .lower() method to the name variables. The retest it with the names karen and lauren
names = ["Jane","Sally","June","Mary","Karen","Liz","Tara","Maddy","Lynne"]
name_requested = input("What name can I find for you: ")
for name in names:
if name.lower() == name_requested.lower():
print("I have found " + name + " in my list.")
exit()
print("Sadly I did not find " + name_requested + ".")
Resulting Output:

What if a program could add a name to the list of names? Happily, lists are mutable, meaning they can be
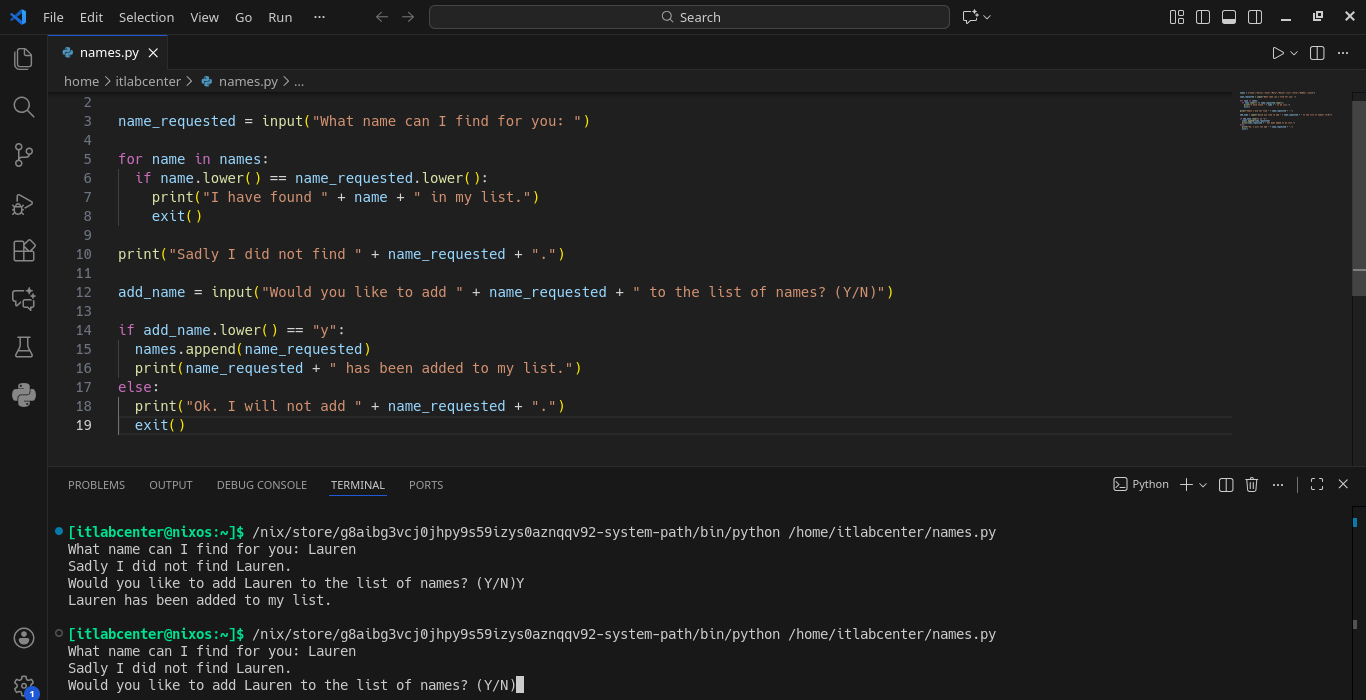
altered. Add the following code to the bottom of the name.py script, then run the script and add Lauren
When prompted, type Y and enter to add Lauren to the list. Then run the script again to test the new name
add_name = input("Would you like to add " + name_requested + " to the list of names? (Y/N)")
if add_name.lower() == "y":
names.append(name_requested)
print(name_requested + " has been added to my list")
else:
print("Ok. I will not add " + name_requested + ".")
exit()
Resulting Output:
What's going on? Is our code even adding Lauren to the list? Let's confirm if Python is indeed appending
Lauren to the names list. Add the following code to the if condition, right above the else line and test
print(names)
Resulting Output:
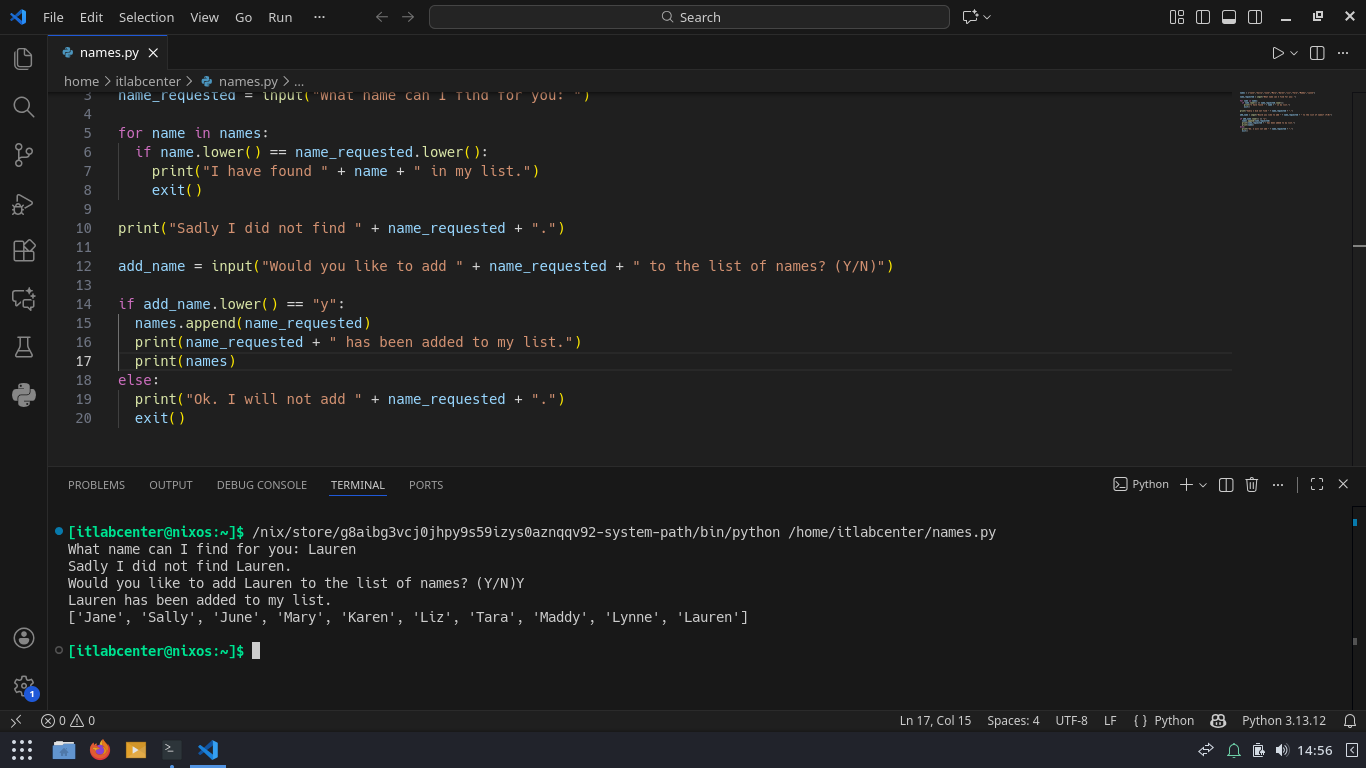
Lauren is being added to the names list, but if we re-run the script, we still find no Lauren in the list

This is because the names list gets re-written every time the program runs. If we wanted our list to be
stateful (to remember things), we must store the names in the list outside the script. One solution is to
use a file. Fortunately, it is very easy to read and write files using Python. In the next steps, we will
alter the script to read a text file with our names and then write any changes to a file before exiting
Run the following commands from the Nix OS Terminal to create a names.txt file for Python to use for names
[itlabcenter@nixos:~]$ echo "Jane" > names.txt
[itlabcenter@nixos:~]$ echo "Sally" >> names.txt
[itlabcenter@nixos:~]$ echo "June" >> names.txt
[itlabcenter@nixos:~]$ echo "Mary" >> names.txt
[itlabcenter@nixos:~]$ echo "Karen" >> names.txt
[itlabcenter@nixos:~]$ echo "Liz" >> names.txt
[itlabcenter@nixos:~]$ echo "Tara" >> names.txt
[itlabcenter@nixos:~]$ echo "Maddy" >> names.txt
[itlabcenter@nixos:~]$ echo "Lynne" >> names.txt
Now return to your VS Code window and at the top of the script, replace the names list with the following
names = []
with open('names.txt','r') as file:
for line in file:
line = line.strip()
names.append(line)
This code snippet creates an empty list called names. The next line of code opens names.txt for reading
and gives us a handle to the open text document called file. Then, a for loop extracts text from the file
handle line by line. Each line is stripped (the newline character is removed) and appended to the names
list. Using "with open" is an efficient way to enumerate a file, as the operation closes the open file
Now that we have our array read from a file, add the following code to the bottom of our names.py script
file = open("names.txt","a")
file.write(name_requested + "\n")
file.close()
Before the script ends, we open names.txt for appending. We then write name_requested plus one new-line
character to the file handle. Lastly, we need to close the open file because we used open() vs with open()
With this in mind, here is an example of what our last lines of code would look like using the with open()
with open(names.txt,"a") as file:
file.write(name_requested + "/n")
Note that we exit() the program if the value of ass_name is anything other than Y or y. Thus, the script
will end without writing to the file if the user does not answer Y or y when they're prompted to add name
With these several modifications we have made to correct our login for saving names, here is what we have
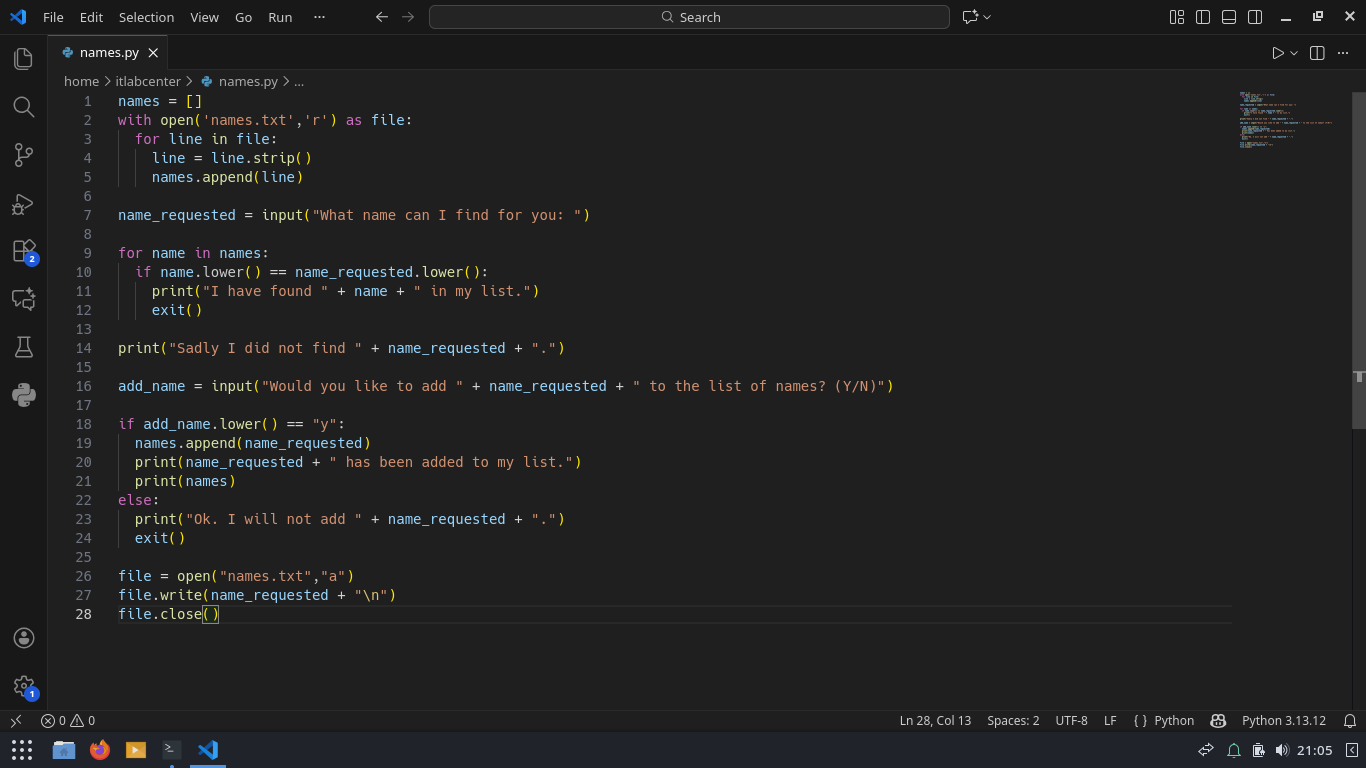
Press CTRL+S to save, then re-run the script. Try adding Lauren to the names list, then re-run to test it

As a scripter and developer, adding comments to make your program understandable to others (and your future
self) is always a good idea! in Python, there are two types of comments, here are examples of each type:
"""
This is a
multiline
comment
"""
#This is a single line comment
Comments do not need to describe every line of code in detail. Instead, they should give a general overview
of what a given code block does, or is suppose to do. Comments are helpful but can be too much if overused
5. Functions in Python
The names.py program we just worked on flows procedurally from top to bottom. This is perfectly fine for
small programs and quick prototyping. However, Python programs typically leverage functions. Functions are
reusable blocks of code that perform a specific task. Functions help to organize code, making it much more
readable and efficient. Once you write a function it can be called as many times as you need it in a script
Like in any program language, functions are defined with a specific syntax structure in Python as follows:
• def: Keyword used to define a function.
• function name: Identifier for the function.
• parameters: Input values (arguments) the function accepts (optional).
• docstring: A special type of comment used to explain the function (optional but recommended).
• return: Keyword used to return a value from the function (optional).
Let's practice implementing functions into our scripts. In VSCode clie File > New File > Python File Python
Enter in the following statements into our new VS Code Python Script to define a function and call on it
def capitalize (text):
""" Returns a word in all caps """
text = text.upper()
return(text)
string = "rubber ducky"
print( capitalize(string) )
print( capitalize("jimmy") )
print( capitalize("abc123") )
Press CTRL+S to save the new code as functions.py. Click the Run icon to run the script, here's the output
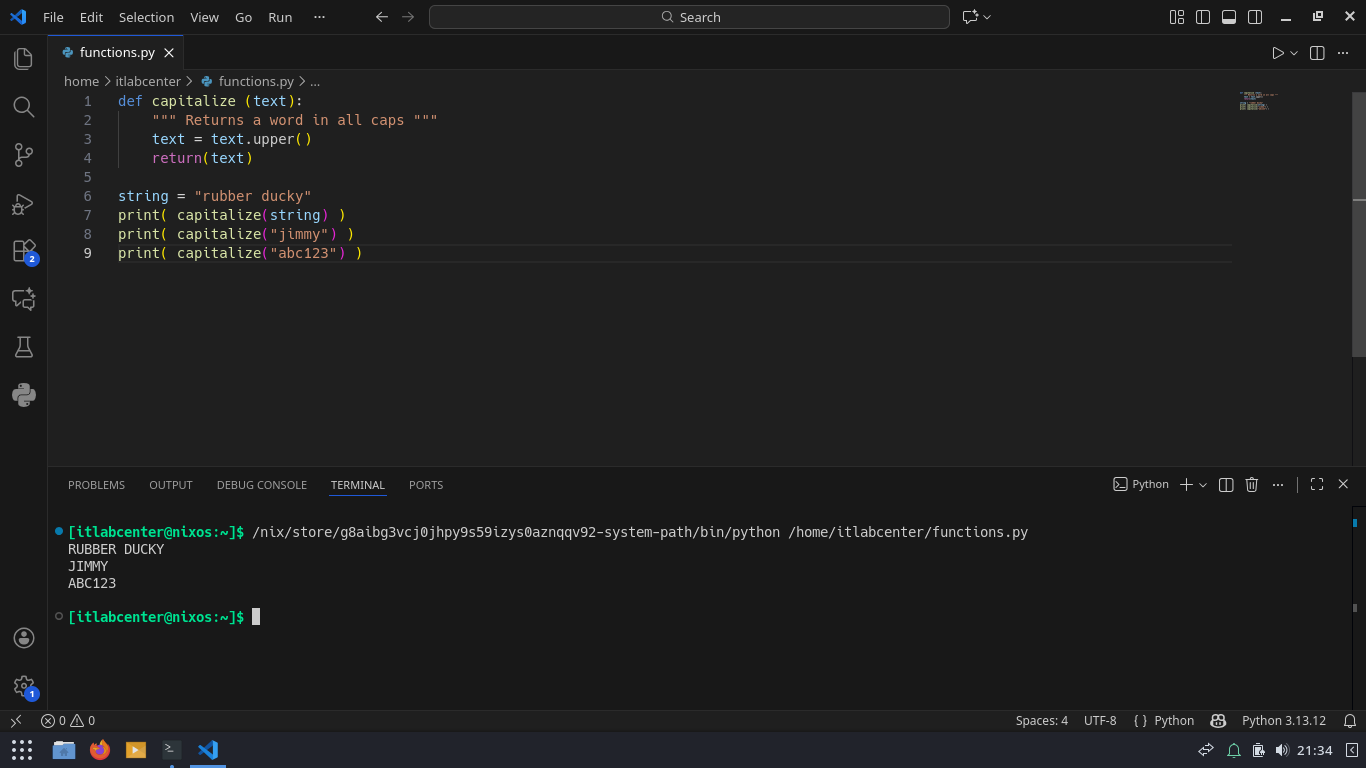
Let's break all this down... First, the def command is used to define a function called "capitalize". We
see that the new capitalize function takes in one parameter called text. There is an optional docstring
(comment) telling us what this function does. Next, we run the .upper() method to capitalize any letters
found in the test parameter. Next, we return the value of text. Finally, we call the capitalize function
by name inside of each print command, passing different things (a variable, a string, and a string with
numbers in it) into the function to see what it will print. We can see that our script is fully functional
Now that we have covered the basic priciples of scripting in Python, lets move onto using the language in
a more practical, Security focused sense, by incorporating it into infrastructure. Let's build it up now
6. Misconfigure an Active Directory Environment
Python contains many useful modules designated for integrating with enterprise environments and frameworks
One of these is the ldap3 library, which allows Python scripts to integrate with Active Direectory Setups
Here we will step beyond the basic REPL statements and VS Code scripts to perform real-world Security work
We will start by setting up our Active Directory environment using Windows Server as our Domain Controller
Download Windows Server 2025 Disk Image (ISO): Windows Server 2025 ISO
Download Rufus Disk Imaging Software: Rufus Official Download
Insert USB Flash Drive, run rufus.exe, select target drive, select our Windows Server 2025 ISO, hit start:
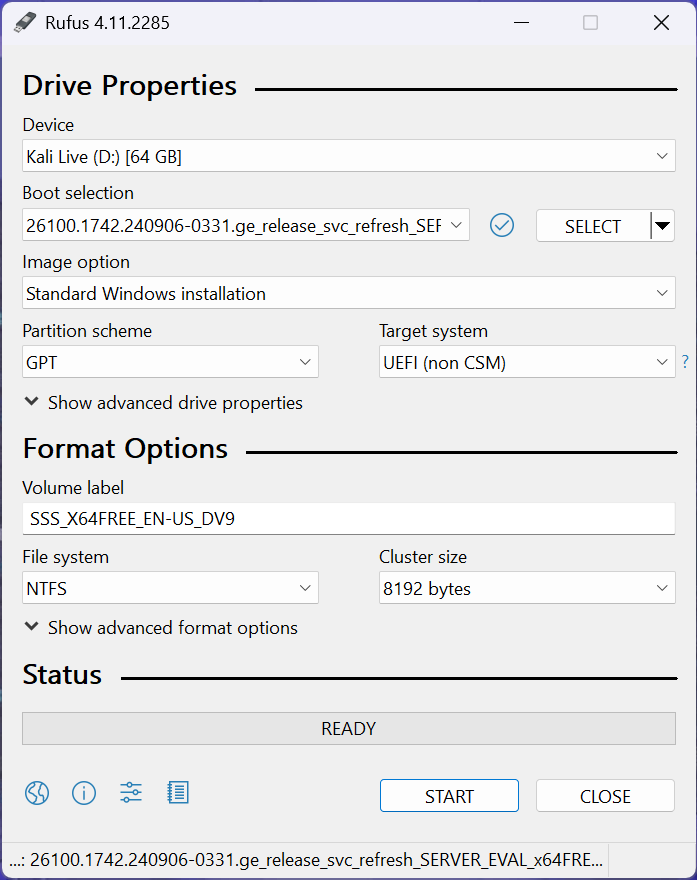
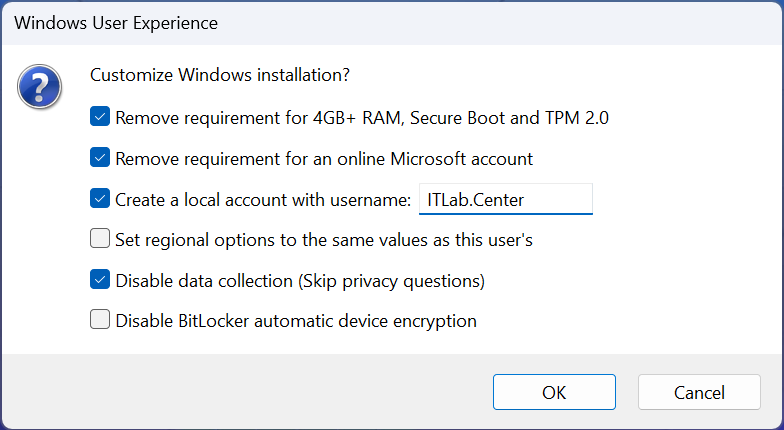
Use the rufus popup menu to customize the Windows Server 2025 installation and disable data collection:
Remove USB Flash Drive and Insert into unused PC. Start the PC and press the hotboot key at the startup:
Navigate through the installer and select the Windows Server Standard Evaluation Desktop Experience option

Now that we have our Server operating, the next step is to promote this server to an AD domain controller
On the taskbar, click the Windows Start icon, then click the Server Manager to open the Windows Manager:
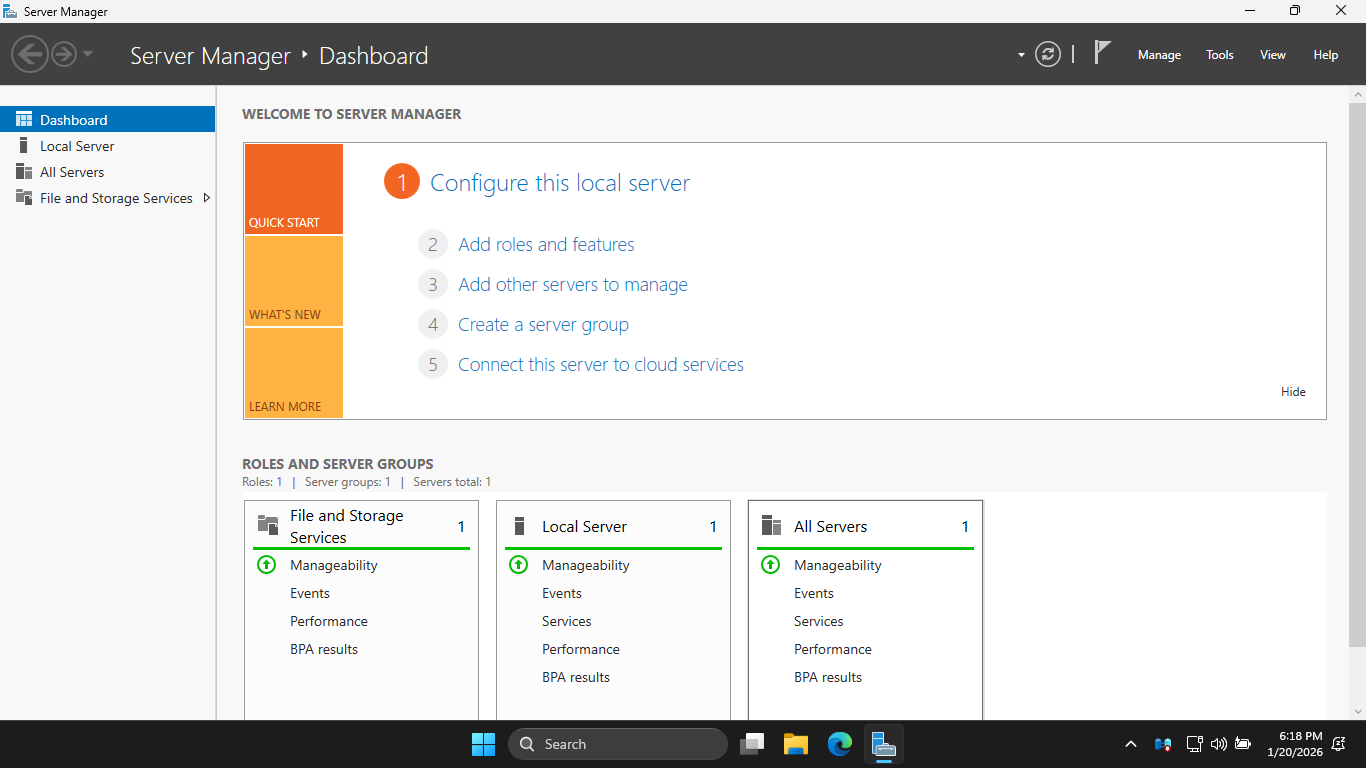
In the Server Manager, click the Add Roles and Features link to open the Add Roles and Features Wizard
Hit Next > Next > Next > Active Directory Domain Services > Add Features > Next > Next > Next > Install
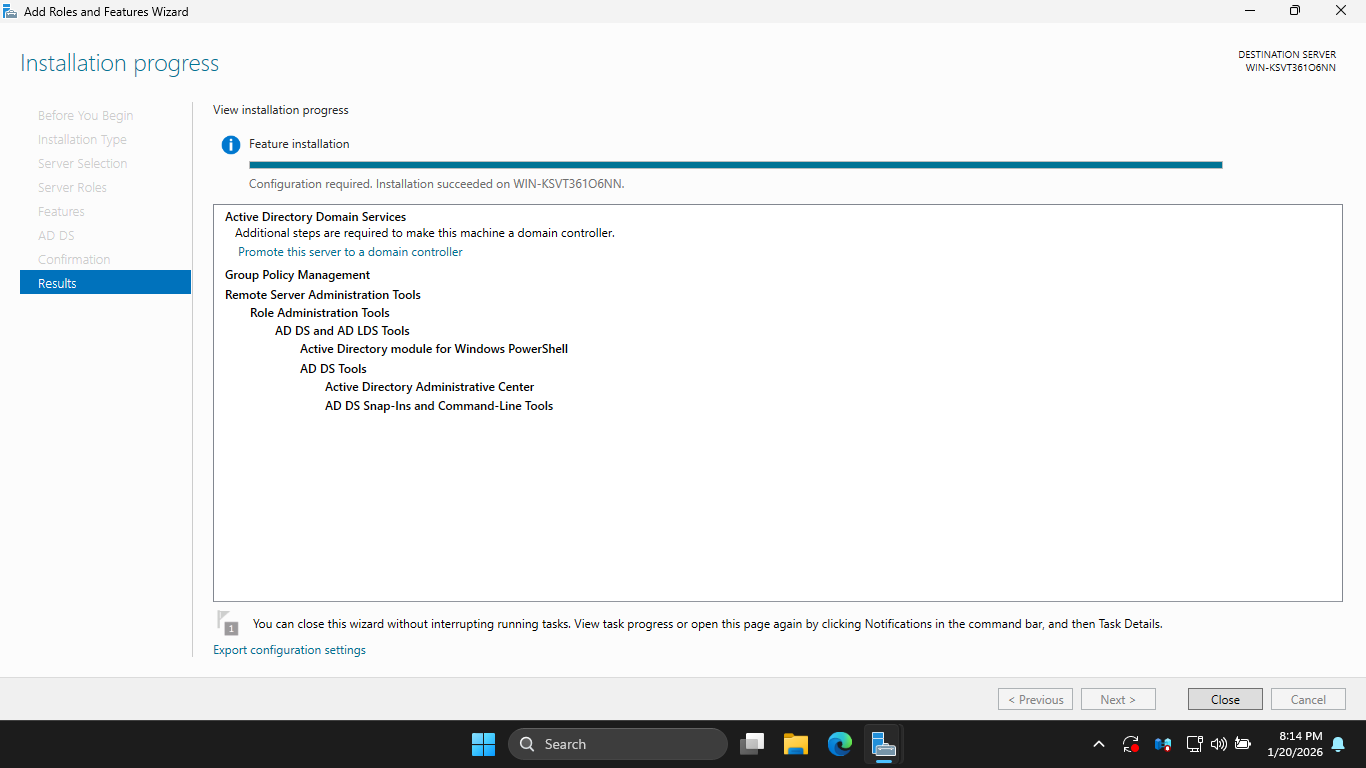
Now hit Promote this Server to a Domain Controller > Add a new forest > Root Domain Name: itlab.local
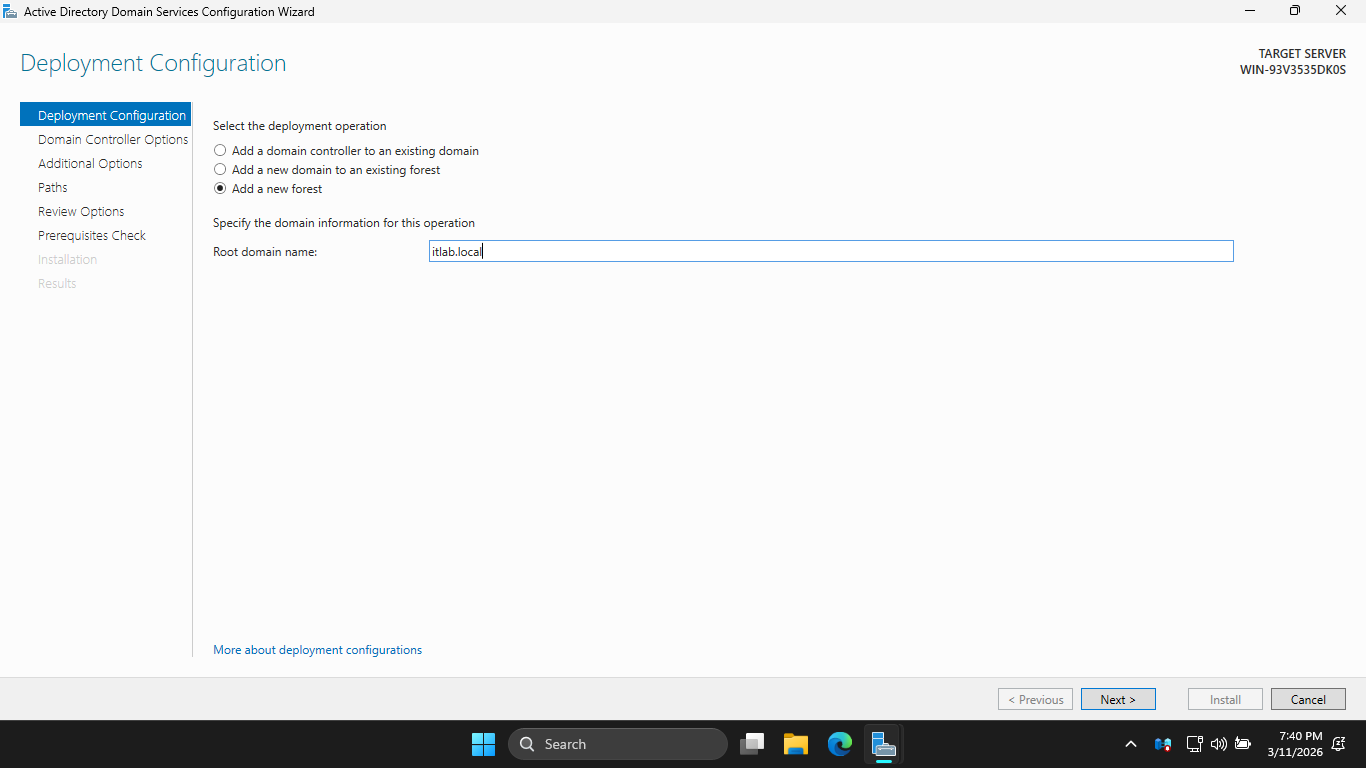
Hit Next, then enter the root password and hit Next > Next > Next > Next > Next > and finally Install
This installation may take some time, a new Domain Controller can take up to 5 minutes to fully boot up
Once our domain controller has booted up, we can move on to creating the vulnerabilities. In this project
we will use Python scripts to create an attack surface map of our active directory environment. For this
to work we need security misconfigurations. Simply installing the role isn't enough; out of the box, AD
is relatively secure. To make our Python Attack Surface Mapper actually find vulnerabilities, we must
deliberately plant the misconfigurations after promotion. From the taskbar open PowerShell ISE as admin
Type out the following script in the top panel of the PowerShell ISE Utility, then hit the green RUN arrow
Import-Module ActiveDirectory
$Domain = "DC=itlab,DC=local"
$TargetOU = "OU=Lab-Assets,$Domain"
$DefaultPass = ConvertTo-SecureString "Winter2026Lab!" -AsPlainText -Force
Write-Host "[*] Initializing Attack Surface Deployment..." -ForegroundColor Cyan
# 1. Create the Lab Asset Container
try {
New-ADOrganizationalUnit -Name "Lab-Assets" -Path $Domain -ErrorAction Stop
Write-Host "[+] Created OU: Lab-Assets" -ForegroundColor Green
} catch {
Write-Host "[!] OU Lab-Assets already exists, proceeding..." -ForegroundColor Yellow
}
# 2. Deploy AS-REP Roasting Target
$User1 = "Vulnerable-SVC1"
New-ADUSer -Name $User1 -SamAccountName $User1 -Path $TargetOU -AccountPassword $DefaultPass -Enabled $true
Set-ADAccountControl -Identity $User1 -DoesNotRequirePreAuth $true
Write-Host "[+] Seeded: AS-REP Roasting Target ($User1)" -ForegroundColor Green
# 3. Deploy Kerberoasting Target
$User2 = "SQL-ServiceAccount"
New-ADUser -Name $User2 -SamAccountName $User2 -Path $TargetOU -AccountPassword $DefaultPass -Enabled $true
Set-ADUser -Identity $User2 -ServicePrincipalNames @{Add="MSSQLSvc/db01.itlab.local:1433"}
Write-Host "[+] Seeded: Kerberoasting Target ($User2)" -ForegroundColor Green
# 4. Deploy Reversible Encryption Target
$User3 = "Legacy-App-User"
New-ADUser -Name $User3 -SamAccountName $User3 -Path $TargetOU -AccountPassword $DefaultPass -Enabled $true
Set-ADUser -Identity $User3 -AllowReversiblePasswordEncryption $true
Write-Host "[+] Seeded: Reversible Encryption Enabled ($User3)" -ForegroundColor Green
# 5. Deploy Password Never Expires Target
$User4 = "Svc-BackupExec"
New-ADUser -Name $User4 -SamAccountName $User4 -Path $TargetOU -AccountPassword $DefaultPass -Enabled $true
Set-ADUser -Identity $User4 -PasswordNeverExpires $true
Write-Host "[+] Seeded: Password Never Expires ($User4)" -ForegroundColor Green
# 6. Deploy Password Not Required Target
$User5 = "Vendor-Temp"
New-ADUser -Name $User5 -SamAccountName $User5 -Path $TargetOU -PasswordNotRequired $true
Enable-ADAccount -Identity $User5
Write-Host "[+] Seeded: Password Not Required ($User5)" -ForegroundColor Green
# 7. Deploy Unconstrained Delegation Target (Computer Object)
$Comp1 = "SRV-WRB-LEGACY"
New-ADComputer -Name $Comp1 -SamAccountName $Comp1 -Path $TargetOU
Set-ADComputer -Identity $Comp1 -TrustedForDelegation $true
Write-Host "[+] Seeded: Unconstrained Delegation Target ($Comp1)" -ForegroundColor Green
Write-Host "`n[*] Vulnerability Deployment Complete. The domain is now vulnerable." -ForegroundColor Cyan
Resulting Output:
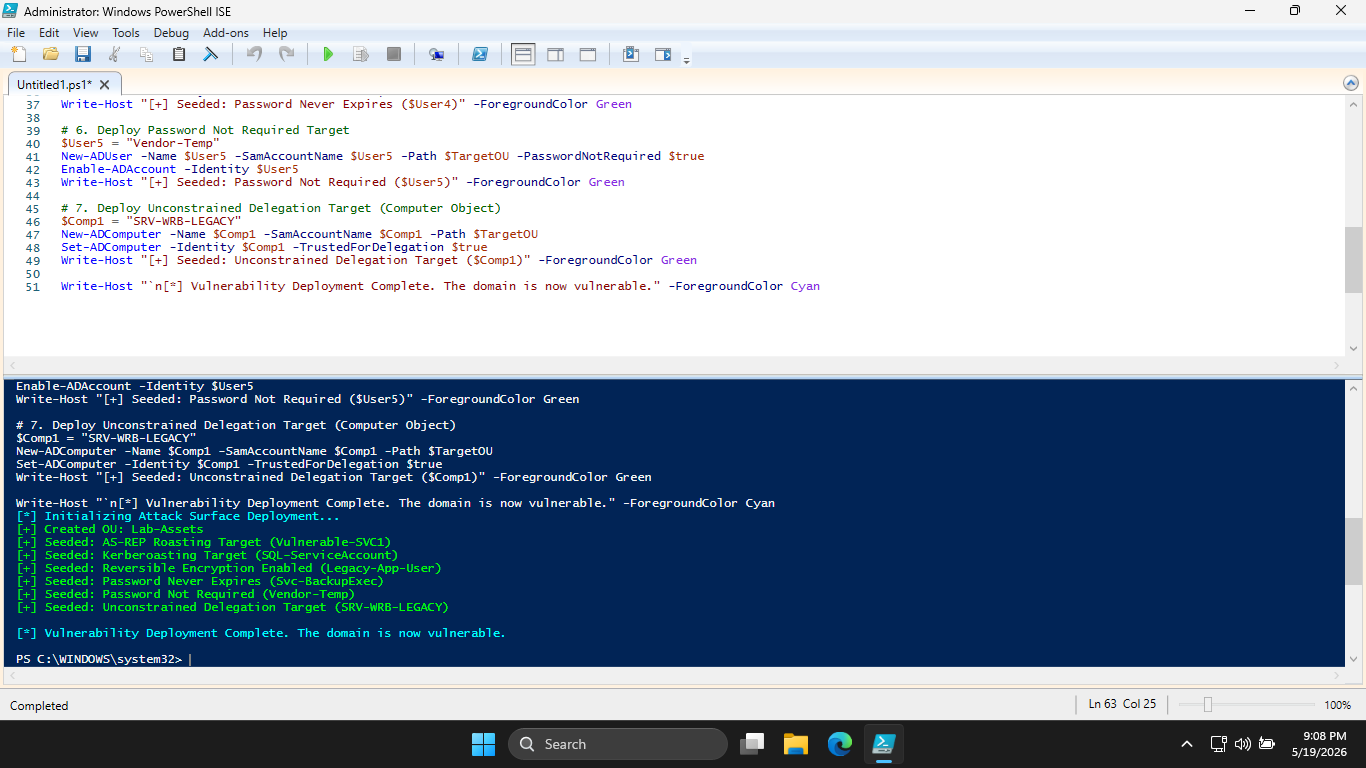
This PowerShell script introduces vulnerabilities into our Active Directory environment, details below
Normally, Kerberos requires a user to encrypt a timestamp with their password hash to request an initial
ticket (TGT). If pre-authentication is disabled, anyone can request auhtetication data for that user. The
Domain Controller will happily reply with a message encrypted with the user's password hash. The attacker
then saves this offline and cracks it at their leisure.
Service Principal Names (SPNs) link a service to a specific logon account. Any authenticated domain user
can request a service ticket (TGS) for any SPN in the domain. The Domain Controller encrypts part of this
ticket using the password hash of the account running the service. The attacker extracts this ticket from
memory and cracks it offline.
Active Direectory normally stores passwords as one-way NTLM hashes. This legacy setting forces AD to store
passwords in a format that is easily decrypted back to pure plaintext. If an attacker performs a DCSync
attack or dumps the ntds.dit database, they don't even have to crack the hash, they just read the plain
test password.
Delegation allows a server to impersonate a user to access other network resources. The term Unconstrained
Delegation means the server is trusted to impersonate the user to any service. If an attacker compromises
this server and tricks a Domain Admin into authentication to it (often via forced authentication attacks
like the "Printer Bug"), the server caches the Admin's TGT, and the attacker instantly owns the entire
domain.
A staple of poorly managed service accounts. If an attacker sompromises and account where the password has
not changed since 2015, they establish long-term persistence that survives standard IT security audits.
This flag bypasses domain password complexity requirements entirely, allowing the account to have a blank
password. It is a massive backdoor for trivial unauthorized access.
This perfectly simulates real-world scenarios where a lazy administrator bypassed the domains password
or account creation policies to make things easier on themselves, while putting the orgs security at risk
7. Join Linux Workstation to Active Directory Domain
While not strictly necessary, in many cases you will be running your assessments from internal endpoints
Here we will simulate that environment by joining our Nix OS / Linux workstation to the Active Directory
To bridge the gap between Windows identity structures and Linux security subsystems, we use three tools
1. Kerberos (krb5): Handles ticket-based authentication
2. adcli: A specialized low-level binary that creates the computer object inside Active Directory and
handles the initial secure handshakes
3. SSSD (System Security Services Daemon): The real workhorse. It sits between local Linux system apps
(like PAM for logins and Sudo for provilege escalation) and remote identity providers (Active Directory)
There are many moving pieces here, and they all interact with one another seamlessly, here is an example
As you can see in the architecture layout above, SSSD acts as a centralized caching responder. When you
type a command or try to authenticate a domain user, your local system libraries query SSSD via the wire
protocol, which then queries the Active Directory backend. Because Nix OS is completely declarative, we
don't configure files like /etc/sssd/sssd.conf or /etc/krb5.conf manually. If you edit them directly, Nix
will simply wipe them out on the next rebuild. Instead, we declare our configuration file in a Nix Module
Run the following command from the Nix OS Terminal to open and edit a new configuration file using VS Code
[itlabcenter@nixos:~]$ sudo code --no-sandbox --user-data-dir /home /etc/nixos/active-directory.nix
Type out the following Nix configuration file as shown below. Use the CTRL+S shortcut to save afterwards
# /etc/nixos/active-directory.nix
{ config, pkgs, ... }:
let
domainLower = "itlab.local";
domainUpper = "ITLAB.LOCAL";
in {
# 1. Install the enterprise identity packages
environment.systemPackages = with pkgs; [
adcli
krb5
sssd
samba4Full
bashInteractive
bind
openldap
];
environment.shells = [ pkgs.bashInteractive ];
# 2. Configure Name Resolution via your DC
services.resolved.enable = true;
# 3. Configure Kerberos
security.krb5 = {
enable = true;
settings = {
libdefaults = {
default_realm = domainUpper;
rdns = false;
dns_canonicalized_hostname = false;
};
};
};
security.pam.services.sssd.enable = true;
# 4. Configure SSSD to translate Active Directory to Linux
services.sssd = {
enable = true;
config = ''
[sssd]
domains = ${domainLower}
config_file_version = 2
services = nss, pam, sudo
[pam]
offline_credentials_expiration = 30
[domain/${domainLower}]
id_provider = ad
auth_provider = ad
chpass_provider = ad
access_provider = ad
cache_credentials = true
ldap_id_mapping = true # Maps Windows SIDs to consistent Linux UIDs automatically
# Nix OS uses a unique filesystem structurel override the default login shell
override_shell = "${pkgs.bashInteractive}/bin/bash"
'';
};
# 5. Map the AD "Domain Admins" Group to Local Linux Sudo
security.sudo = {
enable = true;
extraConfig = ''
# SSSD preserves spaces by default; escape the space with a backslash
%Domain\ Admins ALL=(ALL:ALL) ALL
'';
};
# 6. Auto-create home directories for domain users upon their first login
security.pam.services.login.makeHomeDir = true;
security.pam.services.su.makeHomeDir = true;
}
Open your primary /etc/nixos/configuration.nix file and add your new module to the pre-existing imports:
imports = [
./hardware-configuration.nix
./active-directory.nix
];
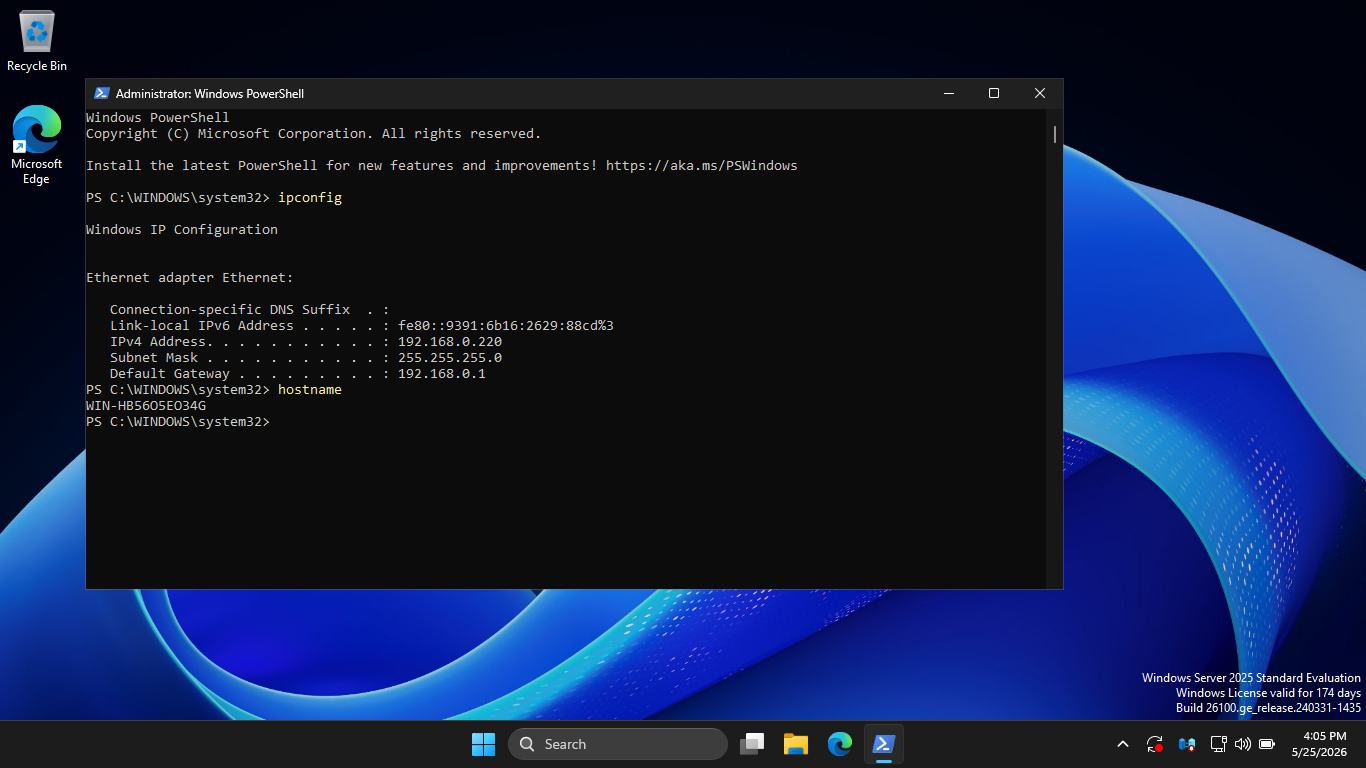
Run the following commands from the Servers Administrator PowerShell to find the servers hostname and IP
PS C:\Windows\System32> ipconfig
PS C:\Windows\System32> hostname
Resulting Output:
Open your primary /etc/nixos/configuration.nix file and add the following network DNS declaration code
networking.nameservers = [ "192.168.0.220" ]; # Replace with your actual DC IP Address
networking.hosts = {
"192.168.0.220" = [
"win-hb56o5eo34g.itlab.local"
"win-hb56o5eo34g"
"itlab.local"
];
};
services.resolved = {
enable = true;
extraConfig = ''
DNSStubListener=no
Domains=itlab.local
'';
};
Run the following command from the Nix OS Terminal to rebuild the system by compiling installed packages
[itlabcenter@nixos:~]$ sudo nixos-rebuild switch
Resulting Output:
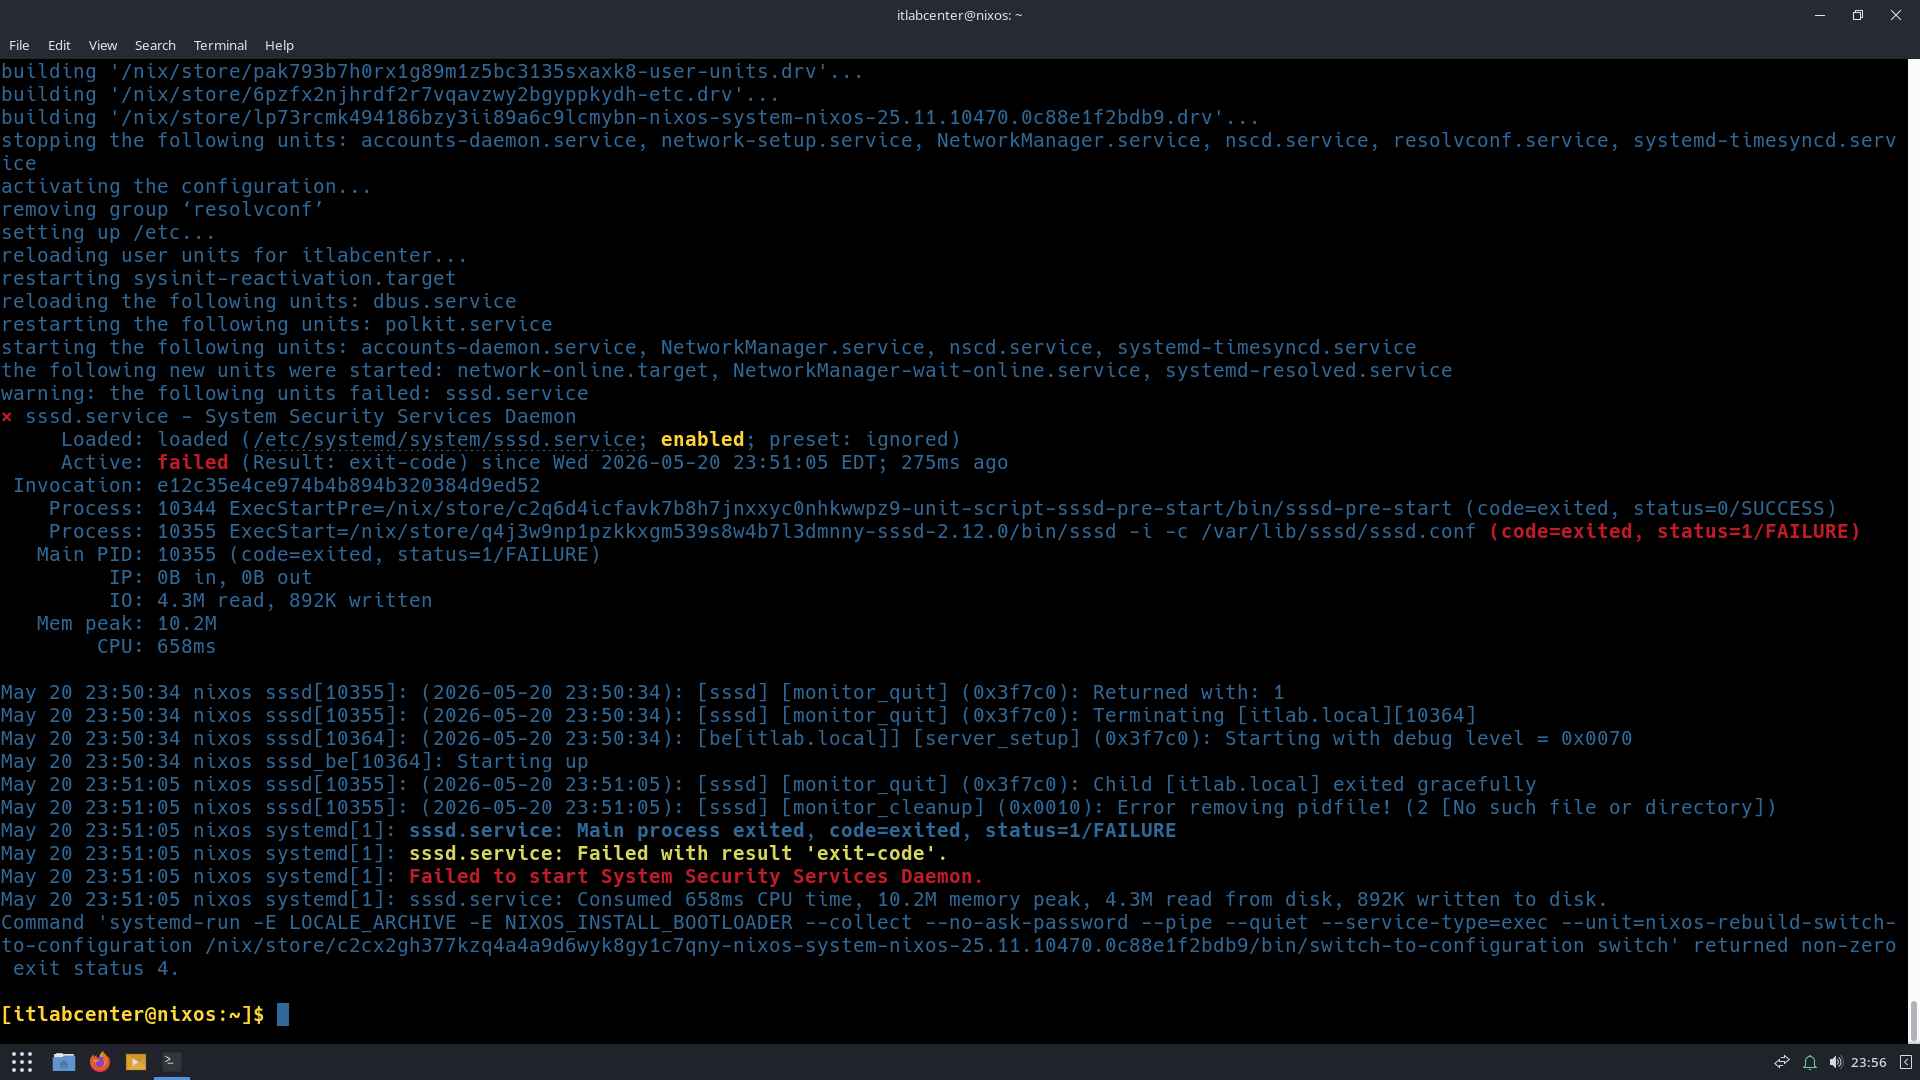
SSSD might fail to start immediately during this initial rebuild. This is completely expected. SSSD can't
start cleanly until the machine is physically joined to the domain and a local keytab file can be located
Now use adcli to securely connect to your Windows Domain Controller, create a computer object account in
the Active Directory database, and securely exchange key materials. You will need to use a domain account
that has rights to join machines to the domain. Run the following command from the Nix OS Terminal below
[itlabcenter@nixos:~]$ sudo adcli join --domain=itlab.local --user=administrator
Type the password for your AD Administrator when prompted. If it suceeds, it will exit silently without
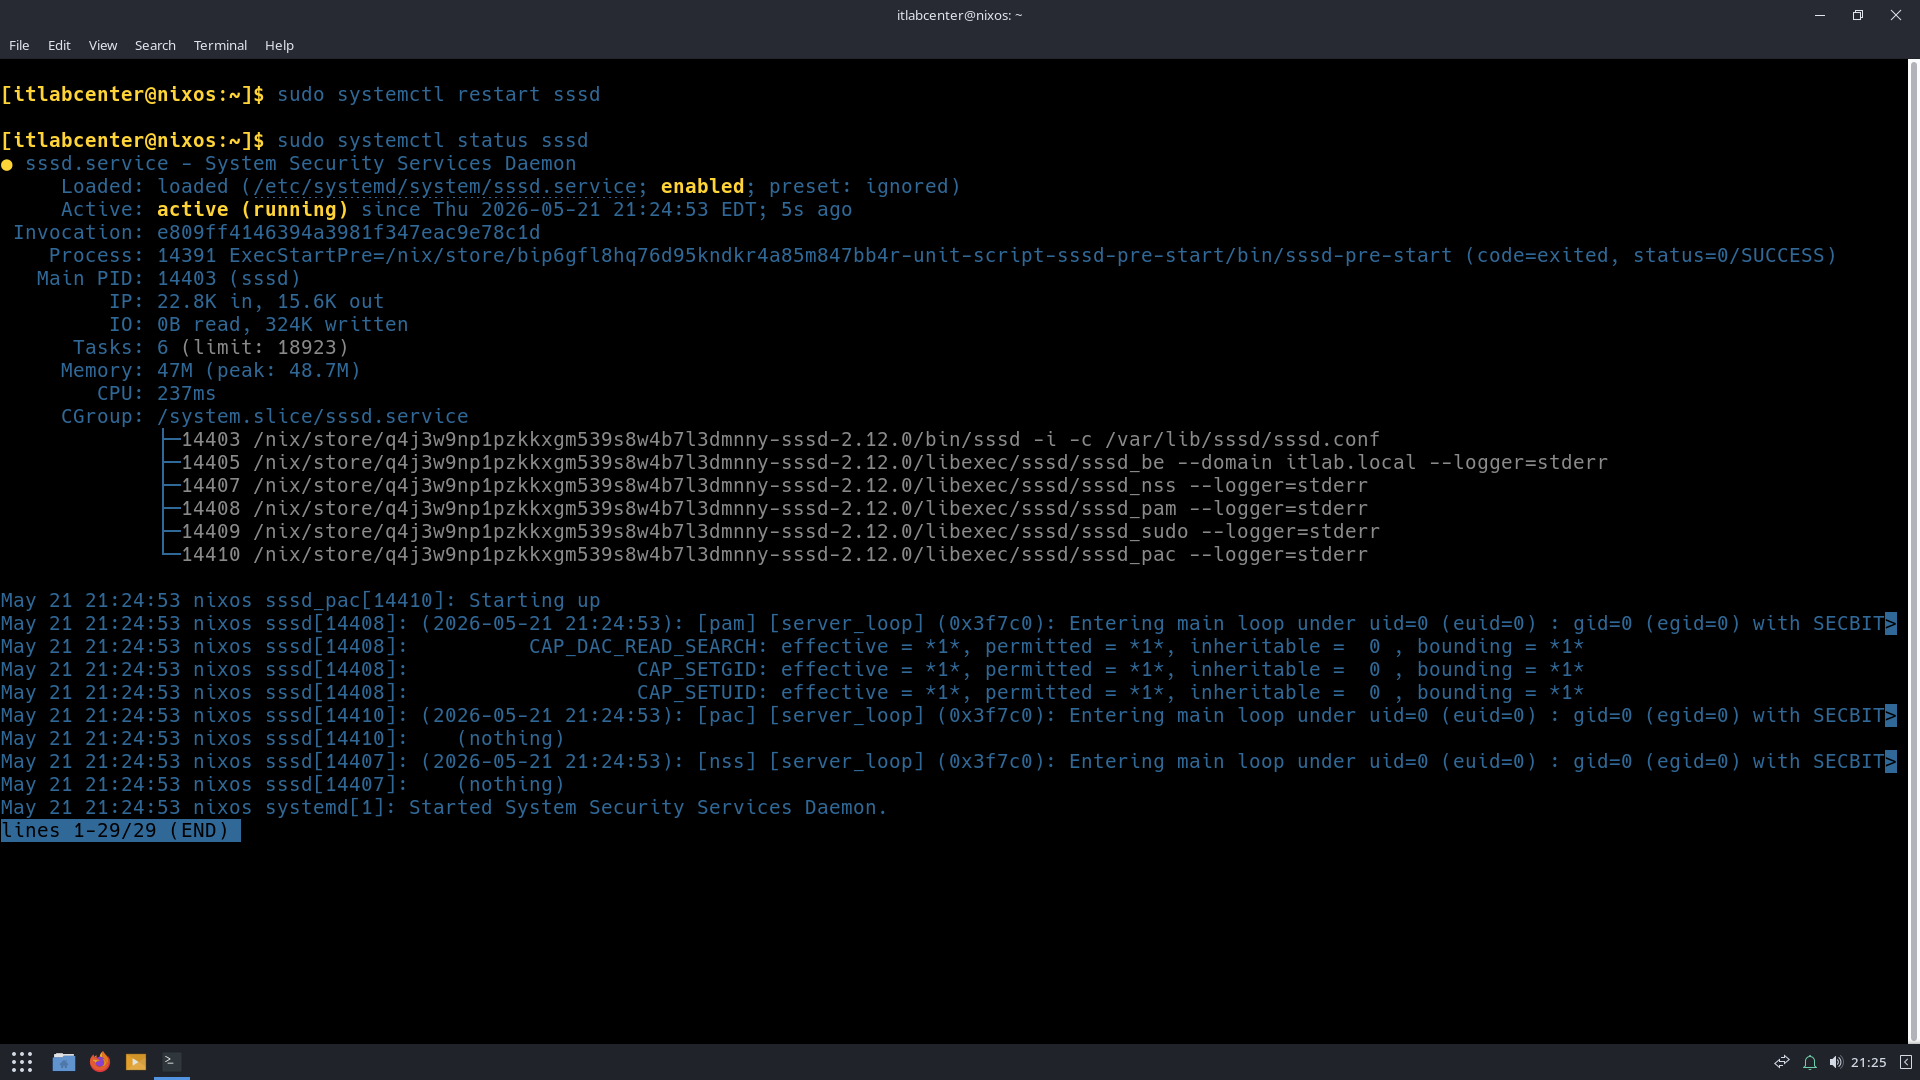
errors and automatically generate your secure authentication file at /etc/krb5.keytab. Enable the Service
[itlabcenter@nixos:~]$ sudo systemctl restart sssd
Resulting Output:
Run the following command from the Nix OS Terminal to test our Active Directory Command Line Permissions
[itlabcenter@nixos:~]$ su - administrator@itlab.local
[administrator@nixos:~]$ ldapsearch -Y GSSAPI -H ldap://itlab.local -b 'DC=itlab,DC=local' '(objectClass=user)' sAMAccountName 2>/dev/null | grep 'sAMAccountName:'
[administrator@nixos:~]$ exit
Resulting Output:

We now have access to the Active Directory user account information from our NIX OS host, time to scan it
8. Map AD Attack Surface Using Python
Let's apply our newly developed Python skills towards real Security Operations work. We will develope a
proactive threat hunting to which can be used to enumerate vulnerabilities and service misconfigurations
within an Active Directory environment. Let's build this script section by section so you can fully see
the mechanics behind it. Since we are on NixOS and utilizing Kerberos, we need to ensure Python has the
correct libraries to speak LDAP (Lightweight Directory Access Protocol) and read your ticket cache. You
will need the ldap3 library and the gssapi wrapper. Adjust your /etc/configuration.nix packages block:
environment.systemPackages = with pkgs; [
(python3.withPackages(ps: with ps; [
ldap3
gssapi
cryptography
]))
vscode
krb5
];
Run the following command from the Nix OS Terminal to rebuild the system by compiling installed packages
[itlabcenter@nixos:~]$ sudo nixos-rebuild switch
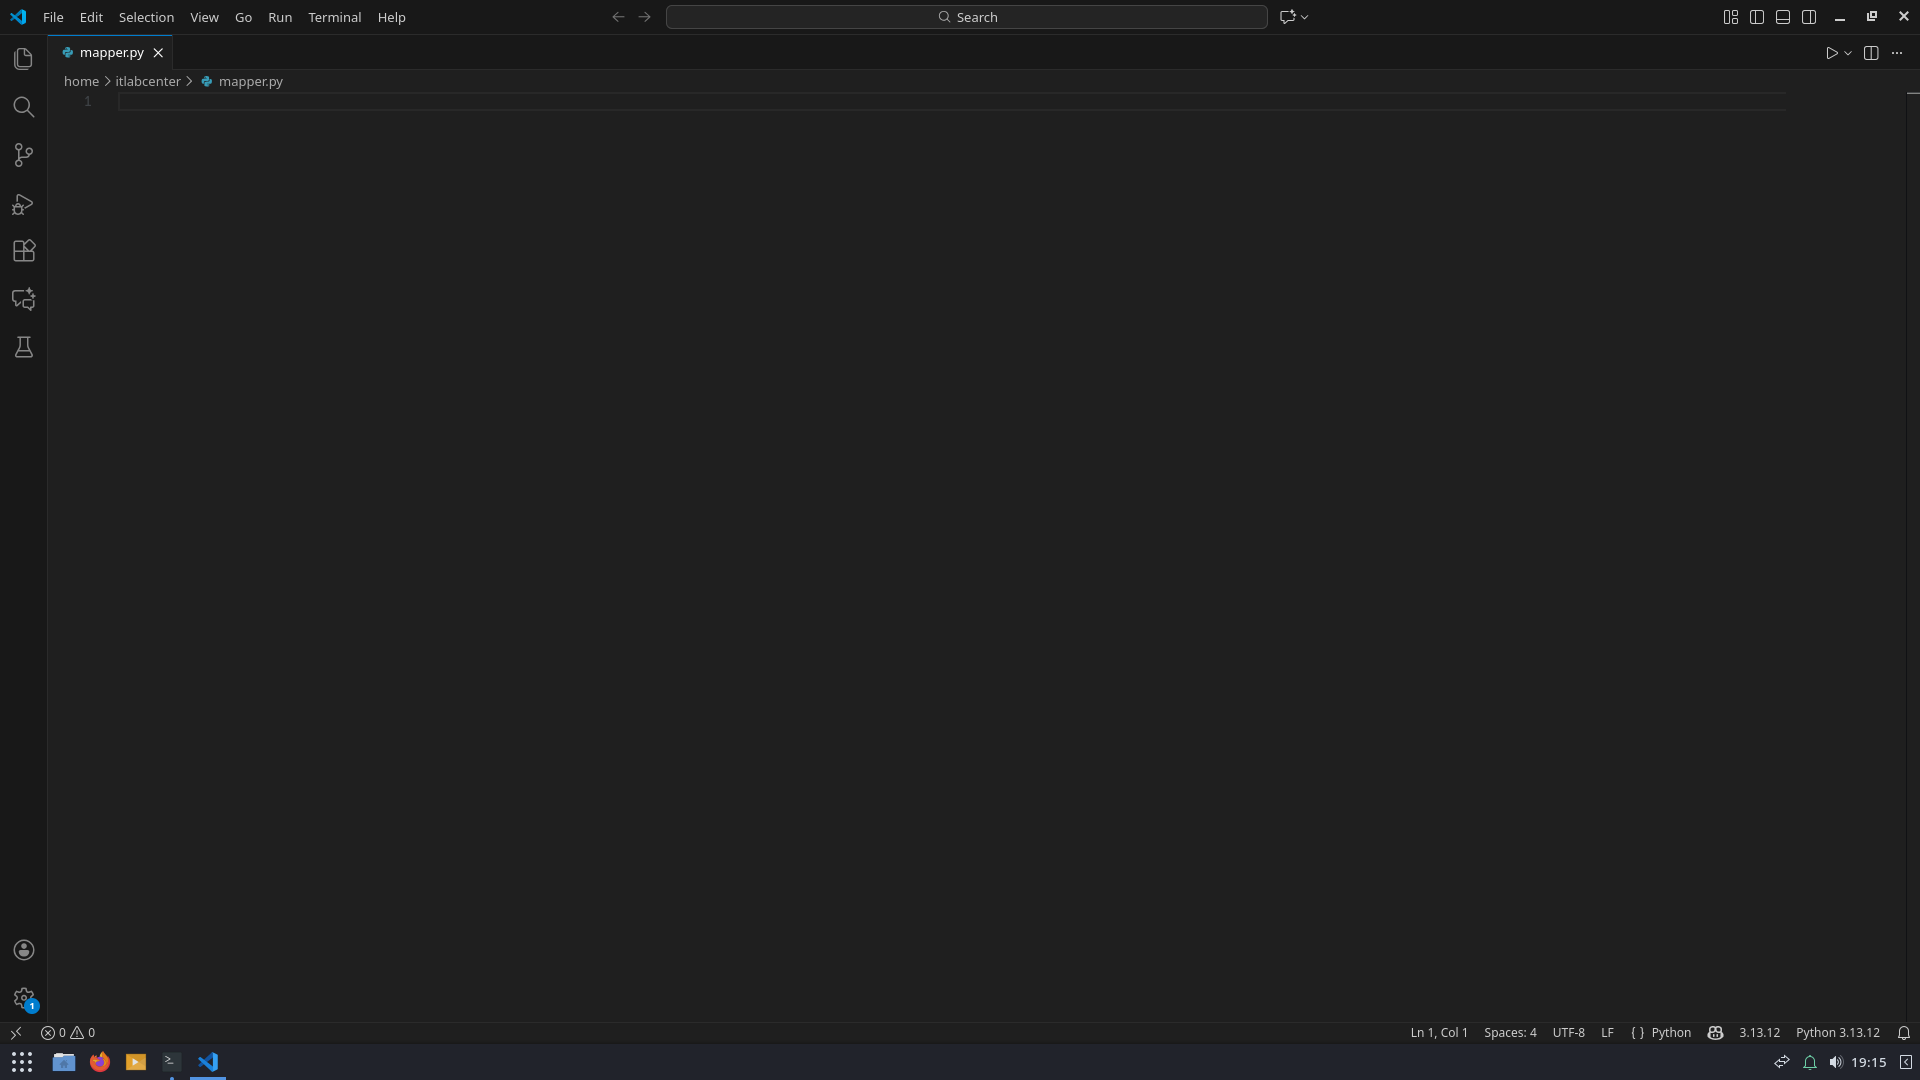
Execute the following command from the Nix OS Terminal to launch the Visual Basic Studio Code Editor app
[itlabcenter@nixos:~]$ code
From the VS Code menu bar, select File > New File... name our new file mapper.py > Built-in > Create File
Here is the complete script. It is designed to be modular, so we can easily plug in the LDAP filters for
the specific vulnerabilities we engineered. We have pre-loaded it with the LDAP syntax for the critical
six vulnerabilities we have planted, but additional filters can be substituted for other vulnerabilities
Type out the following Python script shown below into your VS Code Editor, then press CTRL+S to save it
import sys
import ssl
from ldap3 import Server, Connection, SASL, GSSAPI, ALL, Tls
# --- Configuration ---
# Replace with the true FQDN of your Domain Controller
DC_FQDN = 'win-hb56o5eo34g.itlab.local'
SEARCH_BASE = 'DC=itlab,DC=local'
# --- The Vulnerability Signatures (LDAP Filters) ---
# We use bitwise LDAP queries to check the userAccountControl attribute
VULNERABILITIES = {
"AS-REP Roasting (Pre-Auth Not Required)": "(&(objectCategory=person)(objectClass=user)(userAccountControl:1.2.840.113556.1.4.803:=4194304))",
"Kerberoasting (User Accounts with SPNs)": "(&(objectCategory=person)(objectClass=user)(servicePrincipalName=*)(!(sAMAccountName=krbtgt)))",
"Passwords Set to Never Expire": "(&(objectCategory=person)(objectClass=user)(userAccountControl:1.2.840.113556.1.4.803:=65536)),"
"Unconstrained Delegation Enabled": "(&(objectClass=user)(userAccountControl:1.2.840.113556.1.4.803:=524288))",
"Password Not Required (Blank Passwords Allowed)": "(&(objectCategory=person)(objectClass=user)(userAccountControl:1.2.840.113556.1.4.803:=32))",
"Passwords Stored in Reversible Encryption": "(&(objectCategory=person)(objectClass=user)(userAccountControl:1.2.840.113556.1.4.803:=128))"
}
def connect_to_ad():
"""Establishes a secure connection to AD using the existing Kerberos ticket."""
print(f"[*] Attempting GSSAPI connection to {DC_FQDN}...")
try:
# Define the server, requesting all schema info
tls_config = Tls(validate=ssl.CERT_NONE, version=ssl.PROTOCOL_TLSv1_2)
server = Server(DC_FQDN, port=636, use_ssl=True, tls=tls_config, get_info=ALL)
# Connect using the Kerberos ticket cache (SASL/GSSAPI)
conn = Connection(server, authentication=SASL, sasl_mechanism=GSSAPI)
if not conn.bind():
print("[-] Bind failed. Do you have a valid Kerberos ticket? Run 'kinit'.")
print(conn.result)
sys.exit(1)
print("[+] Successfully bound to Active Directory via Kerberos!\n")
return conn
except Exception as e:
print(f"[-] Connection error: {e}")
sys.exit(1)
def hunt_vulnerabilities(conn):
"""Iterates through our defined signatures and queries the domain."""
print("==========================================")
print(" ACTIVE DIRECTORY ATTACK SURFACE MAP ")
print("==========================================\n")
for vuln_name, ldap_filter in VULNERABILITIES.items():
print(f"[*] Hunting for: {vuln_name}")
# Execute the Search
conn.search(
search_base=SEARCH_BASE,
search_filter=ldap_filter,
attributes=['sAMAccountName', 'description']
)
# Parse and Display Results
if conn.entries:
print(f"[!] Found {len(conn.entries)} vulnerable account(s):")
for entry in conn.entries:
username = entry.sAMAccountName.value
desc = entry.description.value if entry.description else "No description"
print(f" -> {username} (Desc: {desc})")
else:
print("[+] Secure: No accounts found matching this signature.")
print("-" * 40)
if __name__ == "__main__":
# Ensure we have a valid connection before hunting
ad_connection = connect_to_ad()
hunt_vulnerabilities(ad_connection)
ad_connection.unbind()
Run the following command from the NixOS Terminal to request an authentication ticket from our Kerberos
[itlabcenter@nixos:~]$ kinit administrator
In order for our Domain Controller to accept a connection over port 636 we need to setup a certificate
Run the following commands from the Domain Controllers PowerShell to configure a certificate for LDAPS
PS C:\Windows\System32> Install-WindowsFeature Adcs-Cert-Authority -IncludeManagementTools
PS C:\Windows\System32> Add-ADGroupMember -Identity "Enterprise Admins" -Members "ITLab_Center"
PS C:\Windows\System32> shutdown /r
PS C:\Windows\System32> Install-AdcsCertificationAuthority -CAType EnterpriseRootCa -CryptoProviderName "RSA#Microsoft Software Key Storage Provider" -KeyLength 2048 -HashAlgorithmName SHA256 -ValidityPeriod Years -ValidityPeriodUnits 5 -Force
PS C:\Windows\System32> shutdown /r
Run the following command from the NixOS Terminal to execute our Python script to hunt vulnerabilities
[itlabcenter@nixos:~]$ python3 mapper.py
Resulting Output:
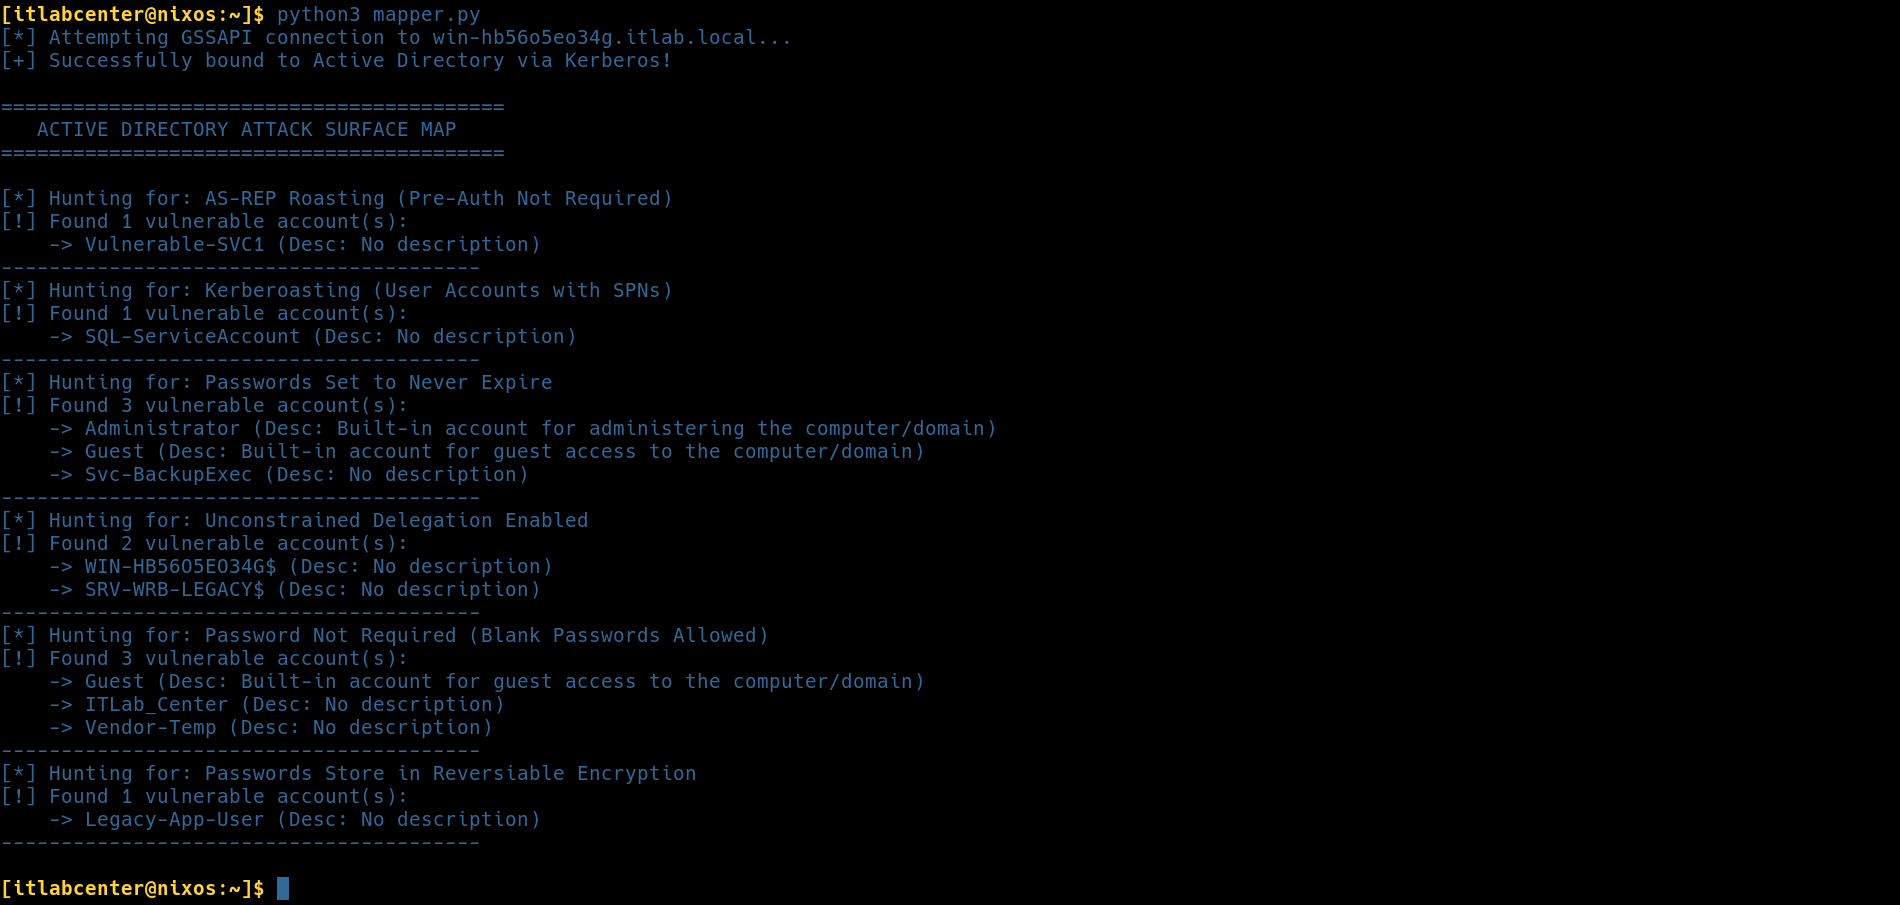
To deeply understand what this script is doing, let's break it down into the core mechanisms it's using:
conn = Connection(server, authentication=SASL, sasl_mechanism=GSSAPI)
This is the payoff for all your NixOS configuration. Instead of hardcoding a username and password using
plaintext (which is a massive security flaw in its own right), this tells the ldap3 library to reach out
to the underlying OS, grab the Kerberos Ticket-Granting-Ticket (TGT) you generated with kinit, and present
it to the Domain Controller. It is silent, secure, and enterprise-grade
VULNERABILITIES = {
"AS-REP Roasting (Pre-Auth Not Required)": "(&(objectCategory=person)(objectClass=user)(userAccountControl:1.2.840.113556.1.4.803:=4194304))",
"Kerberoasting (User Accounts with SPNs)": "(&(objectCategory=person)(objectClass=user)(servicePrincipalName=*)(!(sAMAccountName=krbtgt)))",
"Passwords Set to Never Expire": "(&(objectCategory=person)(objectClass=user)(userAccountControl:1.2.840.113556.1.4.803:=65536)),"
"Unconstrained Delegation Enabled": "(&(objectClass=user)(userAccountControl:1.2.840.113556.1.4.803:=524288))",
"Password Not Required (Blank Passwords Allowed)": "(&(objectCategory=person)(objectClass=user)(userAccountControl:1.2.840.113556.1.4.803:=32))",
"Passwords Stored in Reversible Encryption": "(&(objectCategory=person)(objectClass=user)(userAccountControl:1.2.840.113556.1.4.803:=128))"
}
Active Directory stores a massive amount of security data in a single integer attribute referred to as
userAccountControl (UAC). To find misconfigurations, we can't just look for a word; we have to use bitwise
matching (that crazy 1.2.840.113556.1.4.803 string is the LDAP Object Identifier for bitwise AND operator)
The flags (:=4194304, :=65536, etc.) isolate the bit flag for the vulnerabilities we are hunting for
conn.search(
search_base=SEARCH_BASE,
search_filter=ldap_filter,
attributes=['sAMAccountName', 'description']
)
The conn_search() method sends the filter to the DC. The data comes back as a list of entry objects. We
then iterate through conn.entries and extract the sAMAccountName (the login name) and the description
(attackers frequently find passwords lazily left in the description field).
9. Remediate Active Directory Vulnerabilities
The primary purpose of any vulnerability scanning activities is to improve security posture. Here we will
do so by remediating the vulnerabilities our Python script has uncovered, Open the PowerShell ISE as admin
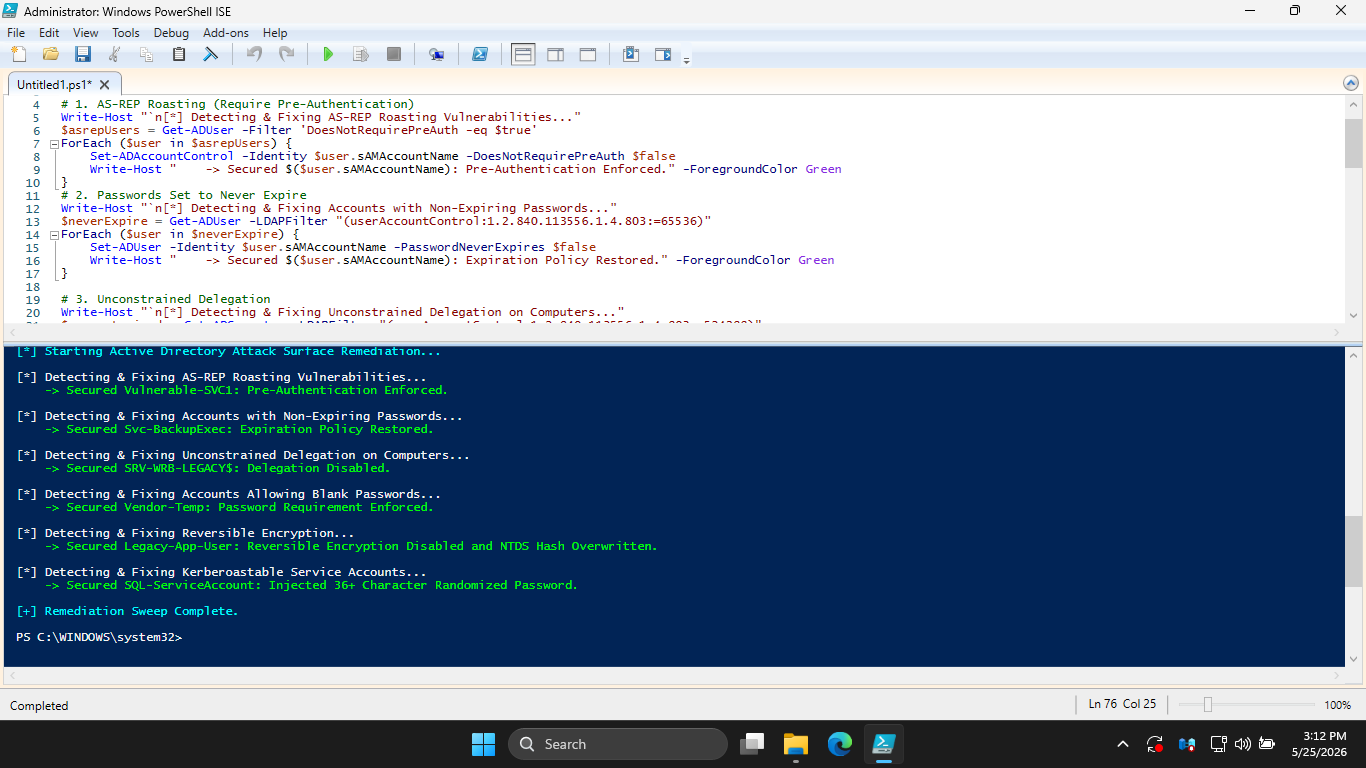
Execute the following script from PowerShell ISE to remediate the vulnerabilities our mapper discovered
Import-Module ActiveDirectory
Write-Host "[*] Starting Active Directory Attack Surface Remediation..." -ForegroundColor Cyan
# 1. AS-REP Roasting (Require Pre-Authentication)
Write-Host "`n[*] Detecting & Fixing AS-REP Roasting Vulnerabilities..."
$asrepUsers = Get-ADUser -Filter 'DoesNotRequirePreAuth -eq $true'
ForEach ($user in $asrepUsers) {
Set-ADAccountControl -Identity $user.sAMAccountName -DoesNotRequirePreAuth $false
Write-Host " -> Secured $($user.sAMAccountName): Pre-Authentication Enforced." -ForegroundColor Green
}
2. Passwords Set to Never Expire
Write-Host "`n[*] Detecting & Fixing Accounts with Non-Expiring Passwords..."
$neverExpire = Get-ADUser -LDAPFilter "(userAccountControl:1.2.840.113556.1.4.803:=65536)"
ForEach ($user in $neverExpire) {
Set-ADUser -Identity $user.sAMAccountName -PasswordNeverExpires $false
Write-Host " -> Secured $($user.sAMAccountName): Expiration Policy Restored." -ForegroundColor Green
}
# 3. Unconstrained Delegation
Write-Host "`n[*] Detecting & Fixing Unconstrained Delegation on Computers..."
$unconstrained = Get-ADComputer -LDAPFilter "(userAccountControl:1.2.840.113556.1.4.803:=524288)"
ForEach ($comp in $unconstrained) {
Set-ADComputer -Identity $comp.sAMAccountName -TrustedForDelegation $false
Write-Host " -> Secured $($comp.sAMAccountName): Delegation Disabled." -ForegroundColor Green
}
# 4. Password Not Required (Blank Passwords)
Write-Host "`n[*] Detecting & Fixing Accounts Allowing Blank Passwords..."
$blankPass = Get-ADUser -LDAPFilter "(userAccountControl:1.2.840:113556.1.4.803:=32)"
$temppass = ConvertTo-SecureString "T3MP_pa55w0rd!" -AsPlainText -Force
ForEach ($user in $blankPass) {
Set-ADAccountPassword -Identity $user.sAMAccountName -NewPassword $temppass -Reset:$true
Set-ADUser -Identity $user.sAMAccountName -PasswordNotRequired $false
Write-Host " -> Secured $($user.sAMAccountName): Password Requirement Enforced." -ForegroundColor Green
}
# 5. Reversible Encryption (Requires Password Reset)
Write-Host "`n[*] Detecting & Fixing Reversible Encryption..."
$reversible = Get-ADUser -LDAPFilter "(userAccountControl:1.2.840.113556.1.4.803:=128)"
$temppass = ConvertTo-SecureString "T3MP_pa55w0rd!" -AsPlainText -Force
ForEach ($user in $reversible) {
Set-ADUser -Identity $user.sAMAccountName -AllowReversiblePasswordEncryption $false
Set-ADAccountPassword -Identity $user.sAMAccountName -NewPassword $temppass -Reset:$true
Write-Host " -> Secured $($user.sAMAccountName): Reversible Encryption Disabled and NTDS Hash Overwritten." -ForegroundColor Green
}
# 6. Kerberoasting Mitigation
Write-Host "`n[*] Detecting & Fixing Kerberoastable Service Accounts..."
$kerberoastable = Get-ADUser -LDAPFilter "(&(servicePrincipalName=*)(!(sAMAccountName=krbtgt)))"
ForEach ($user in $kerberoastable) {
$complexPass = ConvertTo-SecureString "SvcAcct!$([guid]::NewGuid().ToString())" -AsPlainText -Force
Set-ADAccountPassword -Identity $user.sAMAccountName -NewPassword $complexPass -Reset:$true
Set-ADUser -Identity $user.sAMAccountName -Clear ServicePrincipalName
Write-Host " -> Secured $($user.sAMAccountName): Injected 36+ Character Randomized Password." -ForegroundColor Green
}
Write-Host "`n[+] Remediation Sweep Complete." -ForegroundColor Cyan
Resulting Output:
Run the following command from the NixOS Terminal to execute our Python script to validate remediation
[itlabcenter@nixos:~]$ python3 mapper.py
Resulting Output:
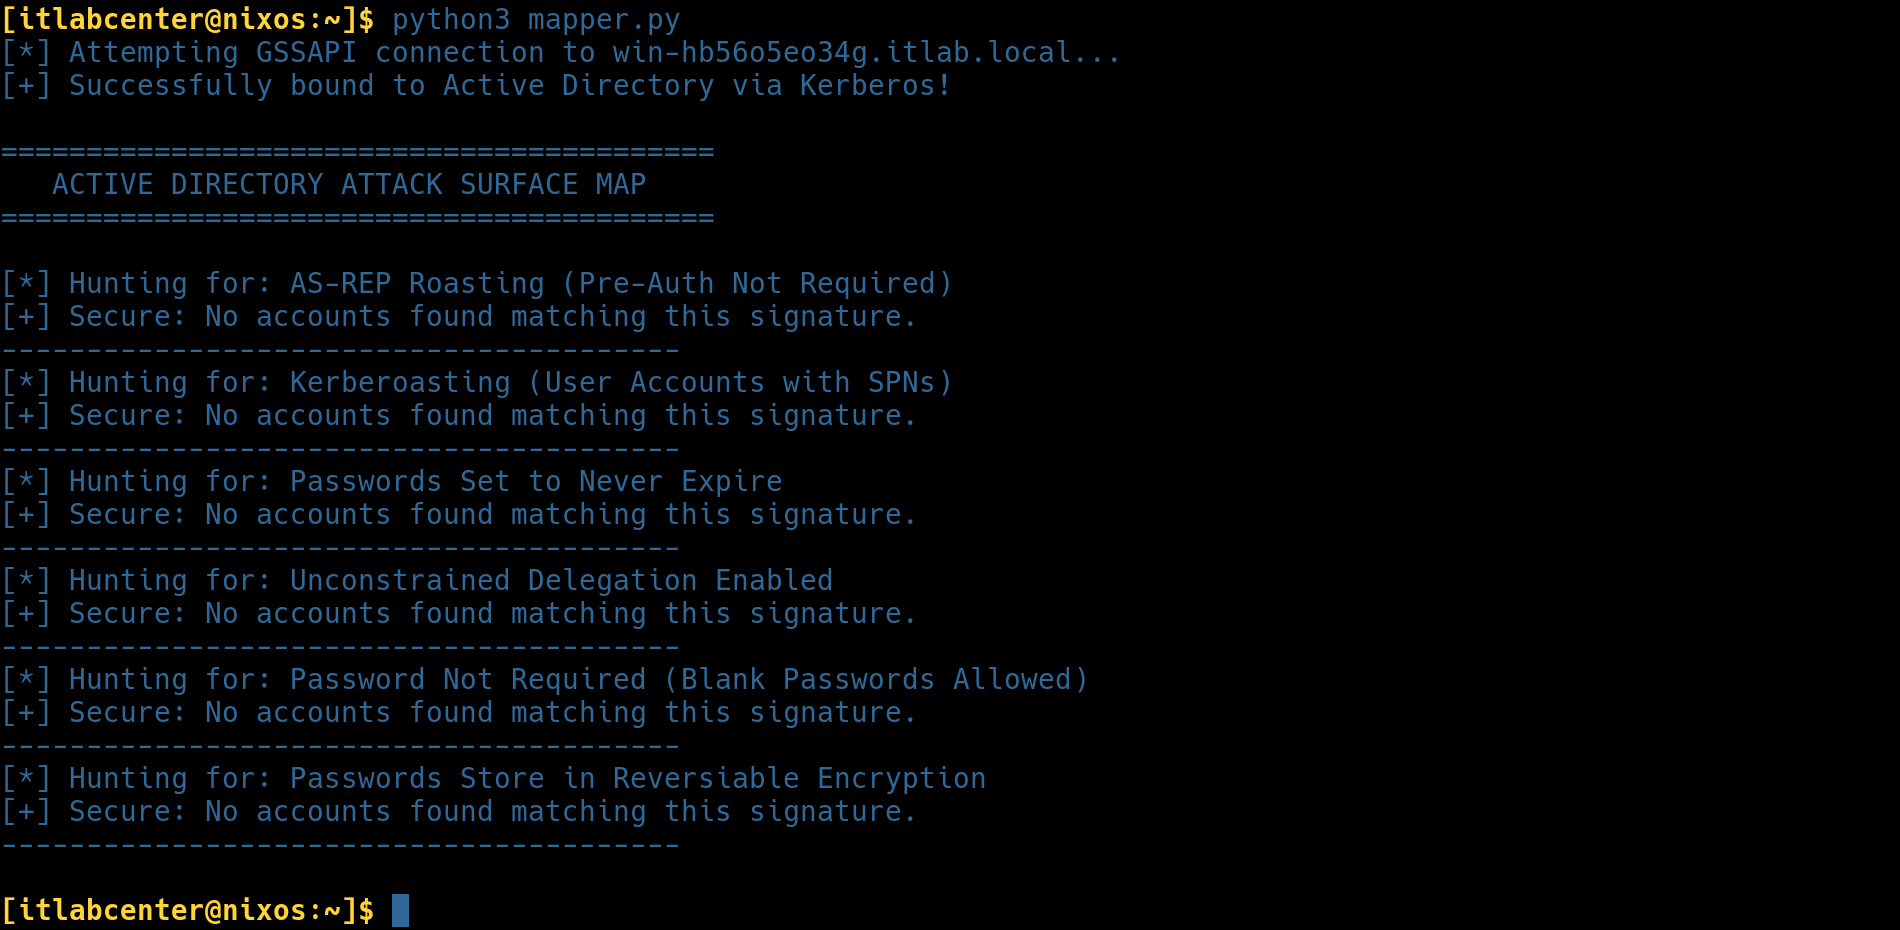
We can see that after our remediation efforts, the vulnerabilities are no longer detected on our system
Congratulations! You have completed this guided lab on Python Scripting. You have briefly covered a lot
of Python: integers, strings, operators, slicing, lists, for loops, if/else causes, and even our own file
handling. I hope this lab inspires you to learn more Python syntax and start writing your own tools in
Python. Writing tools and automating tasks are the best ways to learn Python and grow as a professional