In this lab, implement enterprise-grade patching workflows across Windows, and Linux environments. Beyond simple updates, this project demonstrates a deep understanding of the Software Development Life Cycle (SDLC) and the critical role of Change Control in maintaining system uptime. You'll also expand the scope to include deployment strategies using Microsoft SCCM and Self-Hosted Linux Repositories to simulate a hardened infrastructure.
Cybrary is a well established and free IT training platform with several intuitive labs to explore
A paid subscription with more advanced labs is available as well outside the scope of this platform
Head to https://www.cybrary.it to create a free account for learning available on their platform
Head to Endpoint Patching Basics to complete it yourself or you can perform it on homelab below
Quick Links:
Requirements:
• Windows PC w/ Internet Connection
• USB Flash Drives w/ at least 64GB Capacity
• 2 Unused PCs w/ at least 4GB of Memory
1. Endpoint Patching Overview
Webster's Disctionary defines patching as "to put into good order something that is injured, damaged, or
defective." In Cybersecurity terms, patching is the process of mending software. Software developers work
hard to ensure safe and secure products, but tight delivery timelines and the use of shared repositories
for code and frameworks often leave exploitable security flaws in software. Patching helps mitigate these

Patching is single part of the Maintenance Phase of the larger Software Developement Life Cycle (SDLC)
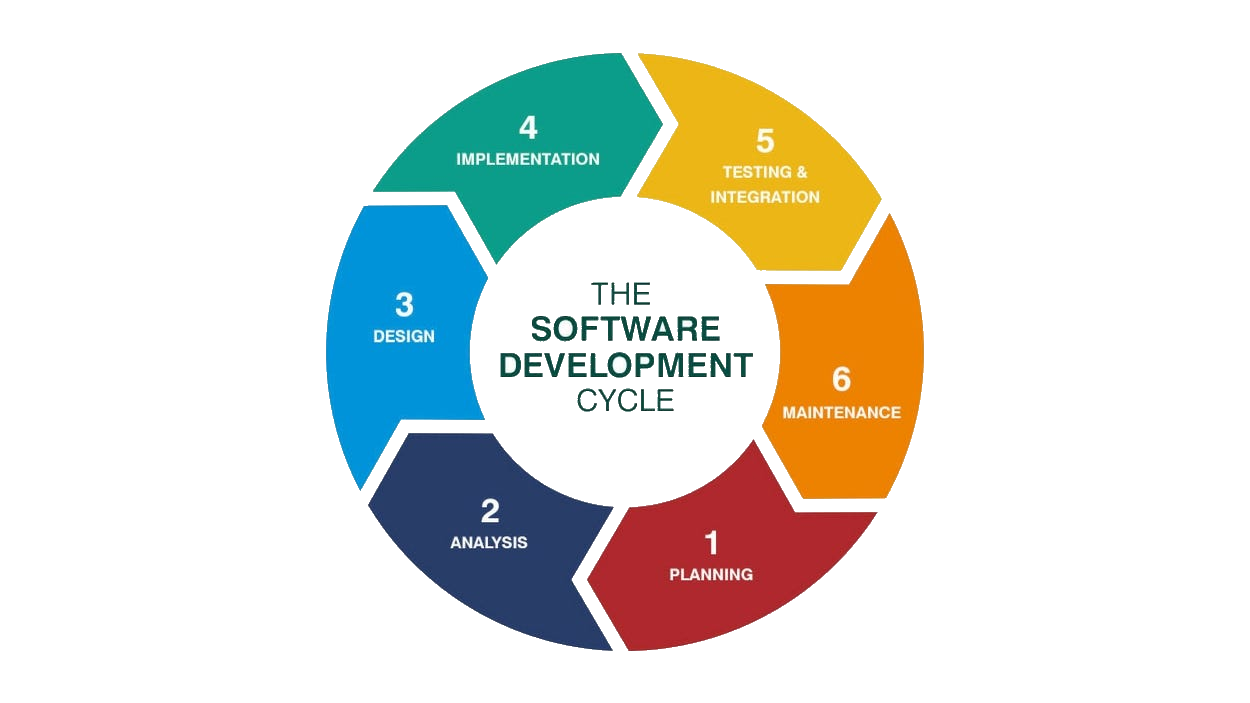
A key takeaway from the SDLC is that flaws are inevitable, and the process is both iterative and ongoing
Software is never "done", only released. A key feature of a Secure Software Developement Life Cycle and
its counterpart DevSecOps, is to build security testing into the early phases of the developement process
Building security into earlier developement pahses allows the QA Team to focus on functionality and the
usability, and helps ensure fewer vulnerabilities make it into the released product or production system
The Windows operating system has nearly 50 million lines of code. Microsoft generates monthly updates for
Windows on the second Tuesday of every month - a day known as Patch Tuesday. For most Windows 11 and 10
users, Windows checks for updates daily and installs them during "off" hours. As such, Patch Tuesday is
not something that individual end-users need to think about. For server administrators, however, patches
need to be rolled out more carefully. Though uncommon, a given patch can do more harm than good, rendering
a server inoperable. For this reason, system administrators leverage a formal change control processs.
This process ensures a patch is first tested in a staging environment, then pushed to a limited number of
servers, and finally rolled out to the enterprise once a patch is deemed safe. This is a full-time effort
Keeping systems up to date is complex, and in many cases, well-known software bugs remain unpatched for
long periods. The overall process for tracking applied and pending patched is known as Patch Management
For small operations, keeping track of patches applied and pending can be done with PowerShell or with a
simple spreadsheet. For larger operations, using a dedicated patching solution that supports Windows and
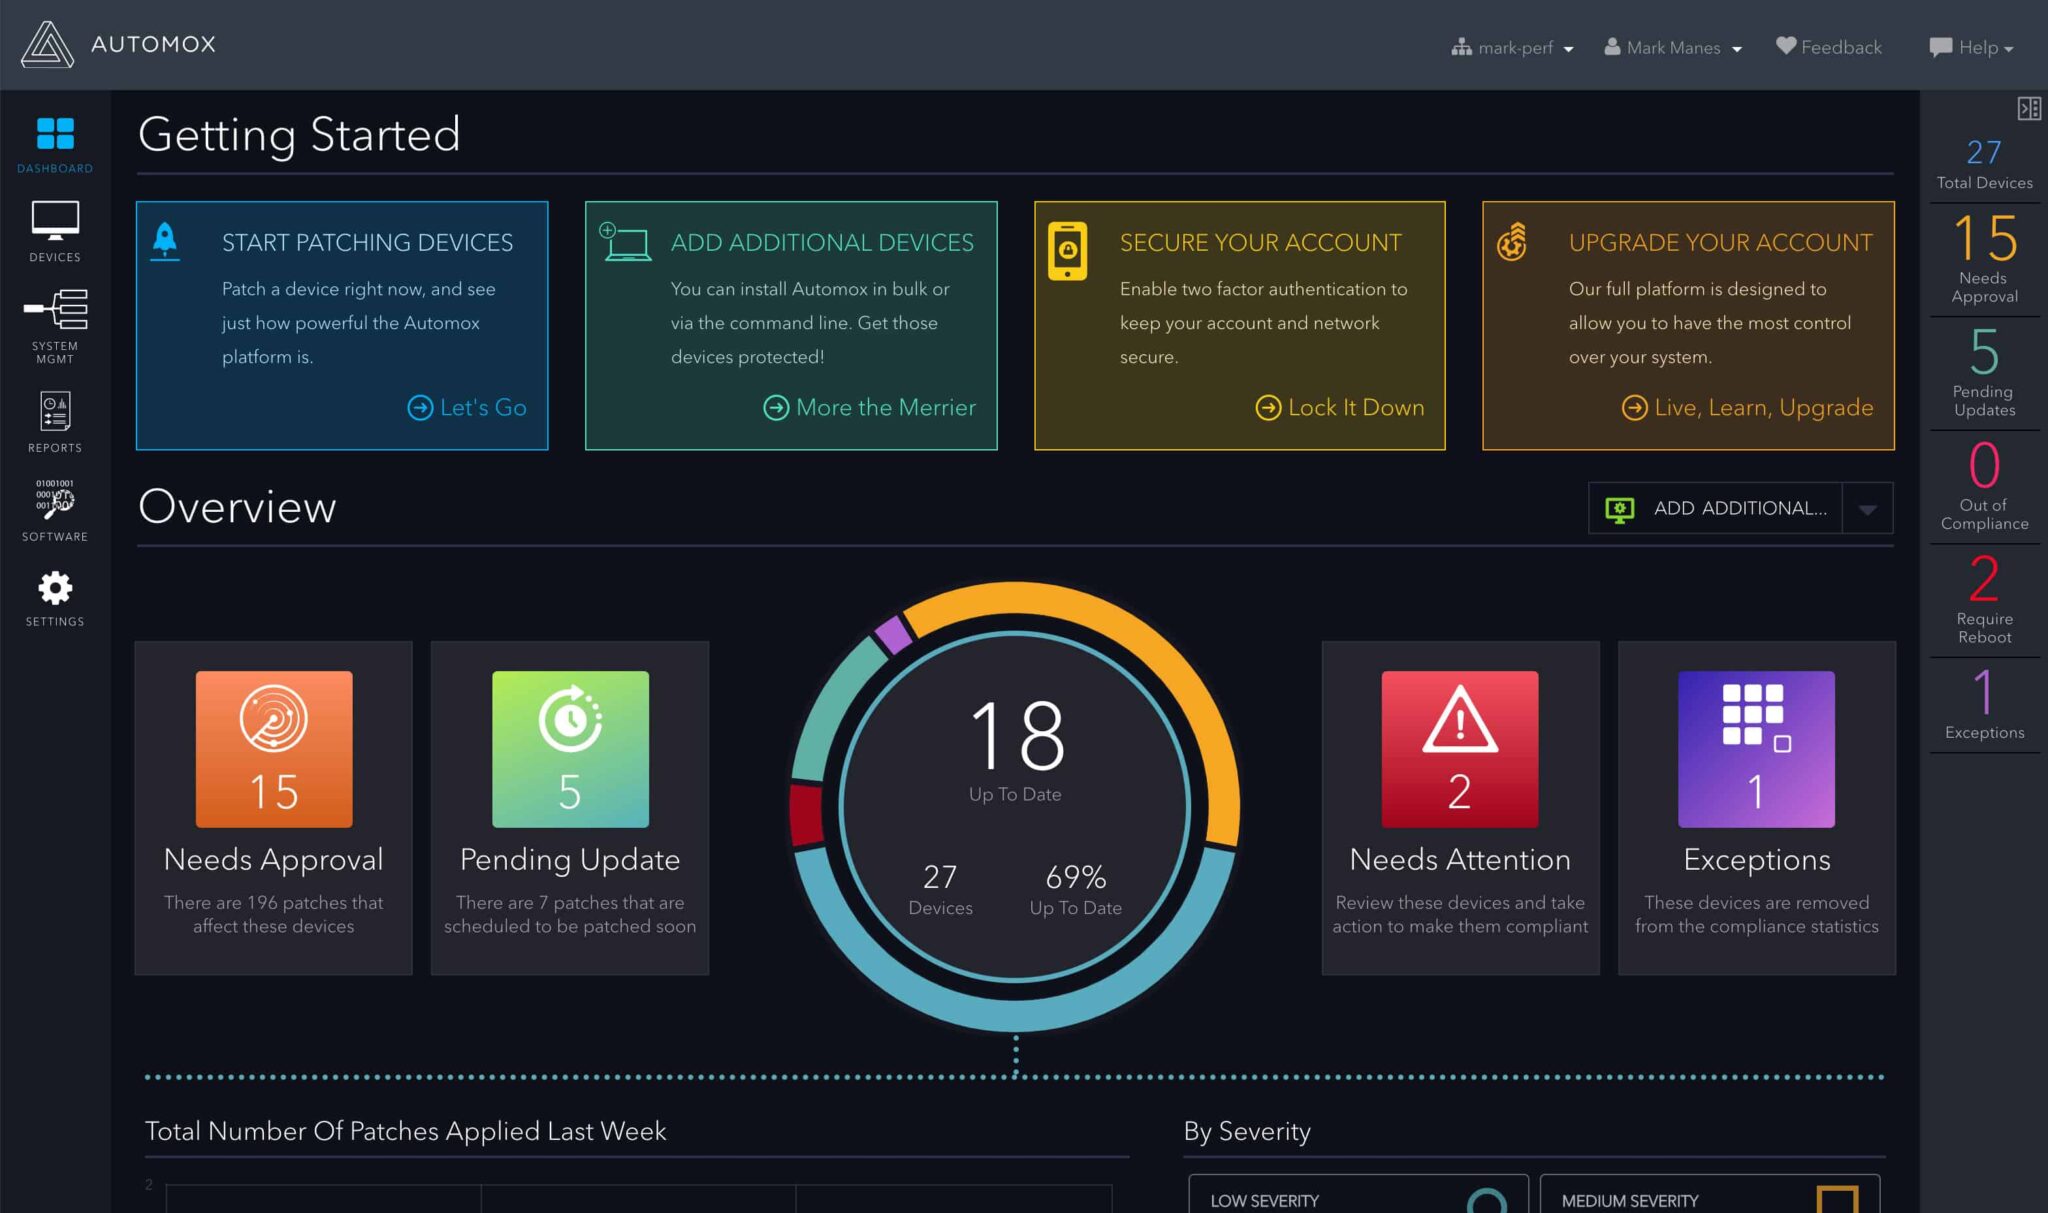
Linux is better. Some vendors, like Automox, offer a cloud/agent-based solution. Other vendors, such as
ManageEngine, offer dedicated in-house patch management servers. Microsoft itself provides Windows Server
Update Service (WSUS) as an installable service for a Windows Server. Some antivirus solutions also track
if the operating system is out of date. For example, ESET can track and report when a system needs a patch
Ideally, patch management will work hand in hand with vulnerability management. Vulnerability Scanners
like Nessus, OpenVAS, and Qualys can help determine if the Operating System or any software running on
top of the OS is vulnerable. In the reports produced by vulnerability scanners, vulnerabilities found are
ranked in order of severity so that the most critical patches can be applied first and less-critical after
In the next lesson, we will demonstrate how to perform basic system patching using Windows PowerShell and
the Linux apt utility. We will also demonstrate how to update a running Docker container without stopping
2. Install Windows 11 24H2 (Unpatched)
Windows 11 is now the premier and modern desktop operating system for the vast majority of organizations
The Windows operating system family has its own unique methods and tools available to performing patching

In order to demonstrate the patching of a Windows System, we must stray from the official installing path
We will be installing the 2024 Edition of Windows 11 so that we have many patches available to complete
Download Windows 11 24H2 ISO: Archive Dot Org Windows 11 ISO
Download Rufus Disk Imaging Software: Rufus Official Download
In this lab, we will be using this older release to demonstrate the various patching methods on Windows
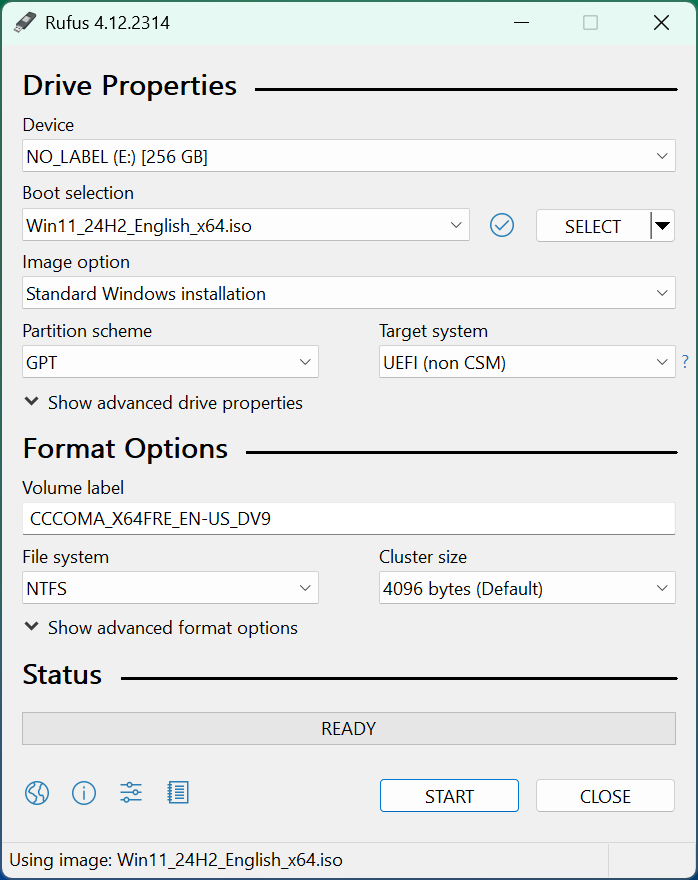
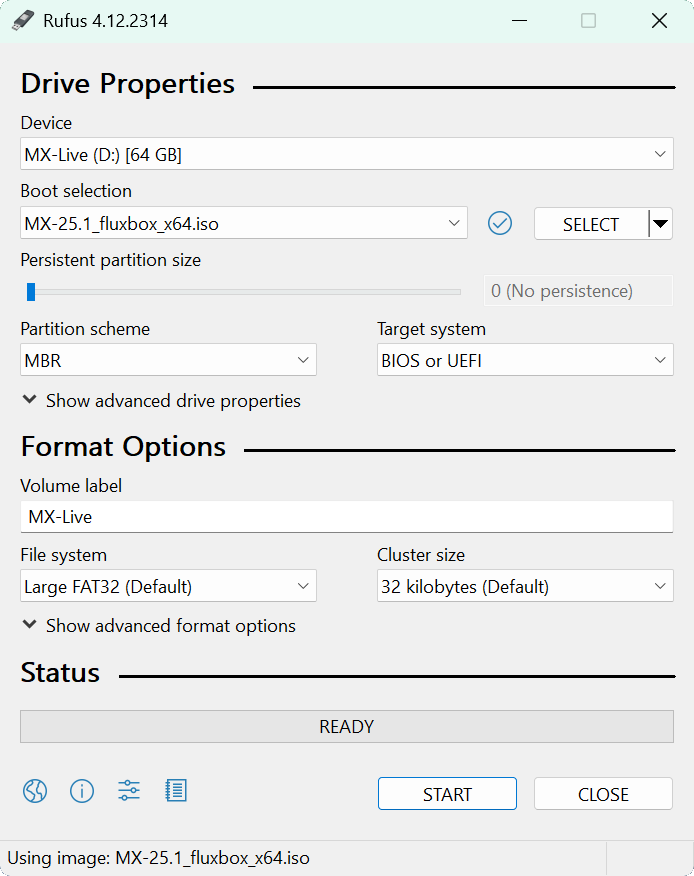
Insert USB Flash Drive, run rufus.exe, select target drive, select Windows 11 24H2 ISO, and hit start:
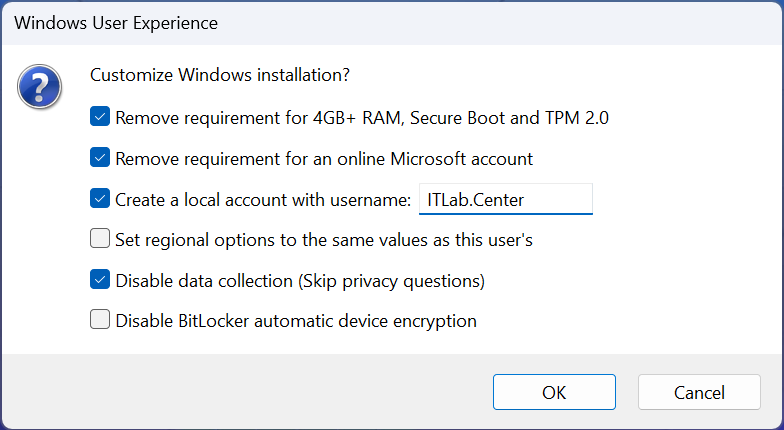
Use the rufus popup menu to customize the Windows 11 24H2 installation and disable the data collection:
Remove the USB Flash Drive and Insert into unused PC. Start PC and press the hotboot key at the startup:
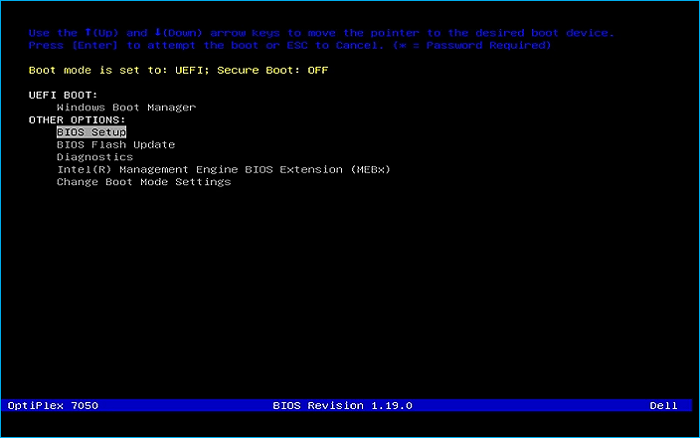
Navigate through the installer and select the 11 Pro Edition to boot up to the Unpatched Windows Desktop
This will act as the perfect baseline for us to perform these controlled patches in a live environment
3. Patch a Windows System
In this lesson, you will practice installing patches on a Windows system, followed by Linux and Docker
We will begin with Windows. While there are many methods for managing security patches on Windows, in this
exercise we will demonstrate how to install and apply security patches using the PowerShell command line
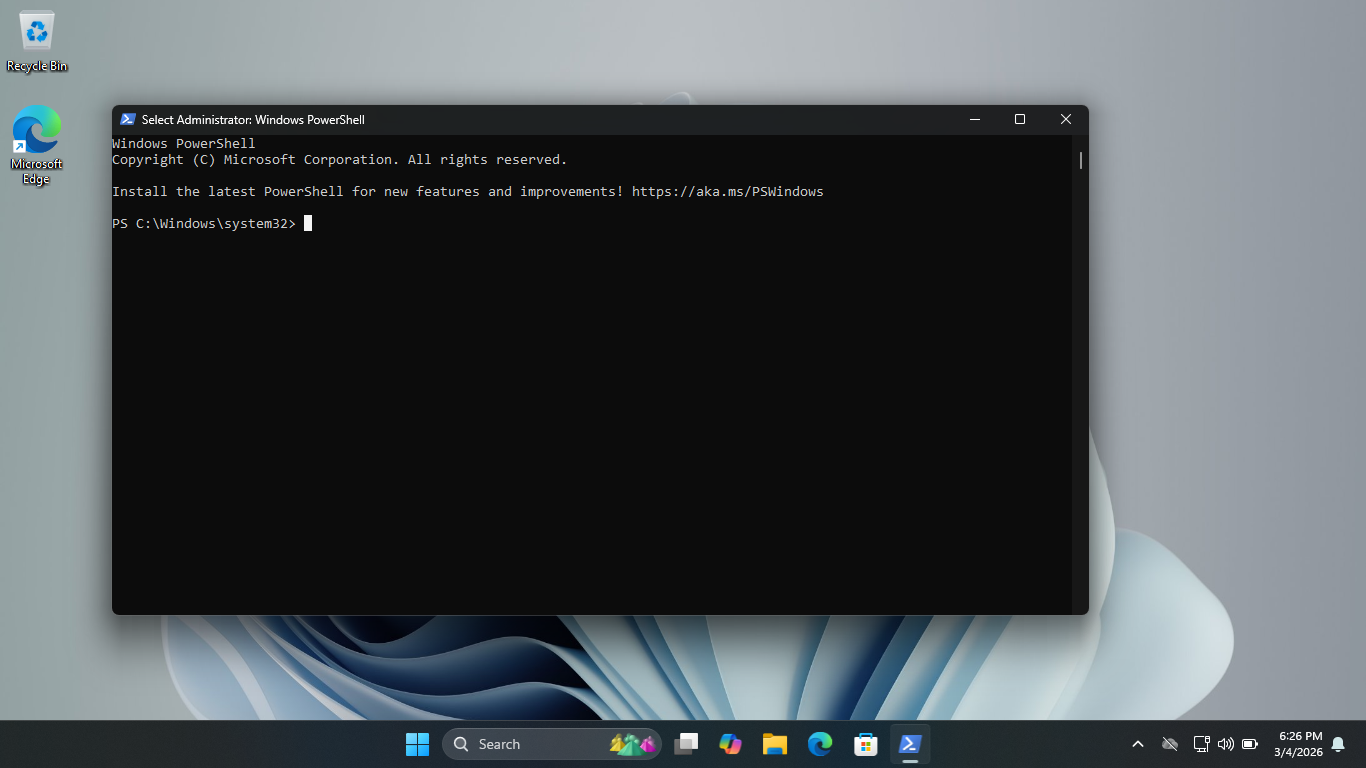
From the taskbar, search for PowerShell, then click on the option listed as Run as Administrator to launch
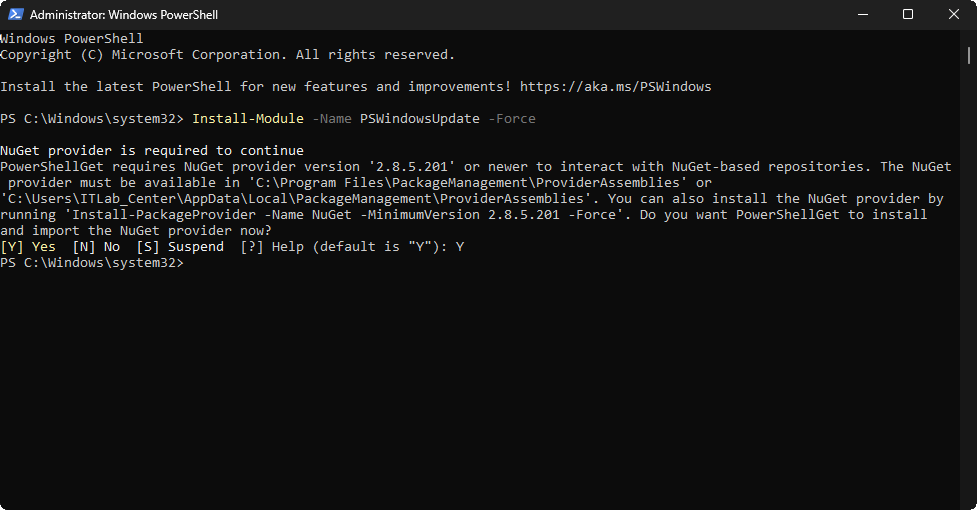
Run the following command from the Administrator PowerShell to install a Windows Update PowerShell Module
PS C:\Windows\system32> Install-Module -Name PSWindowsUpdate -Force
Resulting Output:
Run the following commands from the Administrator PowerShell to reduce the Execution Security and Import
PS C:\Windows\system32> Set-ExecutionPolicy RemoteSigned -Scope LocalMachine
PS C:\Windows\system32> Import-Module PSWindowsUpdate
Run the following command from the Administrator PowerShell to display all the currently installed updates
PS C:\Windows\system32> Get-WindowsUpdate -IsInstalled
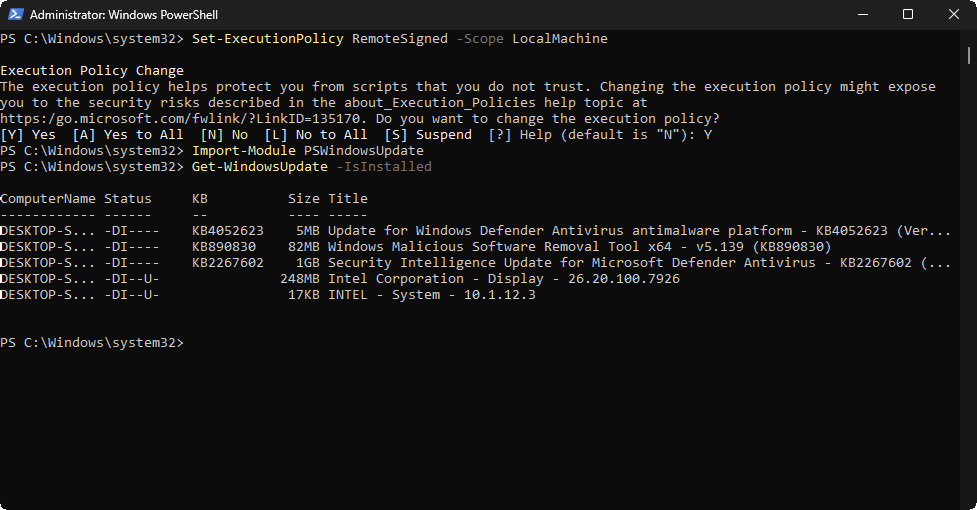
Take note of the currently installed updates. A Status of DI means the update is downloaded and installed
However a status of U means that the update can also be remove if you like, not all updates are removable
Run the following command from the Administrator PowerShell to see a list of all of the available updates
PS C:\Windows\system32> Get-WindowsUpdate
Resulting Output:
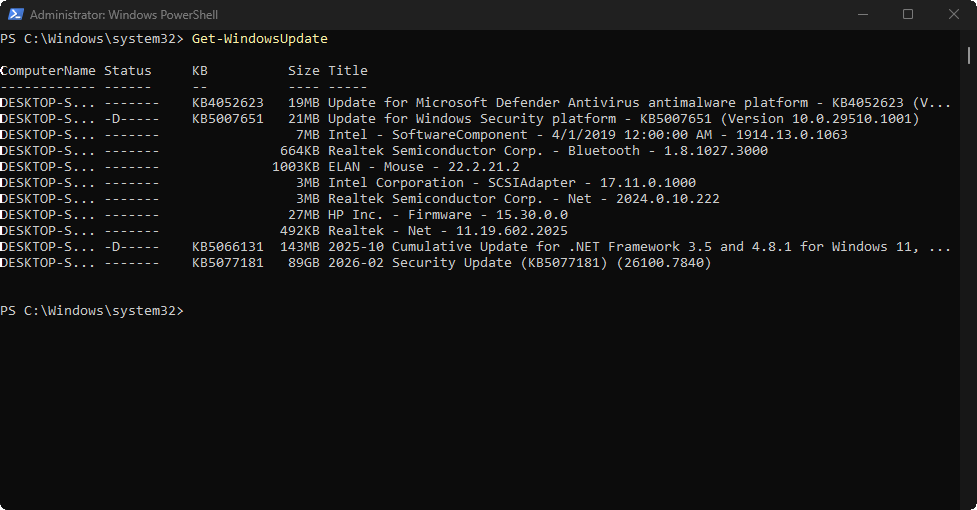
Review the available updates. Each update will be designated by KB number. KB stands for Knowledge Base
A reference to the corresponding Microsoft Knowledge Base article on that issue providing documentation
Next, we will outline the PowerShell commands used to install Windows updates and actually install them
Run the following command from the Administrator PowerShell to install a specific available Windows Update
PS C:\Windows\system32> Get-WindowsUpdate -Install -KBArticleID "4052623" -AcceptAll -AutoReboot
PS C:\Windows\system32> Get-Windows-Update
Resulting Output:
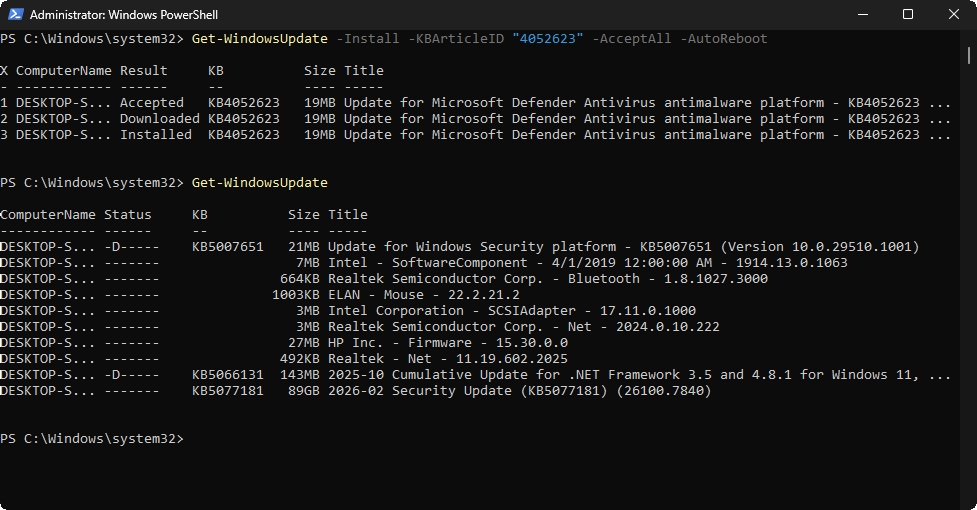
This command above installs a specific update without prompting you to accept and reboots if it is needed
Run the following commands from the Administrator PowerShell to hide one of the Available Windows Updates
PS C:\Windows\system32> $HideList = "KB5007651"
PS C:\Windows\system32> Get-WindowsUpdate -KBArticleID $HideList -Hide -AcceptAll
Resulting Output:
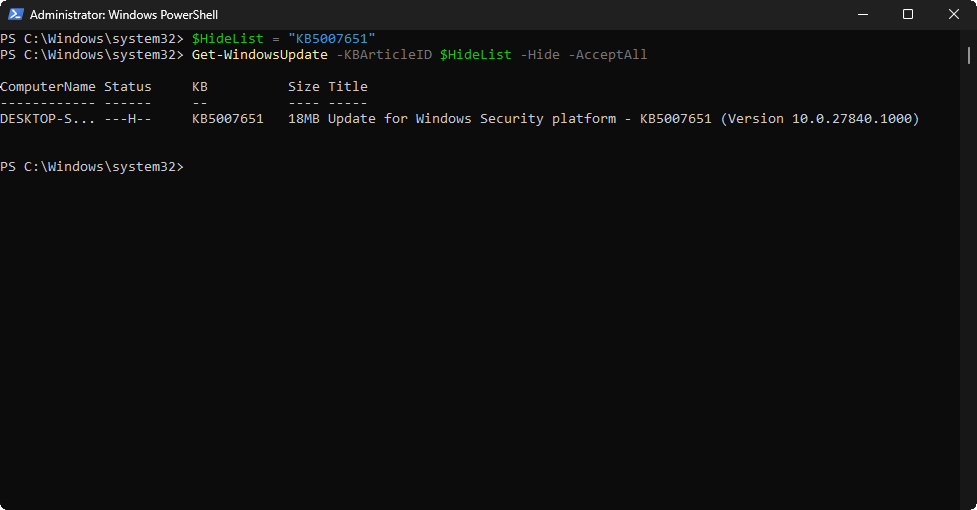
We can see the H status is now displayed, indicating that this specific update is hidden from the GUI view
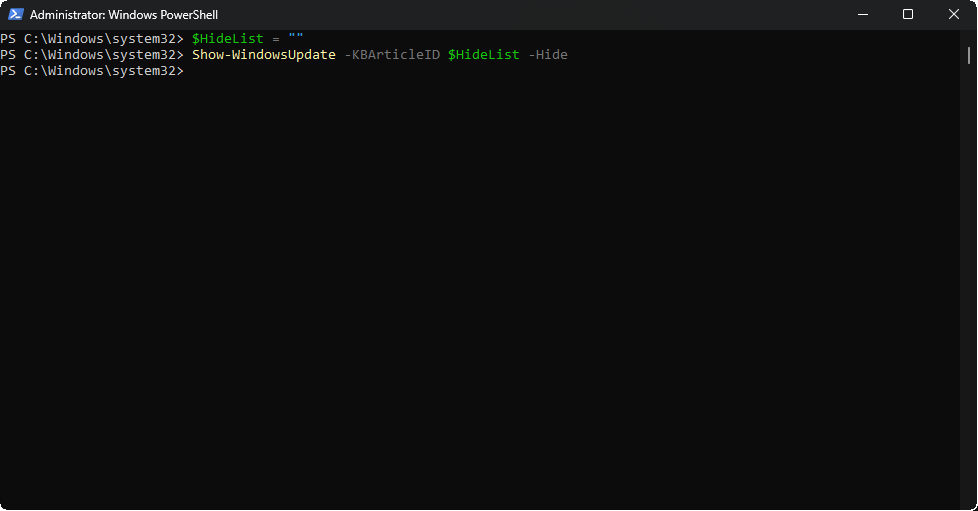
Run the following commands from the Administrator PowerShell to remove that specific update from the List
PS C:\Windows\system32> $HideList = ""
PS C:\Windows\system32> Show-WindowsUpdate -KBArticleID $HideList -Hide
Resulting Output:
Run the following command from the Administrator PowerShell to apply all of the available windows updates
PS C:\Windows\system32> Get-WindowsUpdate -Install -AcceptAll -AutoReboot
Resulting Output:

After the automatic reboot has completed we will now have a fully patched version of Windows 11 Installed
4. Build and Deploy an MECM Environment
Patching with available updates is all well and good, but it is not always feasible to patch in this way
You may have a scenario where you have hundreds of workstations which are all online at different times
In an enterprise environment it is often necessary to 'push' software, so that the user can install them
This concept is known as Secure Software Deployment, and is the foundation for new software installation
The first step in our journey to building Microsoft Endpoint Configuration Manager (MECM) is our server:
Download Windows Server 2025 Disk Image (ISO): Windows Server 2025 ISO
Download Rufus Disk Imaging Software: Rufus Official Download
Insert USB Flash Drive, run rufus.exe, select target drive, select Windows Server 2025 ISO, hit start:
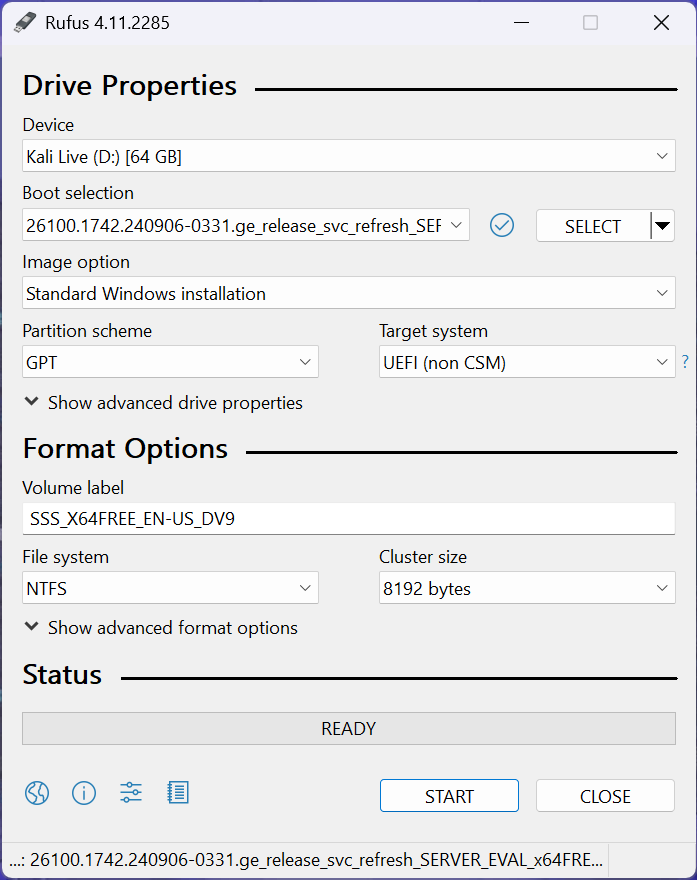
Use the rufus popup menu to customize the Windows Server 2025 installation and disable data collection:
Remove USB Flash Drive and Insert into unused PC. Start the PC and press the hotboot key at the startup:
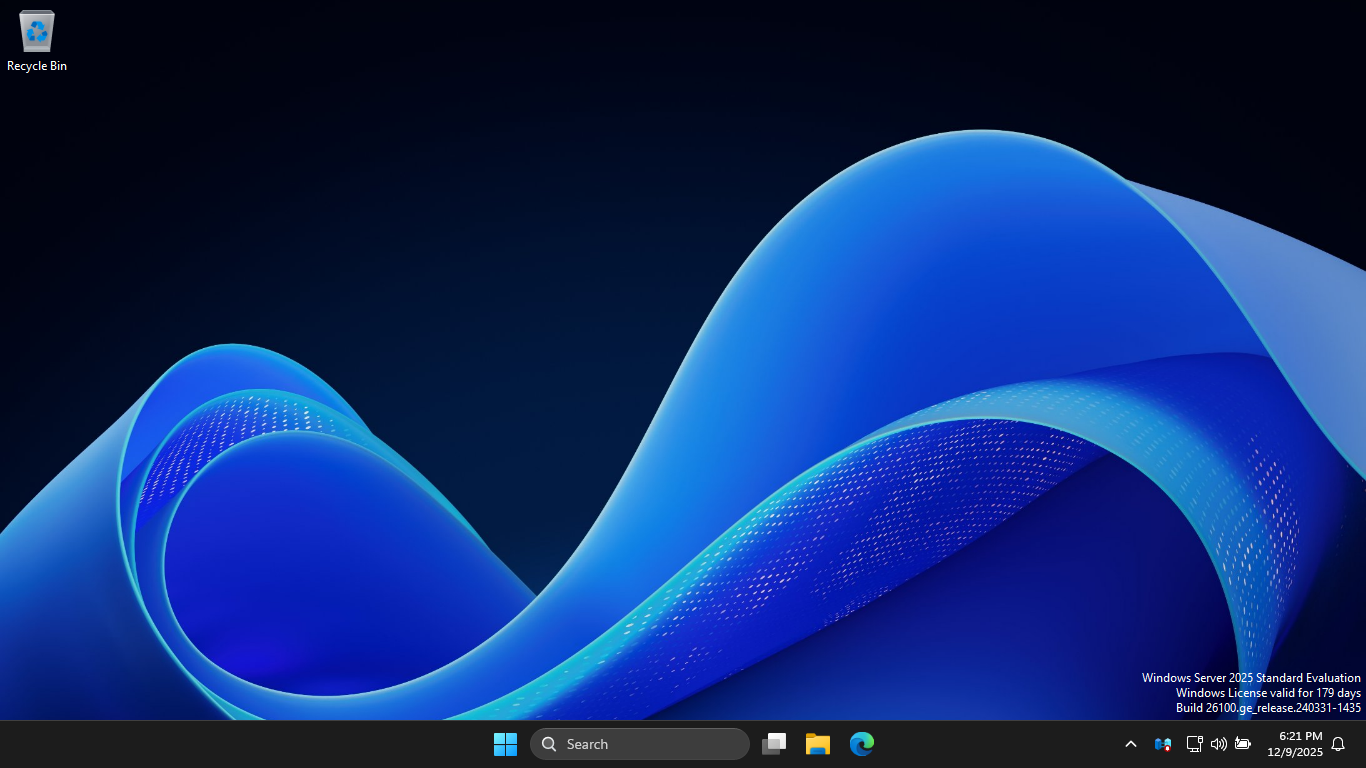
Navigate through the installer and select the Windows Server Standard Evaluation Desktop Experience option:
Now that we have our Server operating, the next step is to promote this server to an AD domain controller
On the taskbar, click the Windows Start icon, then click the Server Manager to open the Windows Manager:
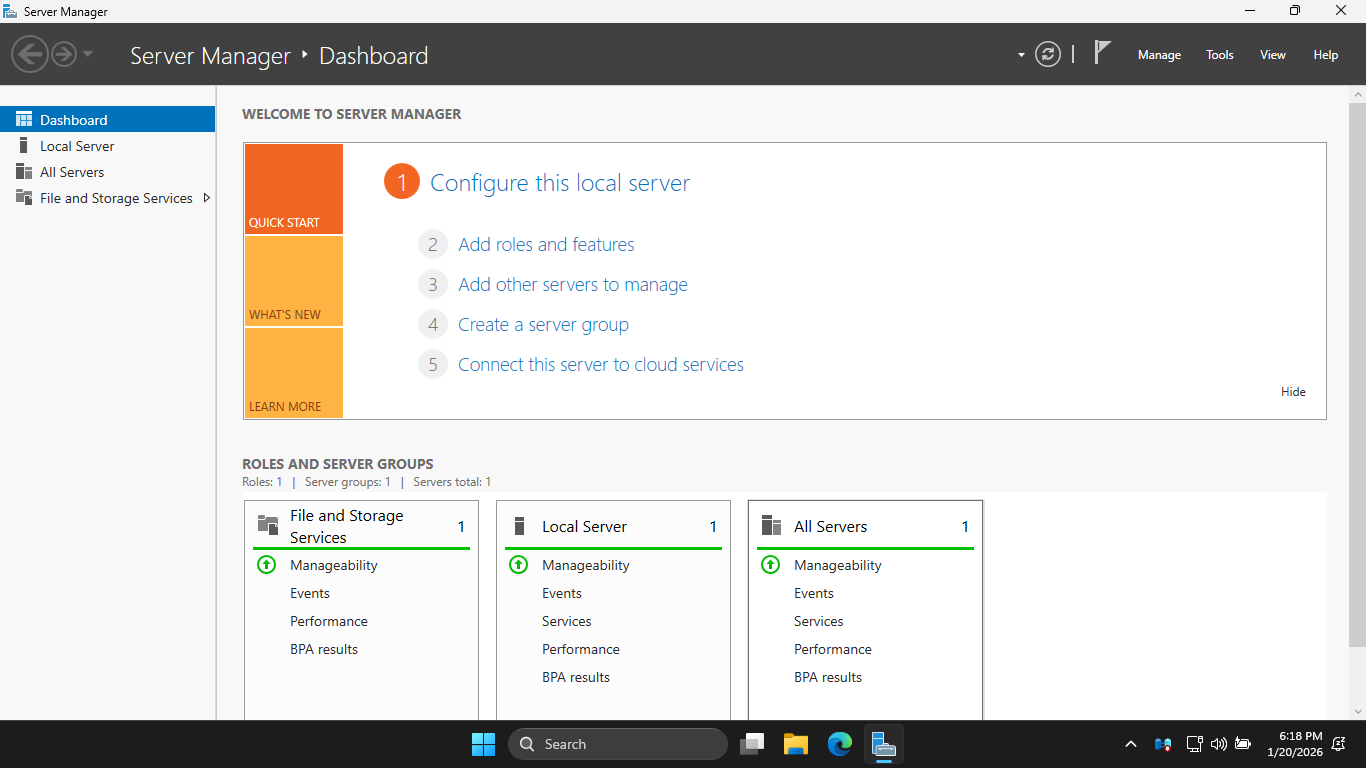
In the Server Manager, click the Add Roles and Features link to open the Add Roles and Features Wizard
Hit Next > Next > Next > Active Directory Domain Services > Add Features > Next > Next > Next > Install
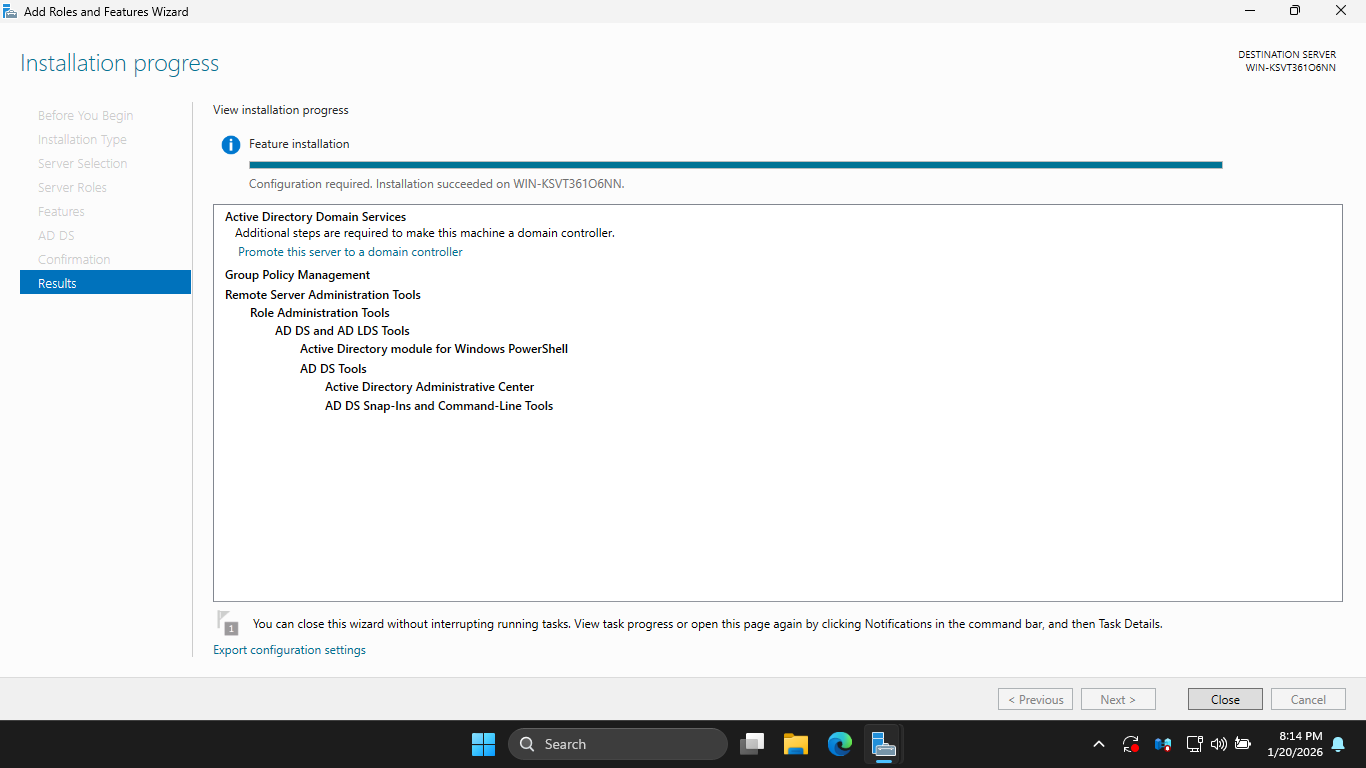
Now hit Promote this Server to a Domain Controller > Add a new forest > Root Domain Name: itlab.local
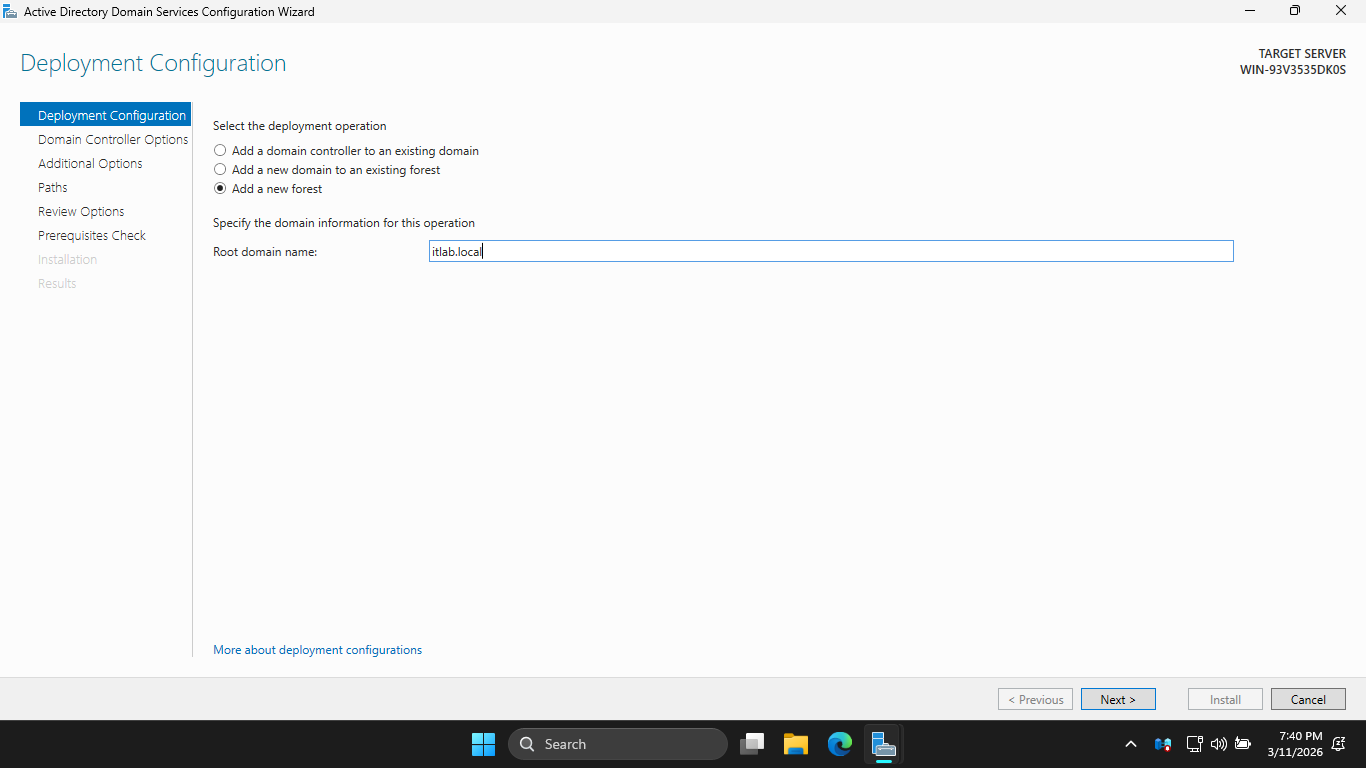
Hit Next, then enter the root password and hit Next > Next > Next > Next > Next > and finally Install
This installation may take some time, a new Domain Controller can take up to 5 minutes to fully boot up
Once our domain controller has booted up, we must prepare our device for the SQL and MECM server install
When installing these services, you cannot use the default "Local System" account, we must create more
From the search bar, enter in PowerShell ISE and launch it as an admin and create a script: File > New
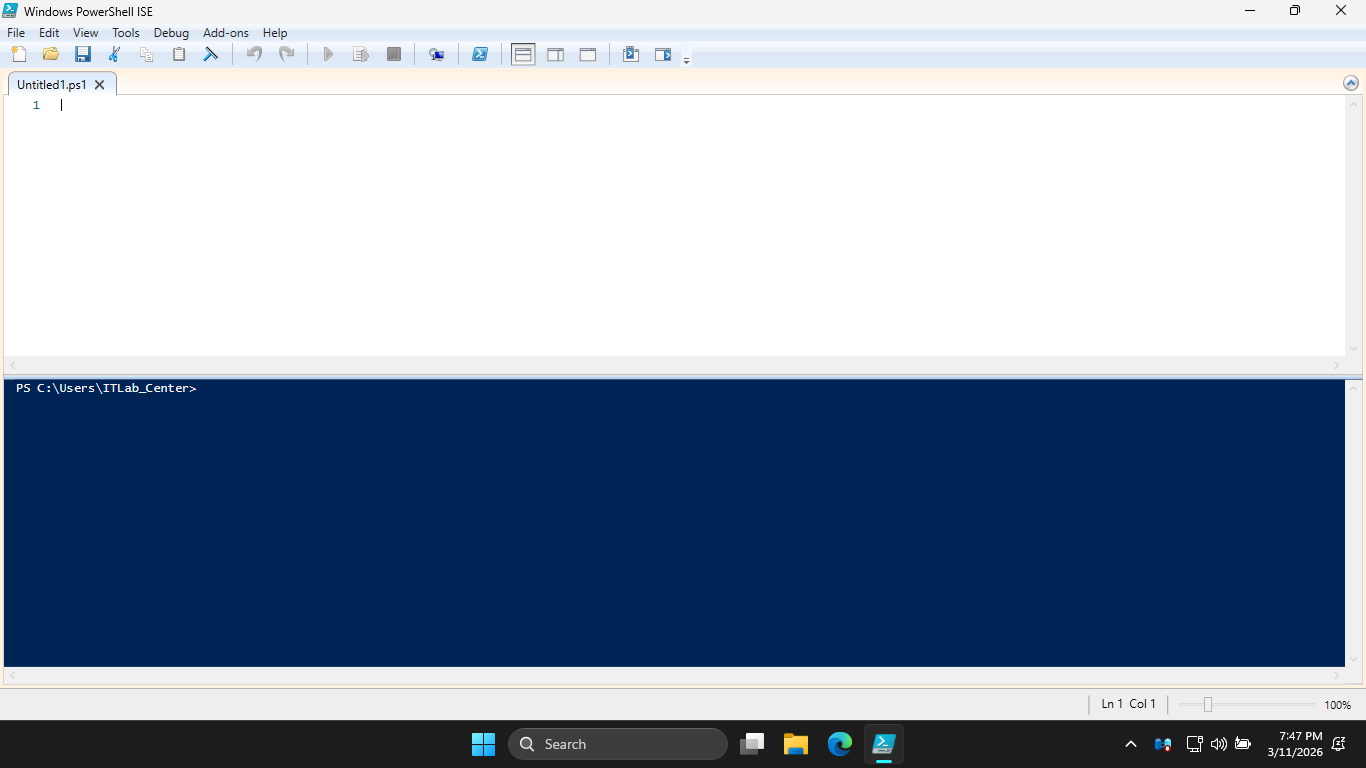
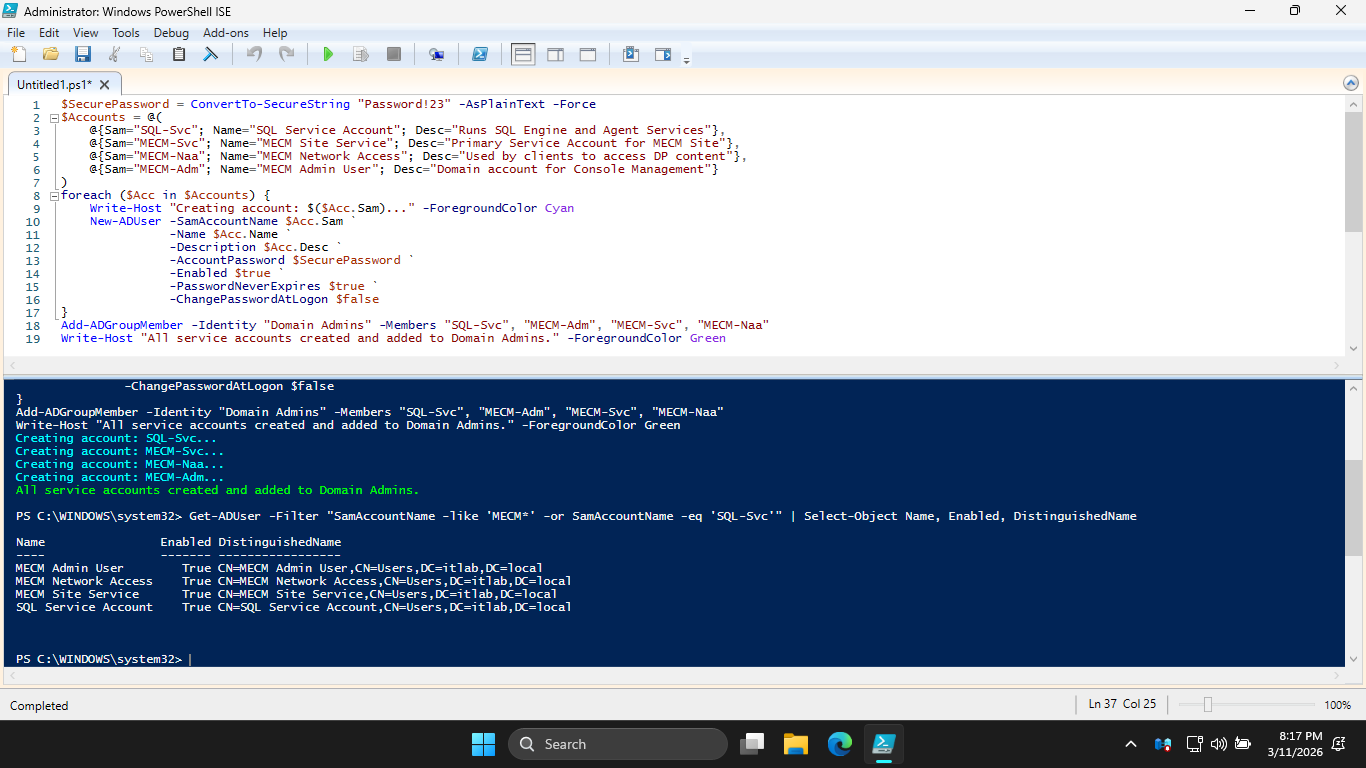
We can use a script to fully automate the creation of our service accounts, type this out then press run
$SecurePassword = ConvertTo-SecureString "Password!23" -AsPlainText -Force
$Accounts = @(
@{Sam="SQL-Svc"; Name="SQL Service Account"; Desc="Runs SQL Engine and Agent Services"},
@{Sam="MECM-Svc"; Name="MECM Site Service"; Desc="Primary Service Account for MECM Site"},
@{Sam="MECM-Naa"; Name="MECM Network Access"; Desc="Used by clients to access DP content"},
@{Sam="MECM-Adm"; Name="MECM Admin User"; Desc="Domain account for Console Management"}
)
foreach ($Acc in $Accounts) {
Write-Host "Creating account: $($Acc.Sam)..." -ForegroundColor Cyan
New-ADUser -SamAccountName $Acc.Sam `
-Name $Acc.Name `
-Description $Acc.Desc `
-AccountPassword $SecurePassword `
-Enabled $true `
-PasswordNeverExpires $true `
-ChangePasswordAtLogon $false
}
Add-ADGroupMember -Identity "Domain Admins" -Members "SQL-Svc", "MECM-Adm", "MECM-Svc", "MECM-Naa"
Write-Host "All service accounts created and added to Domain Admins." -ForegroundColor Green
Resulting Output:
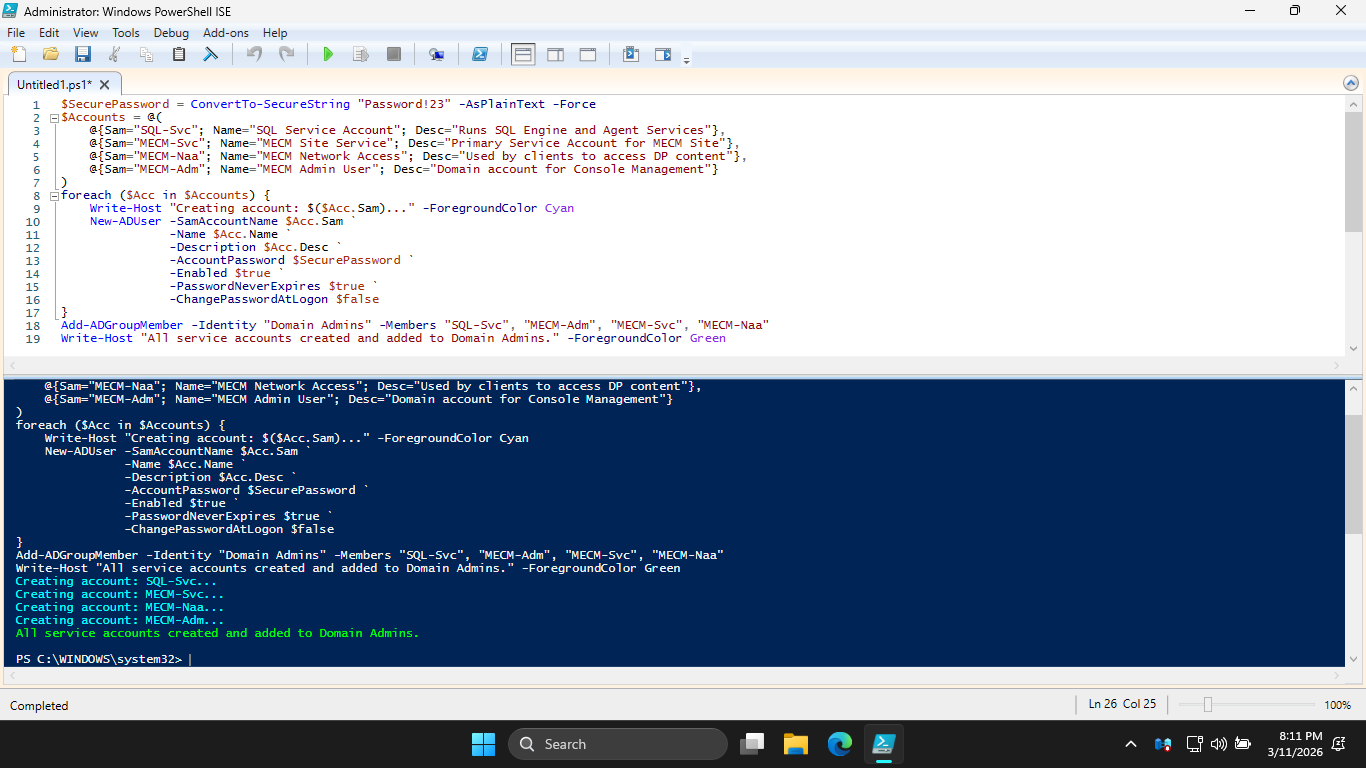
For an enterprise environment, the Principle of Least Privilege would apply, but Domain Admins is ok here
Run the following command from the lower PowerShell Terminal to list our accounts and ensure they are on
PS C:\WINDOWS\system32> Get-ADUser -Filter "SamAccountName -like 'MECM*' -or SamAccountName -eq 'SQL-Svc'" | Select-Object Name, Enabled, DistinguishedName
Resulting Output:
Head back to the Server Manager > Add Roles and Features. Proceed to Features and add .NET Framework 3.5
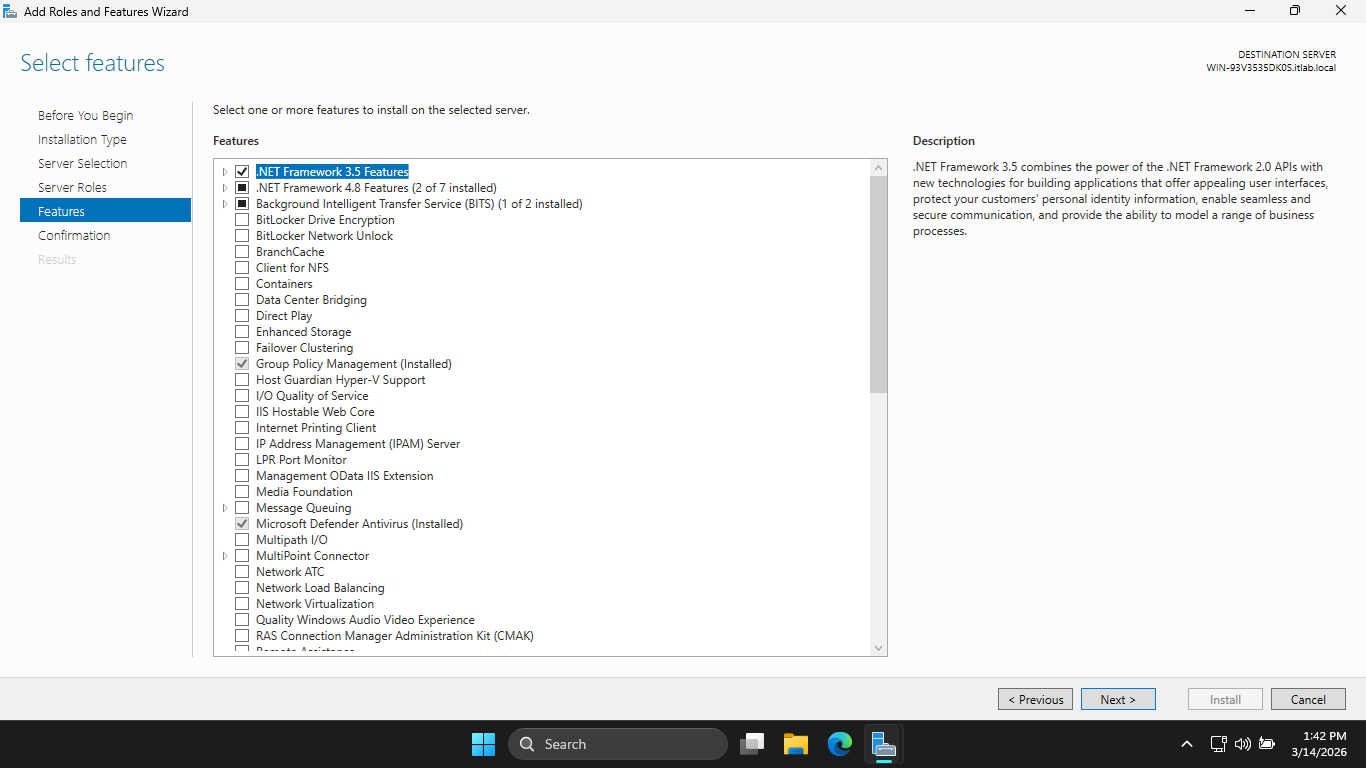
Now click Next > Install. This feature is a requirement for the MECM installation later. Now click close
Our Domain Controller and Service Accounts are now set up. Next step is to install Microsoft SQL Server
This server manages the database of software available to each workstation in the Active Directory Setup
Download the Executable: SQL Server 2025 64-bit
Most configurations fail here because the SQL server needs very specific flags set to work well with MECM
Run the installer executable, when prompted for administrator privilege hit yes, then hit custom install
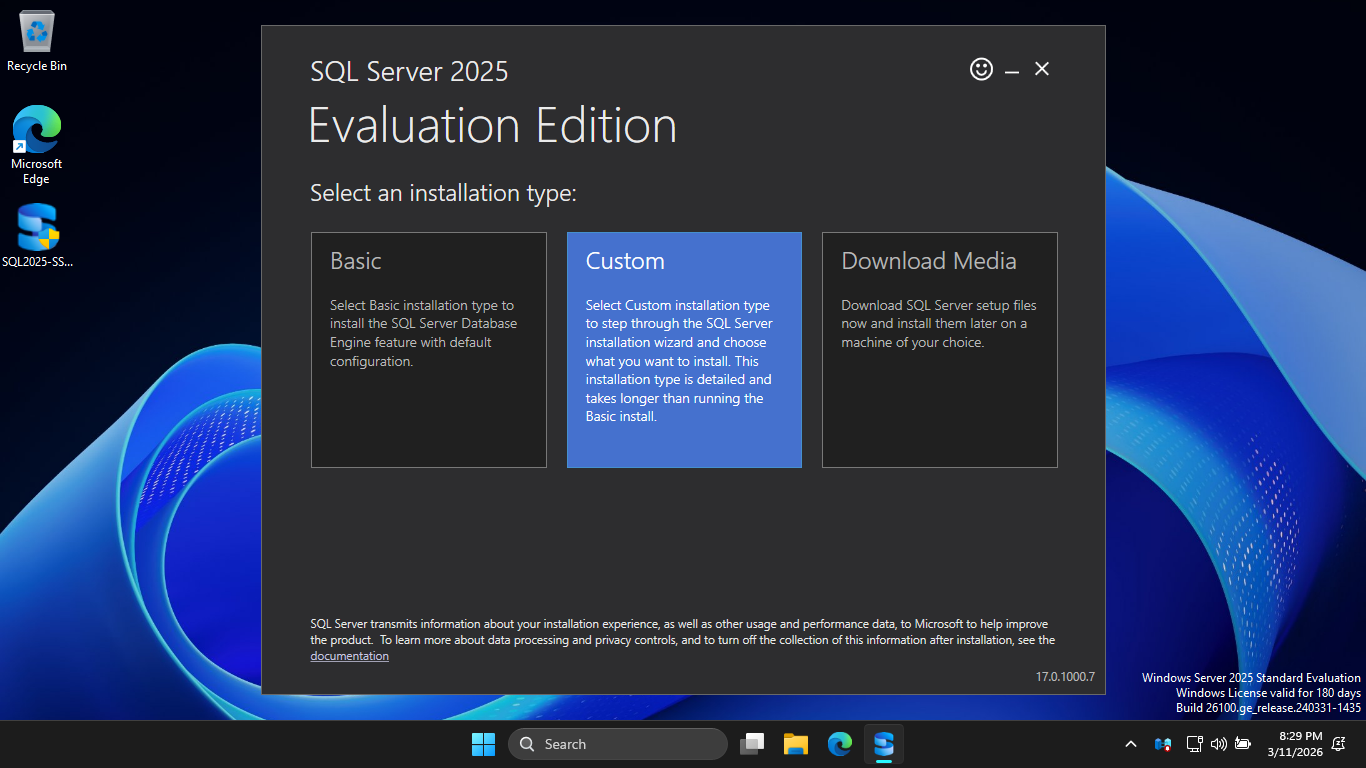
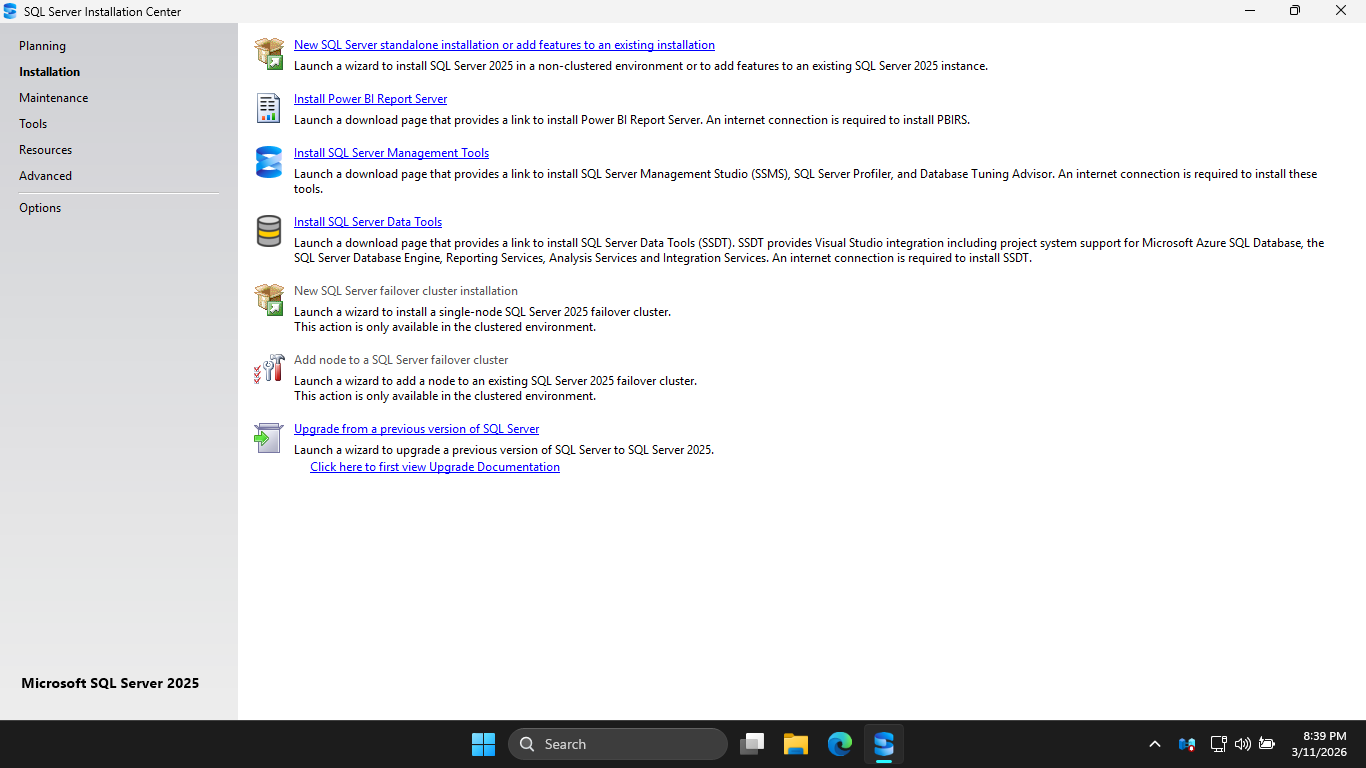
Click Install to download the installation medium onto the C drive under the default directory C:\SQL2025
Now click Installation > New SQL Server standalone installation or add features to an existing installation
Navigate through the installer and select these options, a single missed check can ruin our MECM setup:
• Edition: Evaluation
• License Terms: Accept the Terms
• Global Rules: Ensure All Checks Pass
• Microsoft Update: Leave Unchecked
• Install Rules: Ensure there are no Failures, Warnings are fine
• Azure Extension for SQL Server: Leave Unchecked
• Feature Selection: Database Engine Services + Full-Text and Semantic Extractions for Search
• Instance Configuration: Default Instance
Under the Server Configuration section, we must select our SQL-Svc account for both the first two accounts
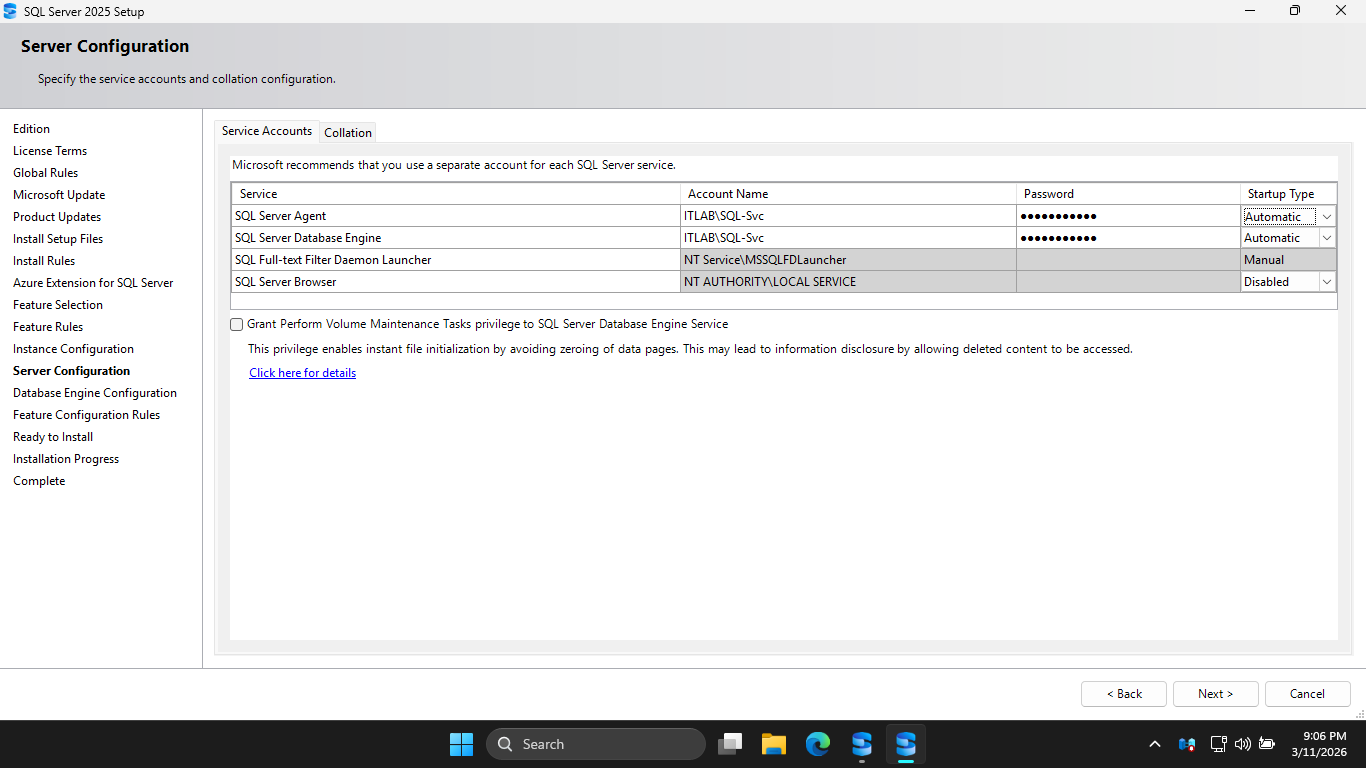
Change the Startup Type for the SQL Server Agent to Automatic and enter Password!23 in the password field
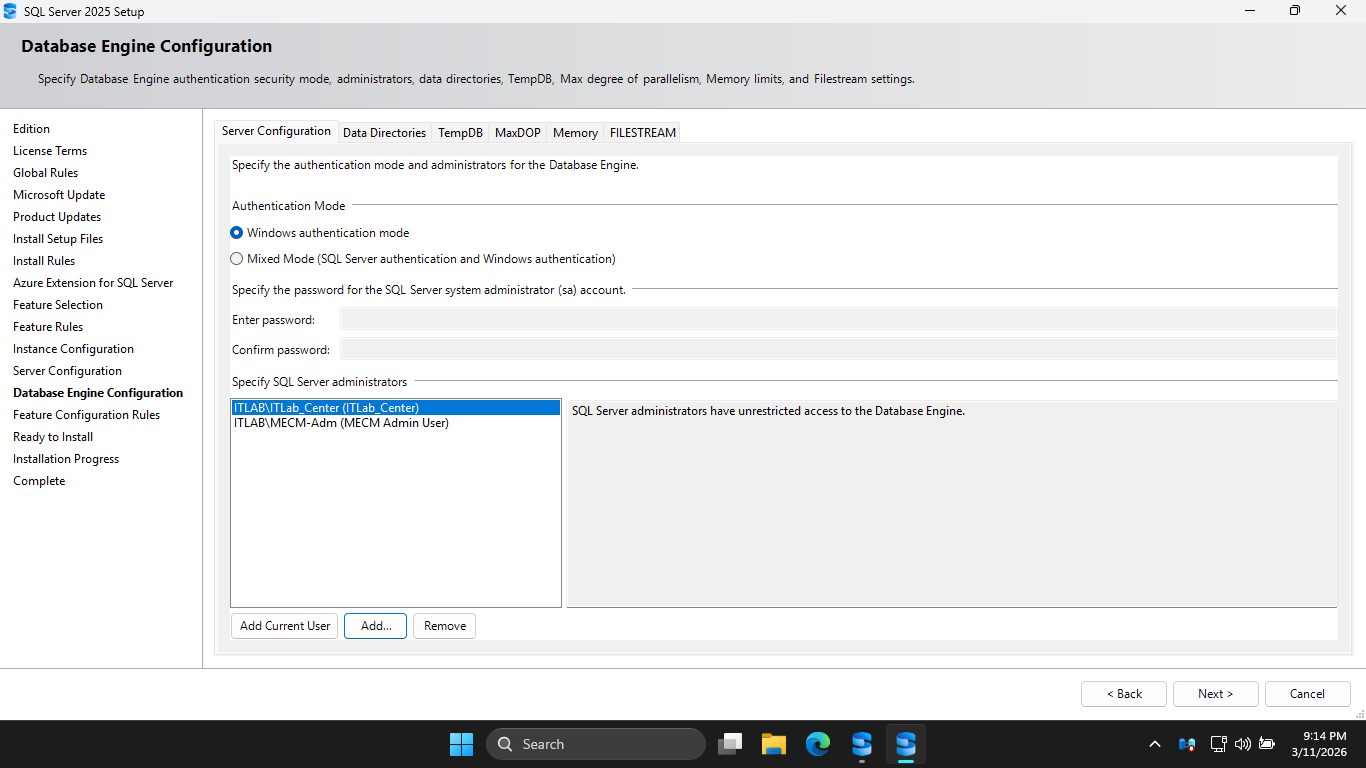
Under Database Engine Configuration, hit Add Current User, additionally add the ITLAB\MECM-Adm account
Head to the Memory tab and hit the Recommended radio button, then set the maximum memory to 2048 Megabytes
This is vital on a Domain Controller so SQL Server doesn't starve the Active Directory services of memory
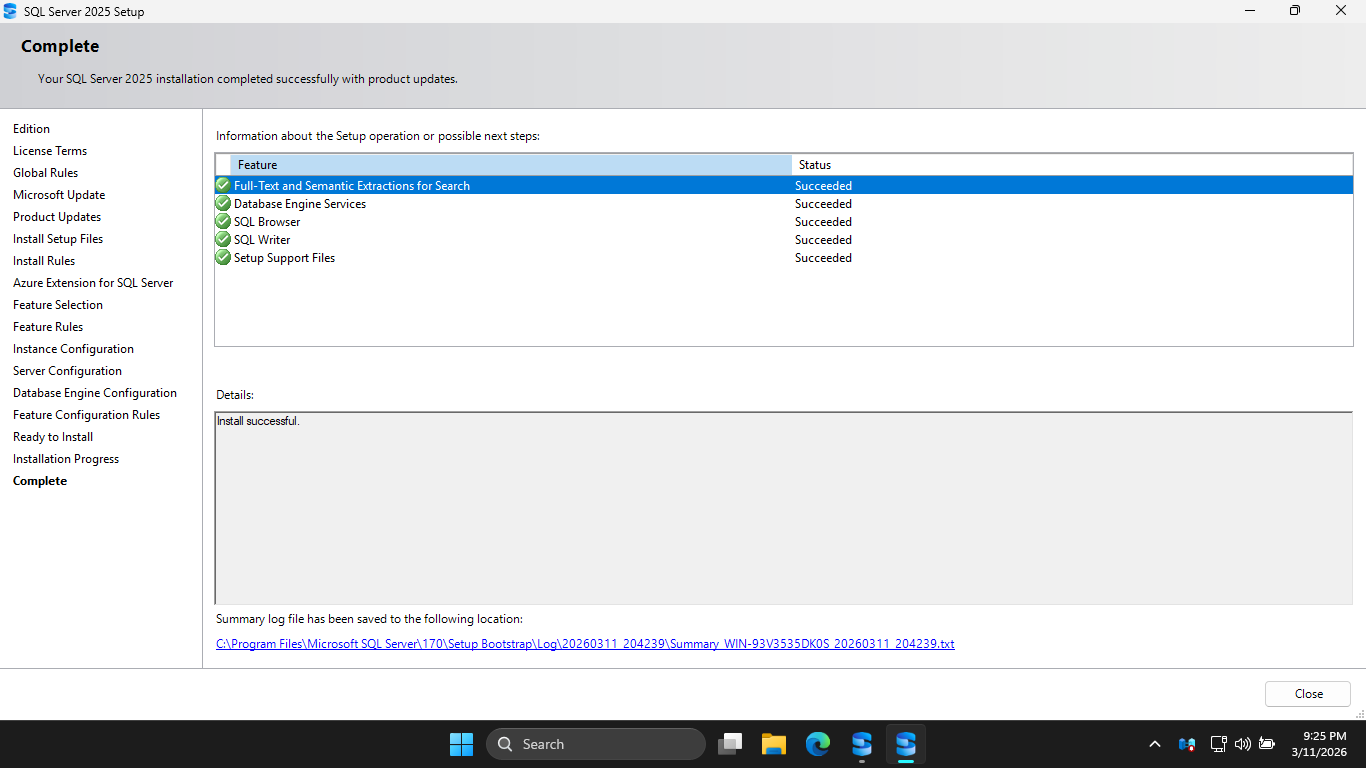
Click the checkbox to accept the recommmended memory options for SQL Server, then hit Next > and Install
Now that we have the SQL Server set up, we need MECM prep. MECM is an orchestrator, it requires extra tools
Run the following command from an Administrator PowerShell Terminal to install the additional Windows tools
PS C:\Windows\system32> Install-WindowsFeature Web-Static-Content, Web-Default-Doc, Web-Dir-Browsing, Web-Http-Errors, Web-Http-Logging, Web-Stat-Compression, Web-Filtering, Web-IP-Security, Web-ISAPI-Ext, Web-ISAPI-Filter, Web-Metabase, Web-WMI, BITS, RDC
Download the following executables on your domain controller windows server to prepare our MECM install
Windows ADK: adksetup.exe
WinPE Add-On: adkwinpesetup.exe
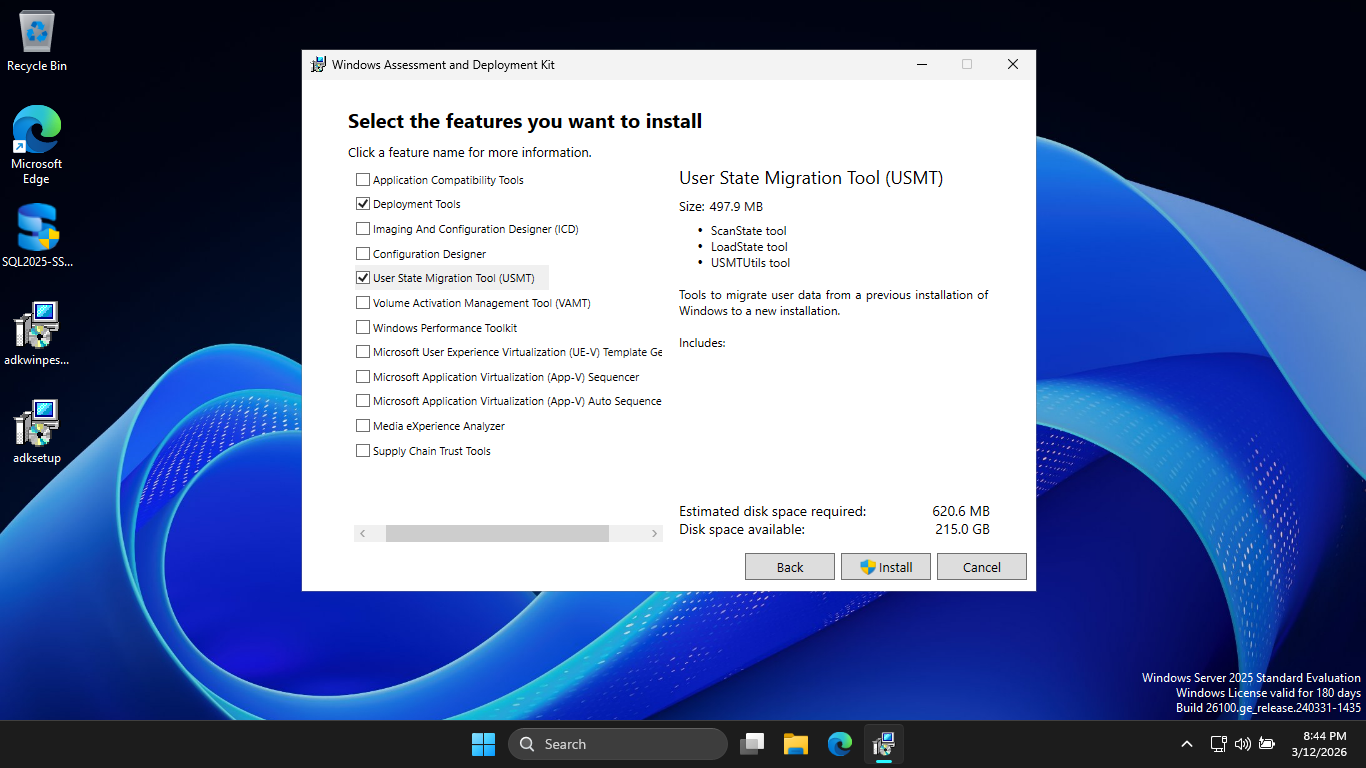
The Windows Assessment and Deployment Kit (ADK) is the mechanical arms, while MECM decides what goes where
Run the adksetup.exe, then hit Next > Next > Accept. Then select only Deployment Tools and USMT options:
Click Install, then hit yes when prompted for admin priviliges. Once this completes, run apkwinpesetup.exe
Click Next > Next > Accept > and finally Install. Now it is finally time to download the MECM executable
MECM Download: ConfigMgr_2509.exe
Run mkdir C:/MECM from an Administrator PowerShell. Then run the ConfigMgr_2509.exe and extract to C:\MECM

Extending the Active Directory Schema is a one-time operation that prepares your domain to understand MECM
Without this, you MECM site cannot publish its location to AD, and your clients won't find its location
Run the following commands from an Administrator PowerShell to add your user account to the Schema Admins
PS C:\Windows\system32> Add-ADGroupMember -Identity "Schema Admins" -Members "ITLab_Center"
PS C:\Windows\system32> shutdown /r
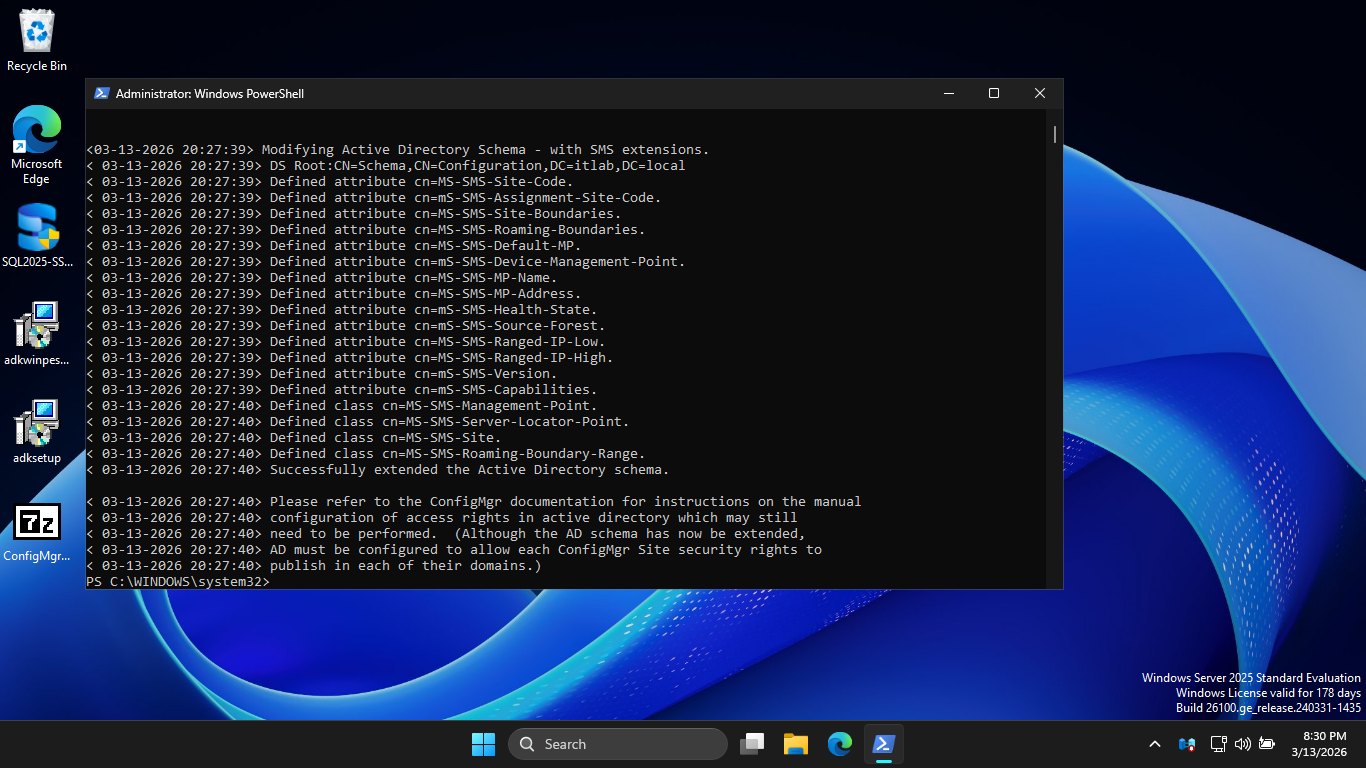
Using the File Explorer, navigate to C:\MECM\SMSSETUP\BIN\X64 and run the extadsch.exe executable program
Run the following command from an Administrator PowerShell to verify Extension of Active Directory Schema
PS C:\Windows\system32> cat C:\ExtADSch.log
Resulting Output:
Run the following command from an Administrator PowerShell for Active Directory Services Interfaces Editor
PS C:\Windows\system32> adsiedit.msc
Resulting Output:
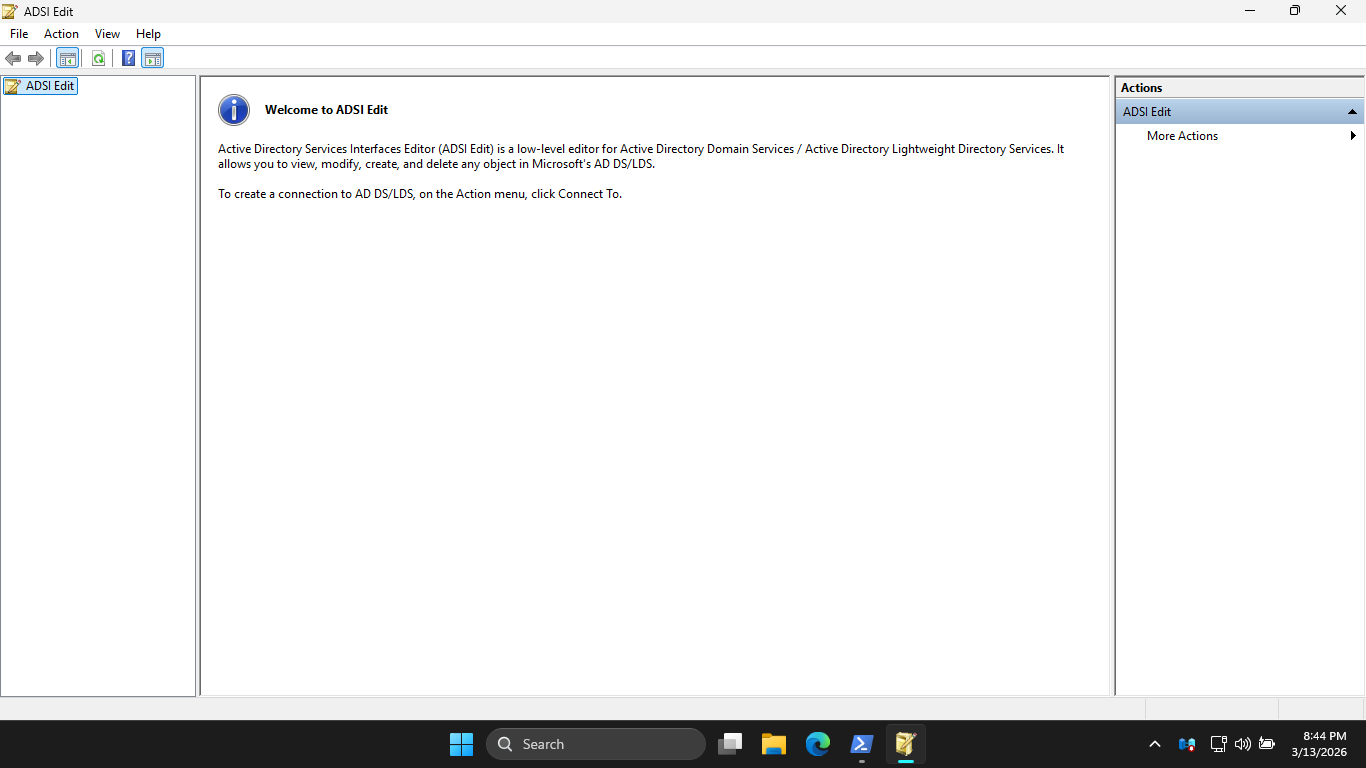
Click More Actions > Connect to... > OK. Then expand Default naming context and click on Domain Controller
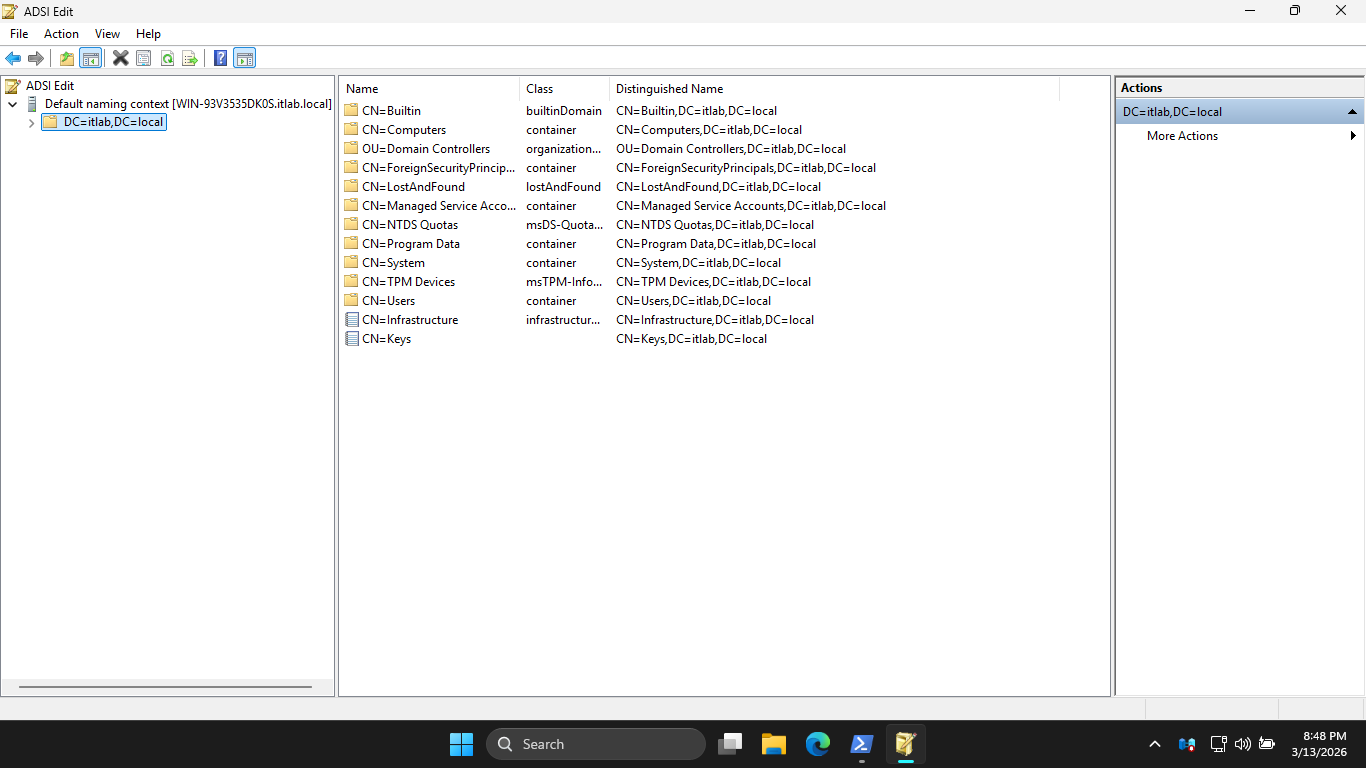
Right-click CN=System > New > Object > Container > Next and type the name System Management > Next > Finish
Run the following command from an Administrator PowerShell to open the Active Directory Users and Computers
PS C:\Windows\system32> dsa.msc
Resulting Output:
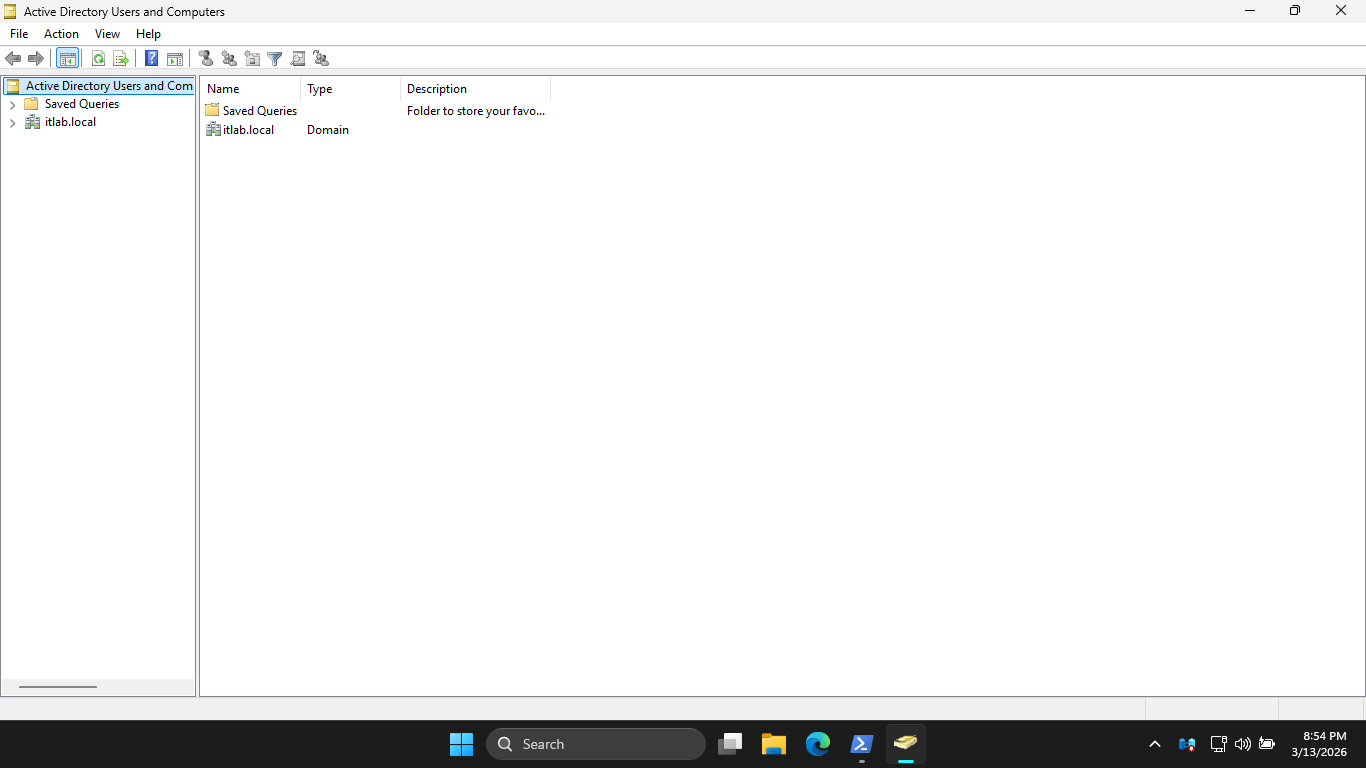
Hit View > Advanced Features. Then expand itlab.local > System, right-click System Management > Properties
Now click Add > Object Types and check Computers. Then hit OK and type out the name of your server below:
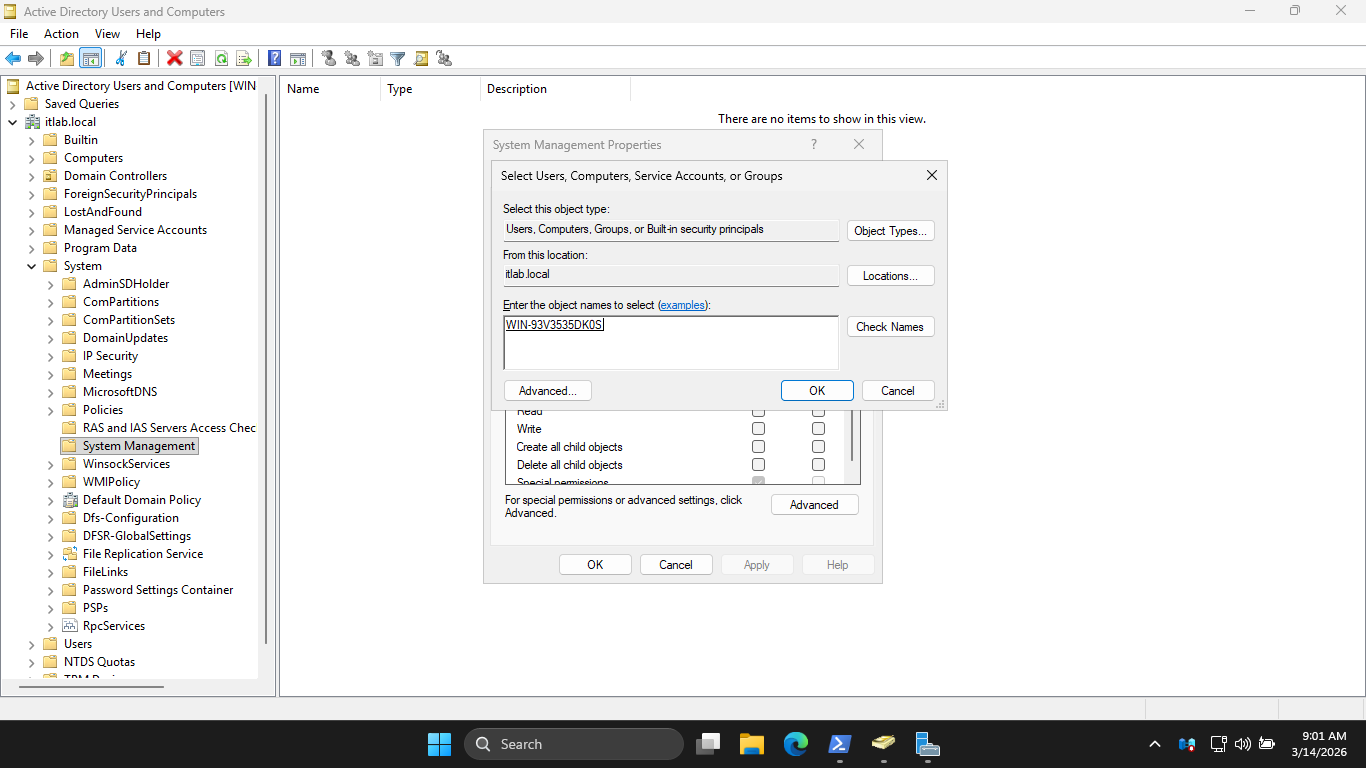
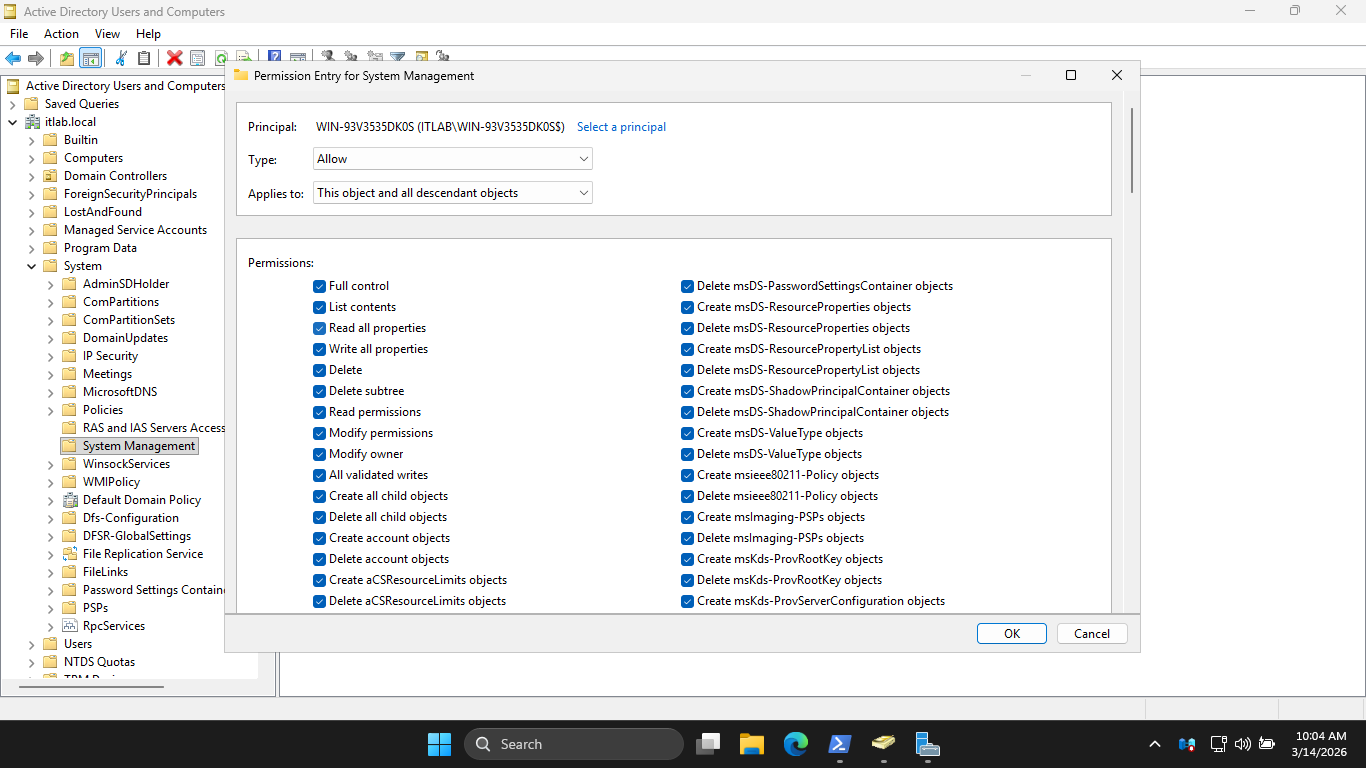
Now Click OK > Advanced > Your Server Name > Edit, and check the Full Control Box. Lastly in the Applies
to dropdown menu, change the selection from This object only to This object and all descendant objects:
Click OK > Apply > OK > OK. Now it's time to install MECM, run the C:\MECM\splash.hta installation program
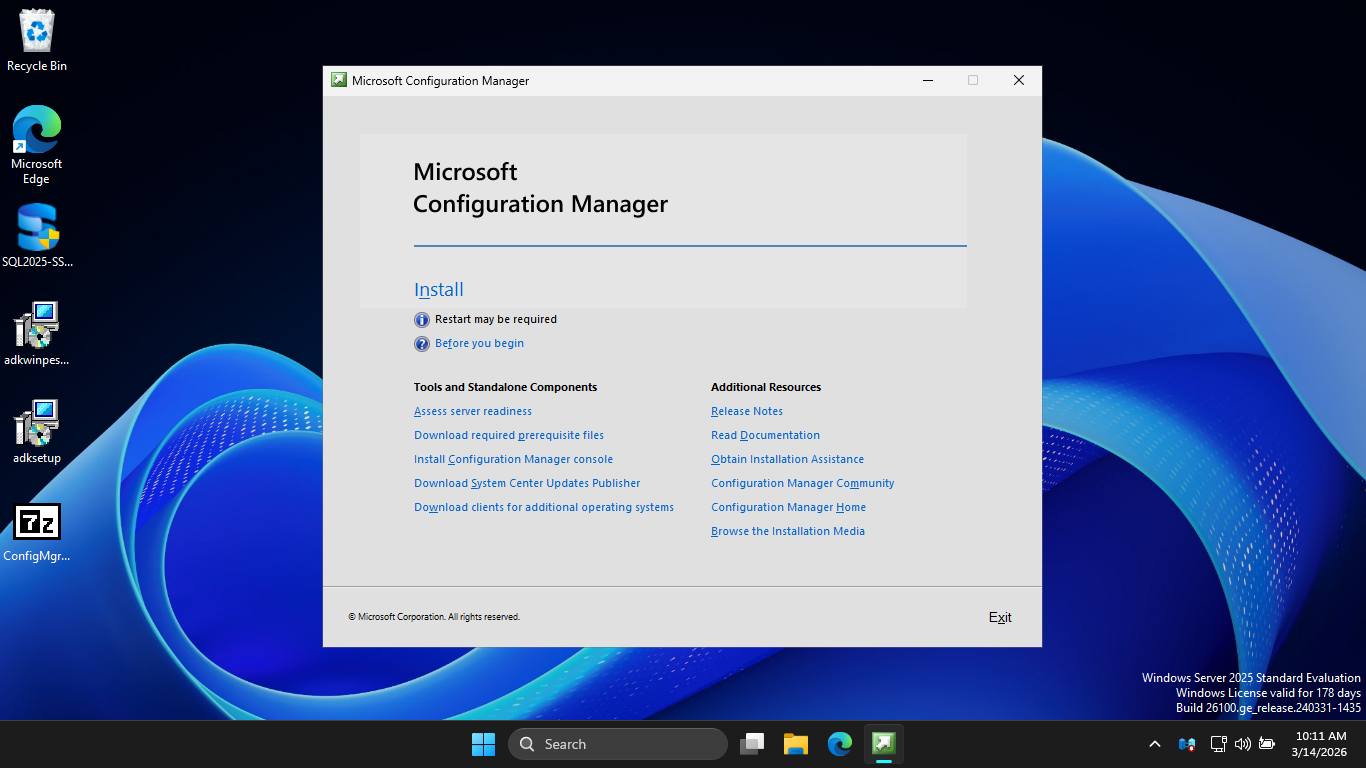
Now click Install > Next > Next > Install the evaluation edition of this product > Next > Accept Licences
Hit Next, then enter C:\MECM for the Path. Hit Next, this will begin the download of all required files
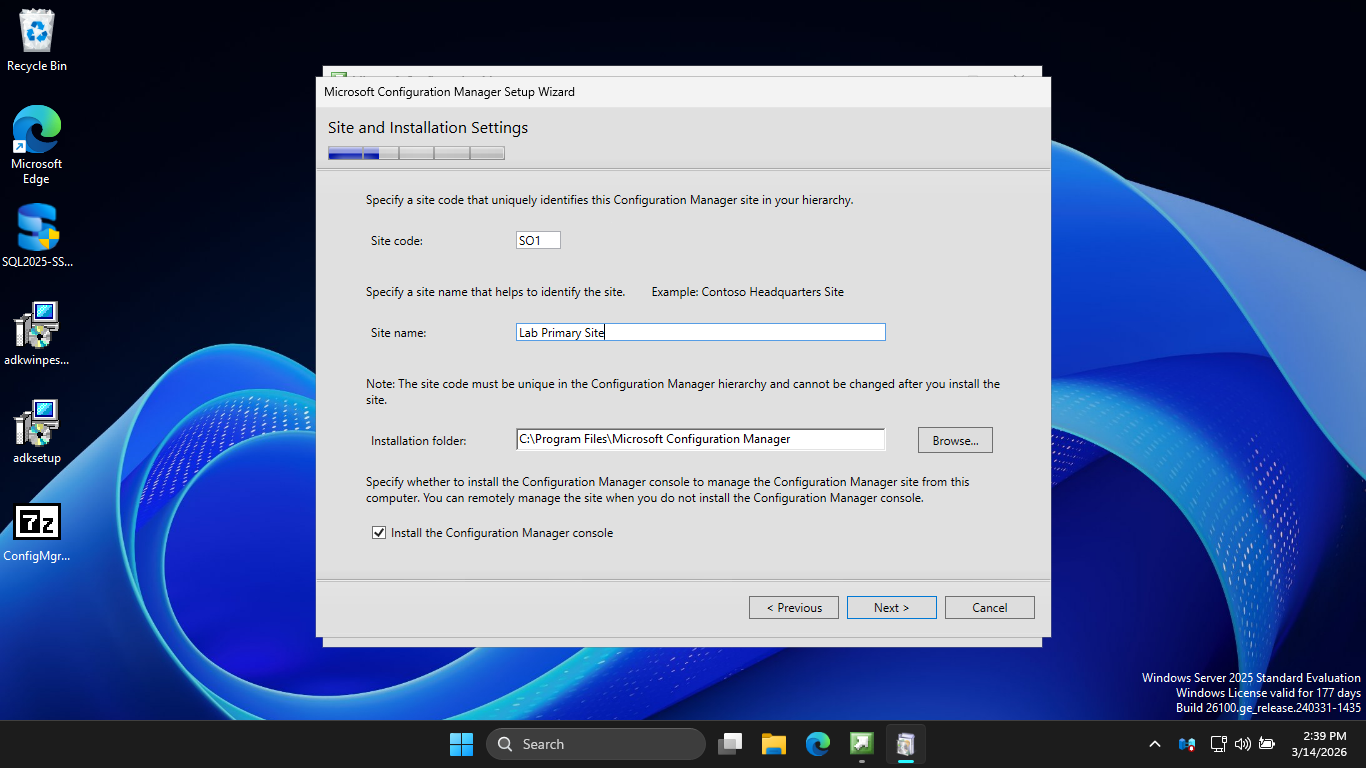
Hit Next > Next. Then enter SO1 as the Site Code and enter Lab Primary Site as the Site Name like below
Hit Next, then select the option to Install the primary site as a stand-alone site. Now hit Next > Yes
Now hit Next > Next > Next, then check the option to Configure the communication method on each site system
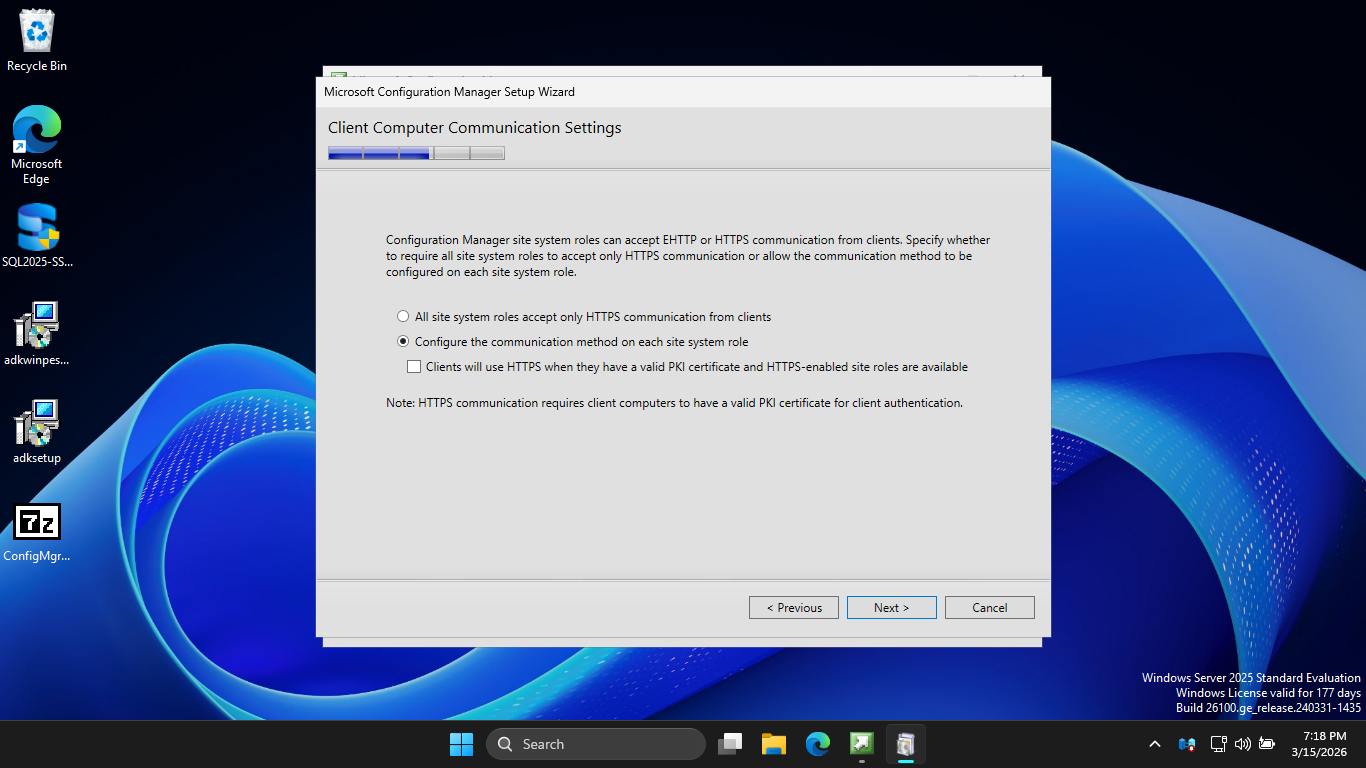
Hit Next > Next > Next > Next > Next > Begin Install. This may take several minutes to complete the install
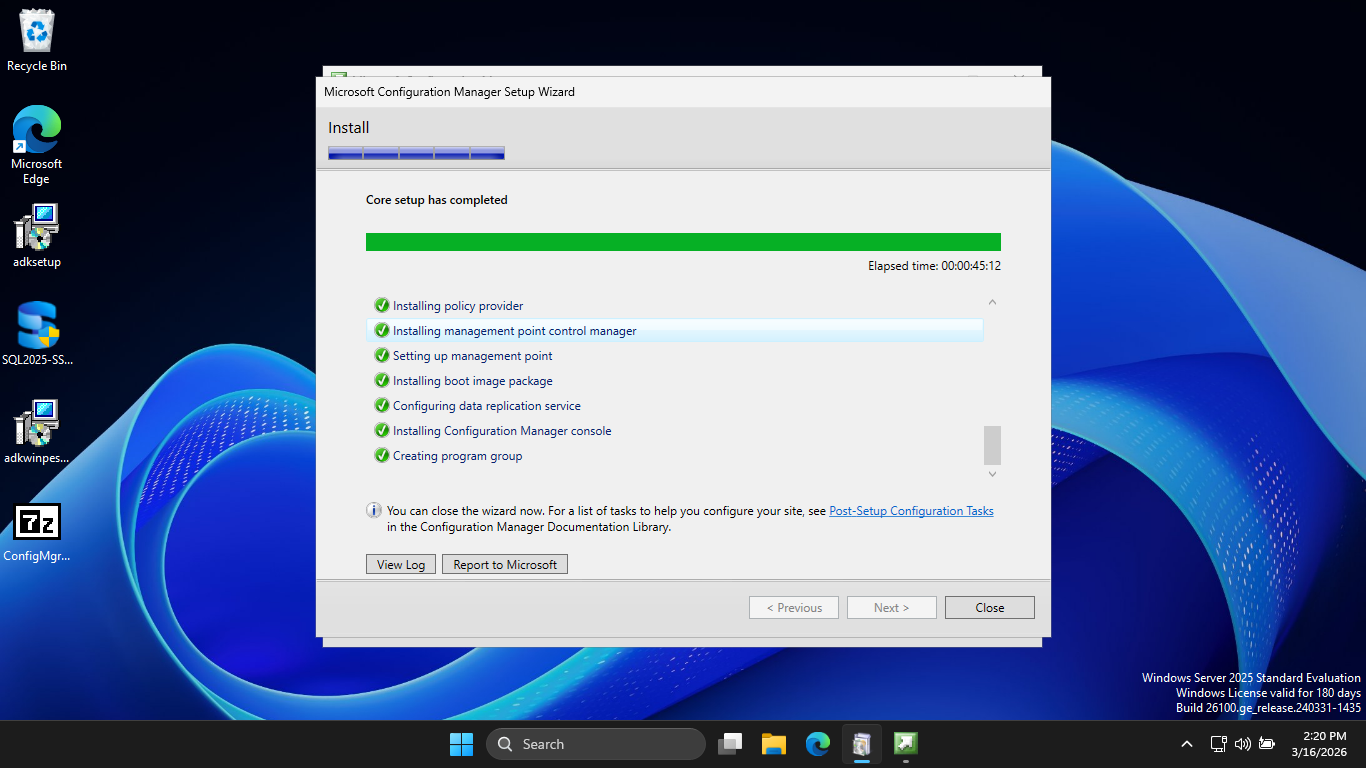
With MECM finally installed, we can move on to initiating a secure software deployment to our Workstation
5. Deploy Google Chrome Using MECM
The AD and MECM Framework is what we will use to distrubute software securely in an enterprise environment
Here we will demonstrate what this process looks like in practice by pushing Google Chrome to our endpoint
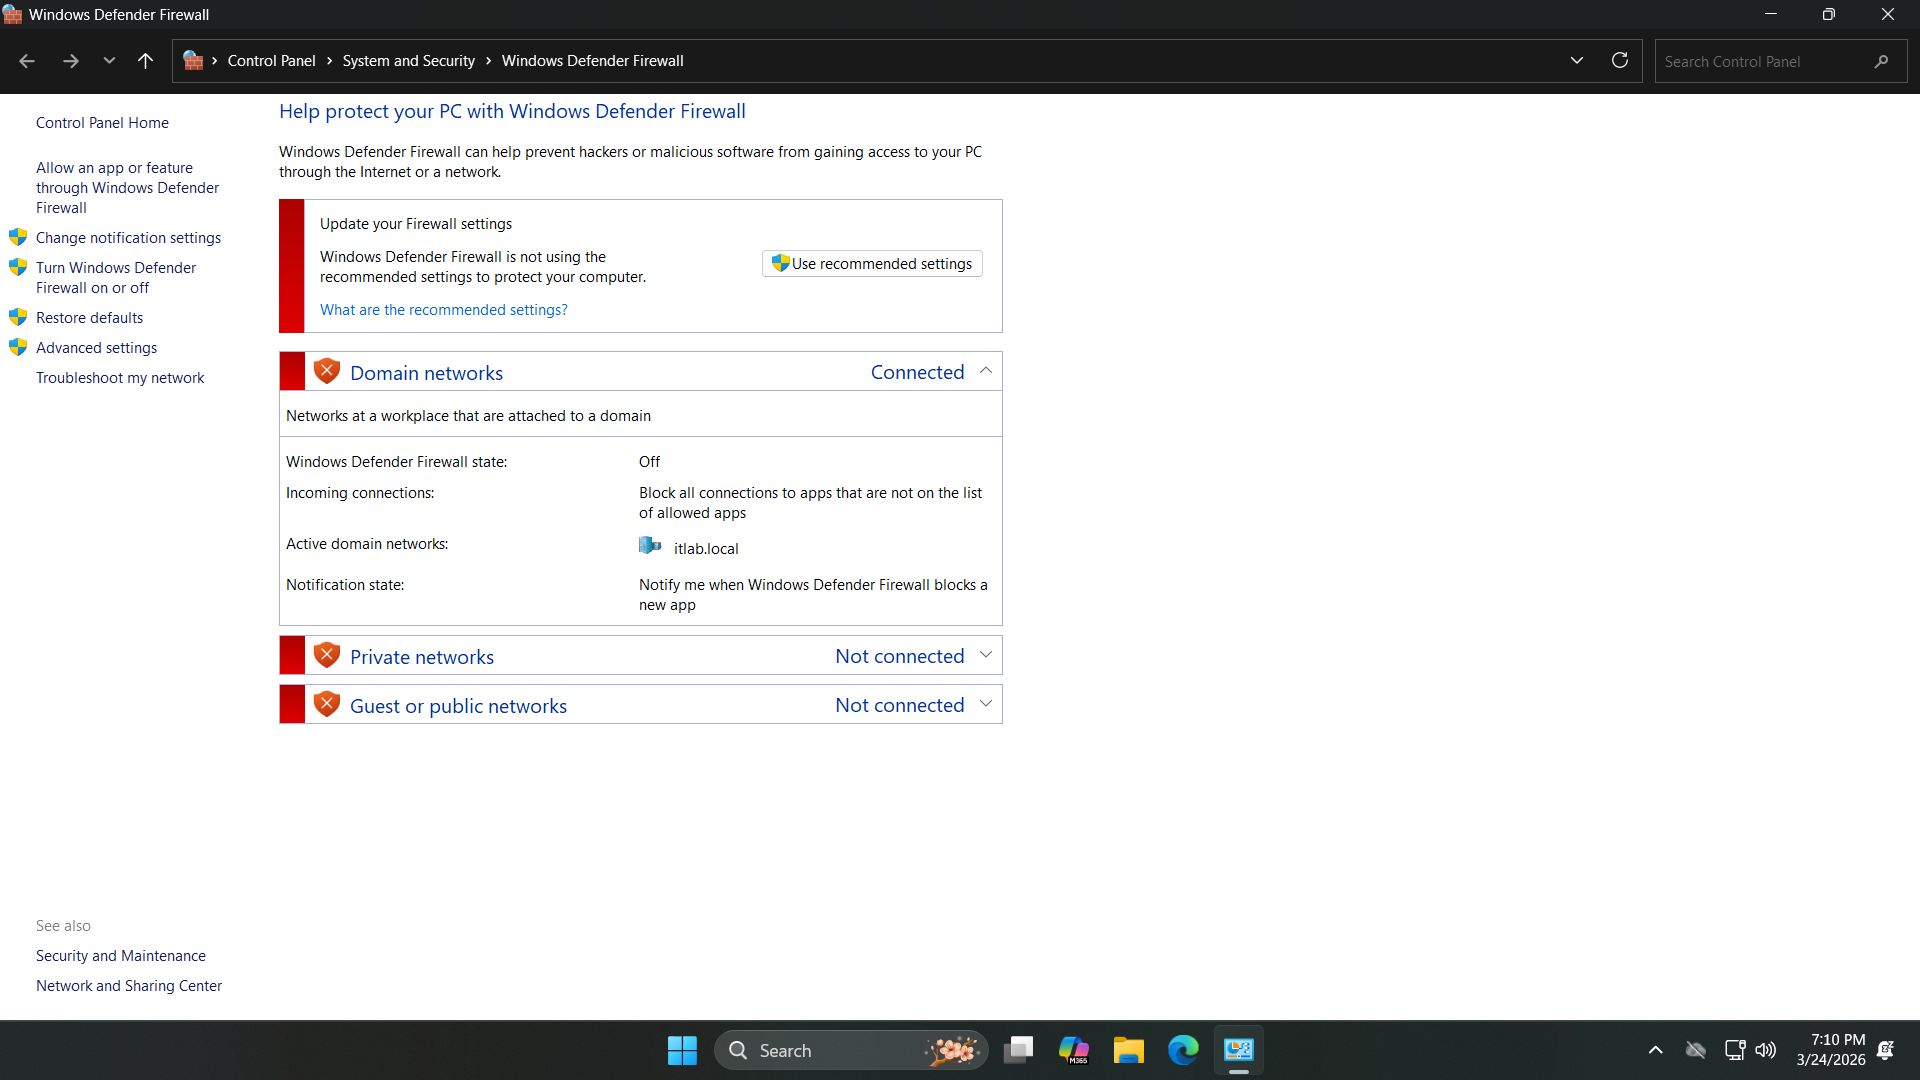
We must disable the Firewall on both the Endpoint and the Server, search for Firewall from the search bar
Select Windows Defender Firewall > Turn Windows Defender Firewall on or off and turn all options to off
In order for us to push any piece of software we must join the endpoint onto the Active Directory Domain
Run the following command from the Servers Administrator PowerShell to find the servers local IP address
PS C:\Windows\system32> ipconfig
Resulting Output:
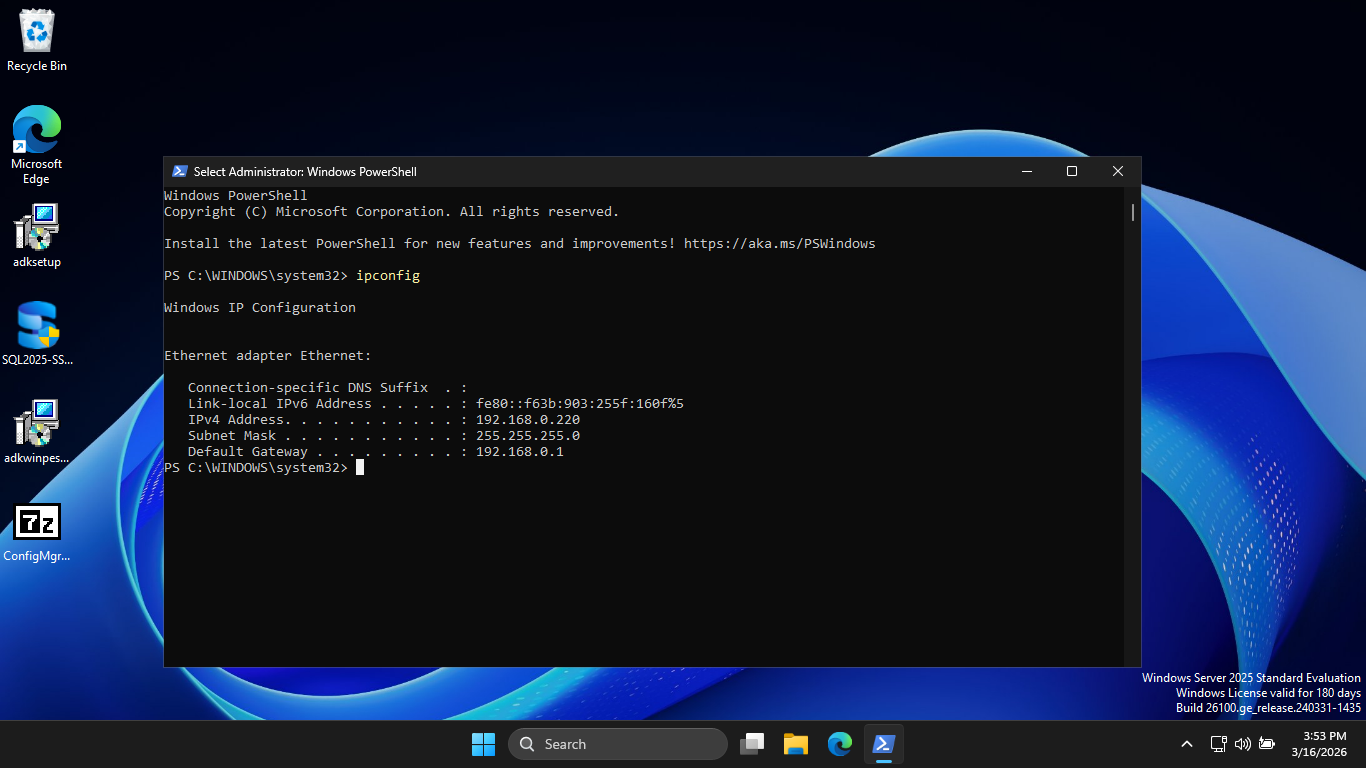
Head back over to our Windows 11 workstation and open an administrator PowerShell using the search bar
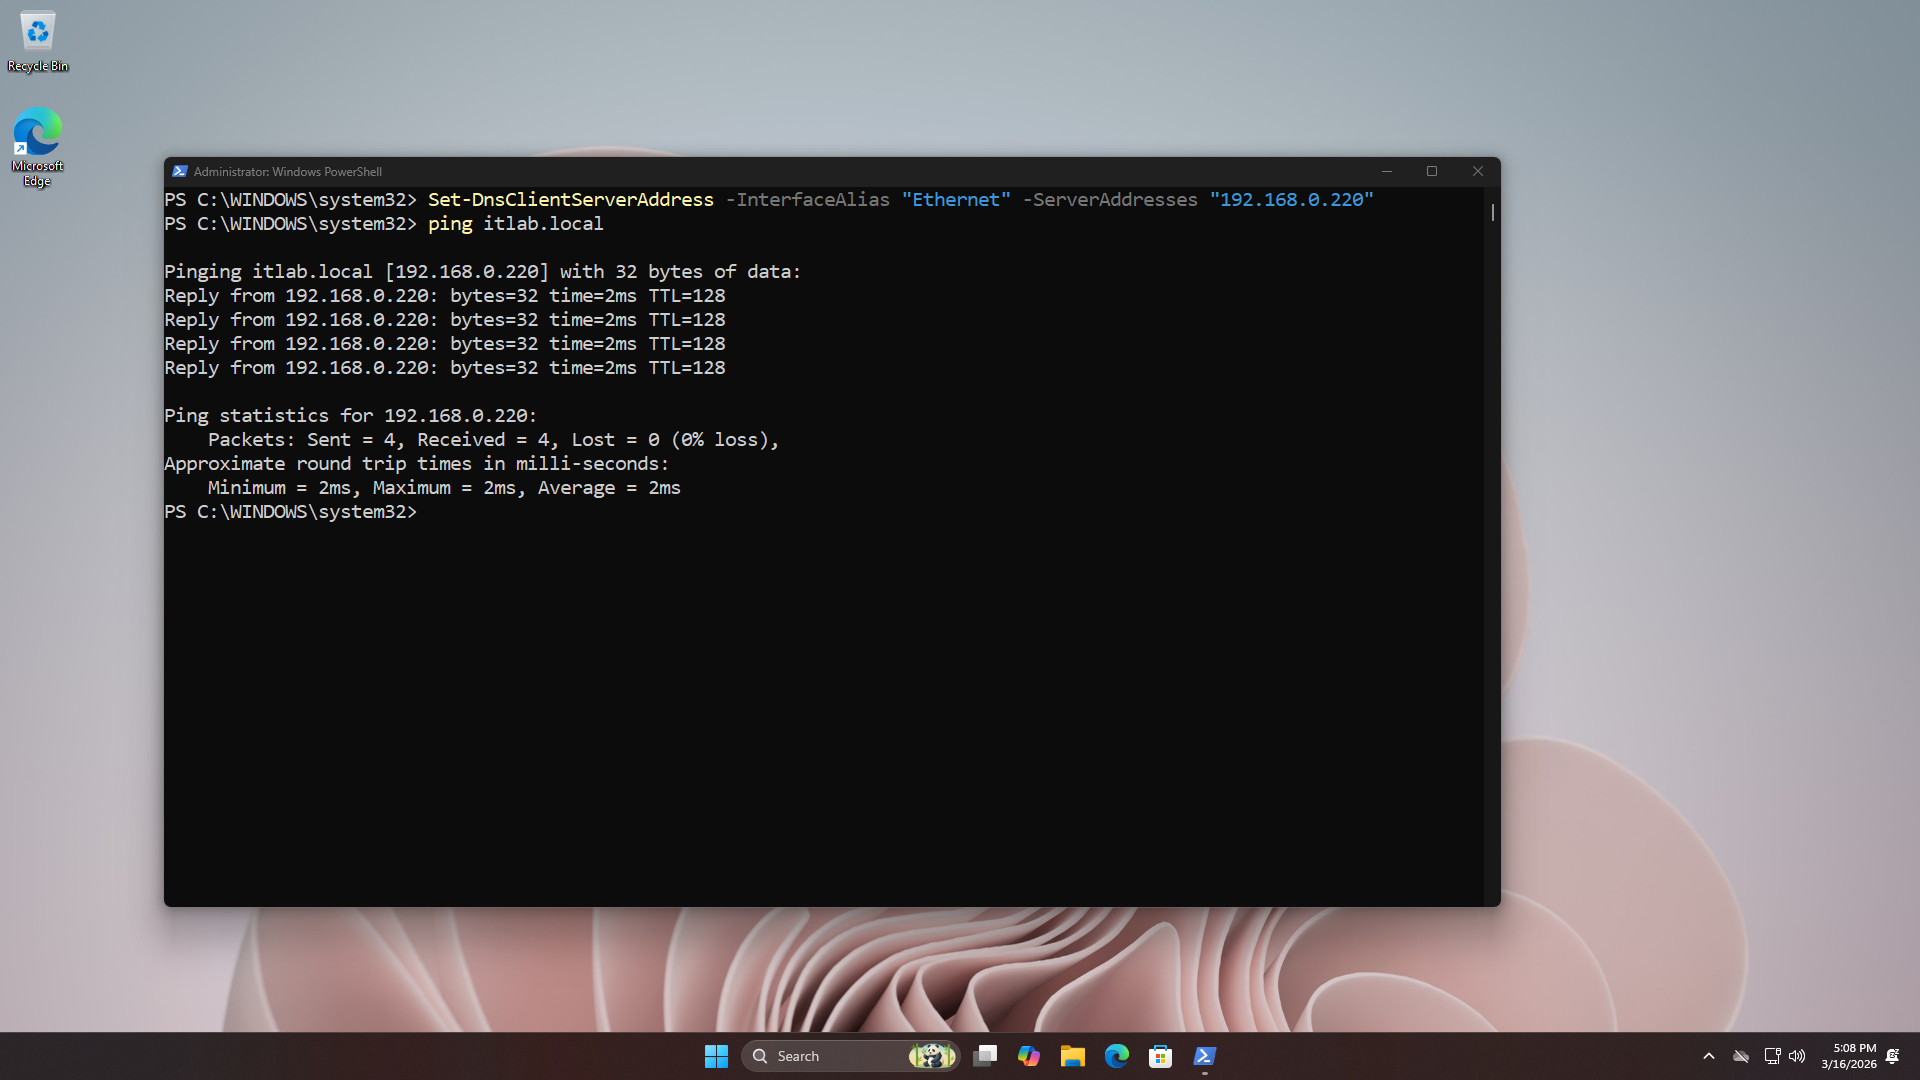
Run the following commands from the Endpoints Administrator PowerShell to point set MECM as the DNS Server
PS C:\Windows\system32> Set-DnsClientServerAddress -InterfaceAlias "Ethernet" -ServerAddresses "192.168.0.220"
PS C:\Windows\system32> ping itlab.local
Resulting Output:
Now to join our enpoint to the domain. From the search bar type in Settings and open the Settings program
Now from the Settings, head to System > About, then hit the Domain or workgroup option under related links
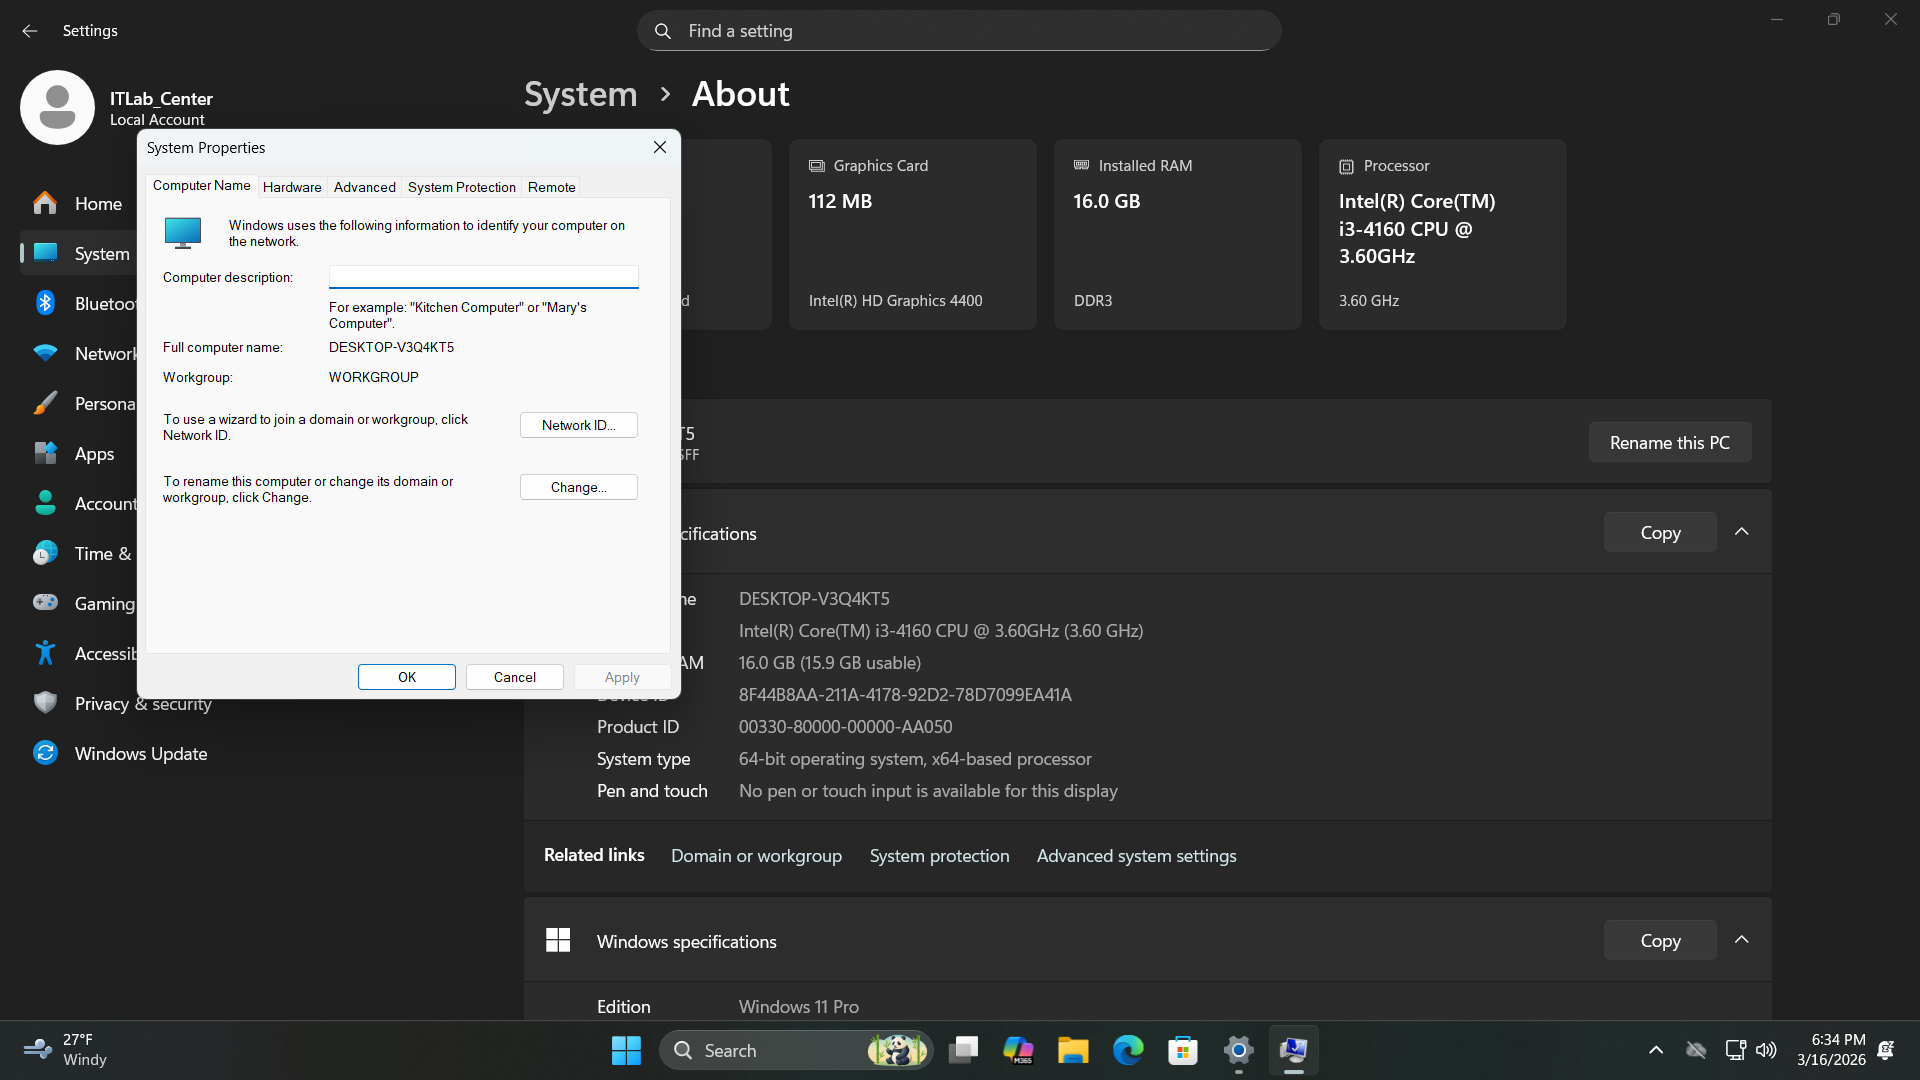
Now click Change > Domain and enter itlab.local into the domain bar. Take not of your computers name > OK
You will be prompted for authentication, enter Administrator as the username and the servers admin password
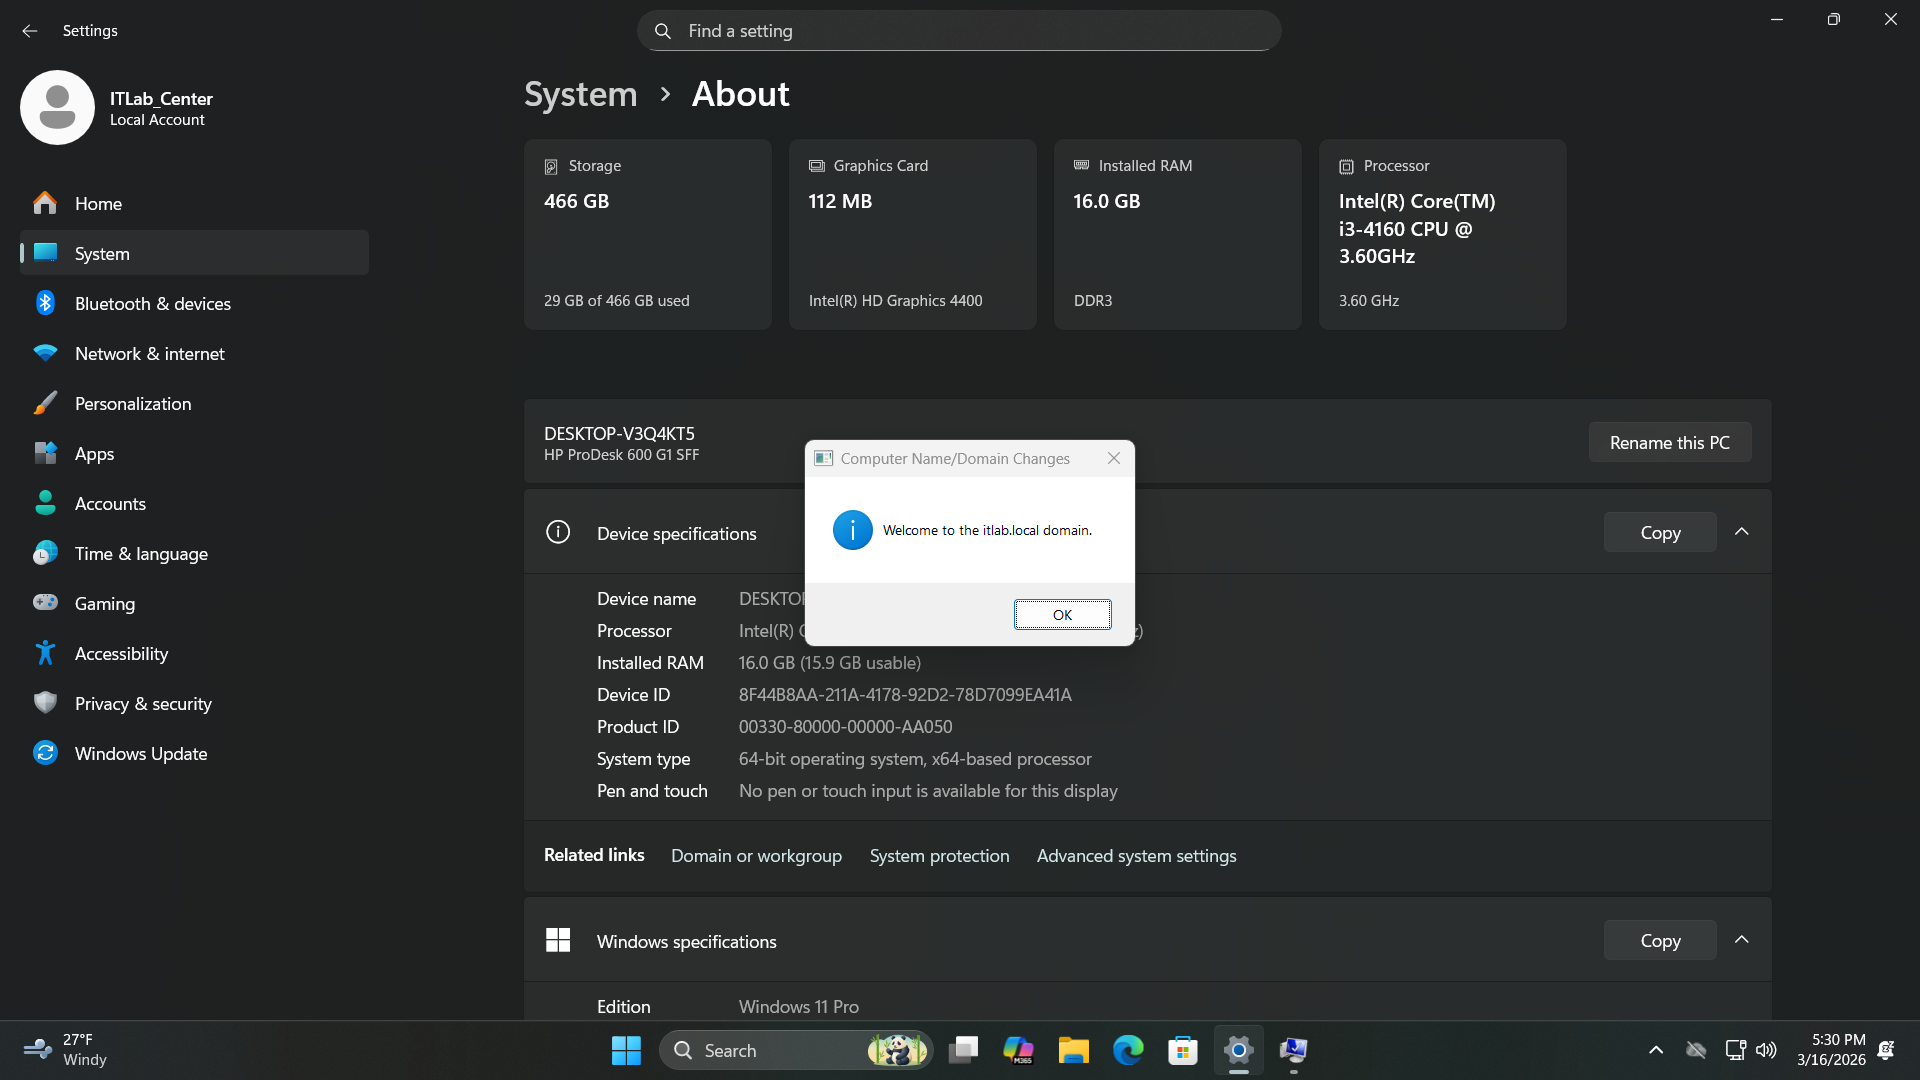
Run the following commands from the Endpoints Administrator PowerShell to restart and join to the domain
PS C:\Windows\system32> shutdown /r
From your MECM Server, search for Configuration Manager Console and select the tab run as Administrator
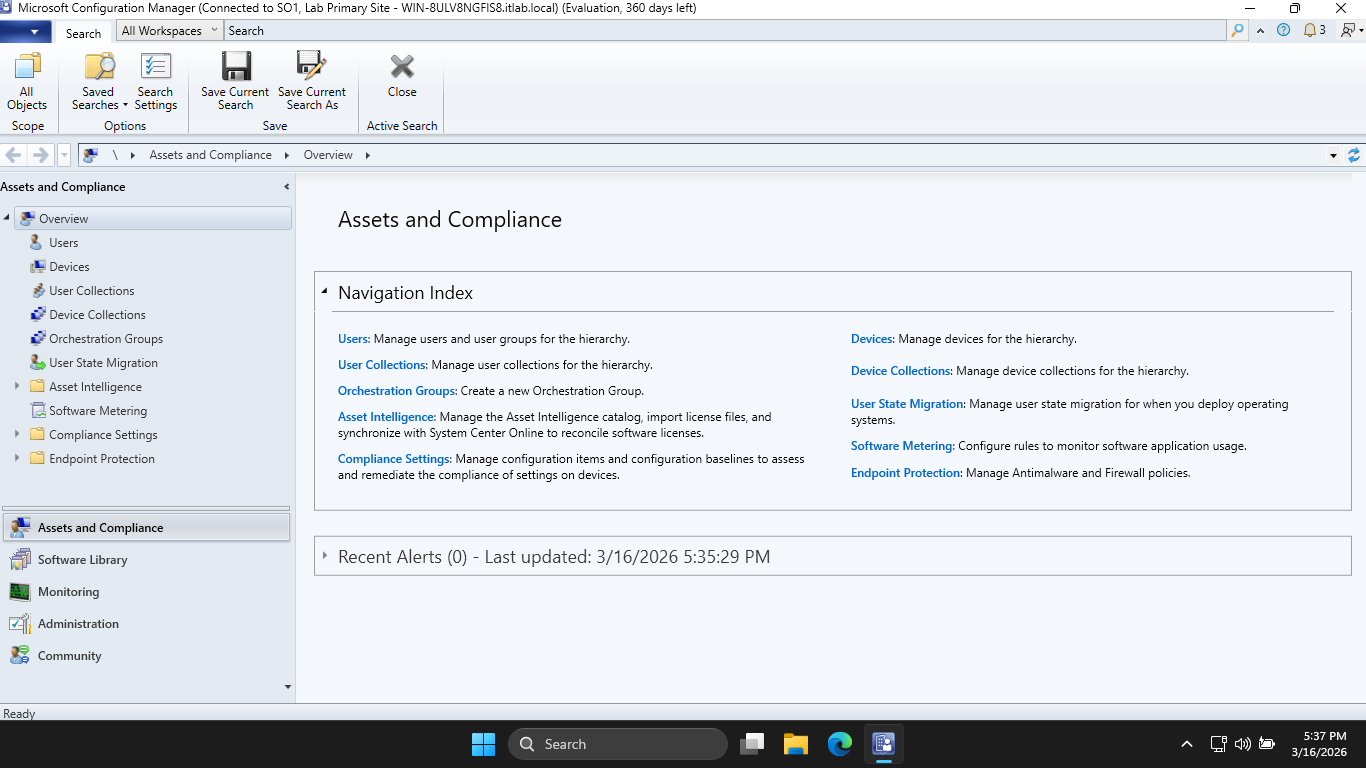
This panel is the MECM console, formerly known as SCCM. These two terms are used interchangably these days
From here head to Administration > Hierarchy Configuration > Boundaries and hit Create Boundary at top-left
• Description: Lab Deployment
• Type: IP subnet
• Network: 192.168.0.0
• Subnet Mask: 255.255.255.0
Enter in the information above, then click Apply > Ok. Now head to Boundary Groups > Create Boundary Group
Enter 'Lab-Boundary-Group' in for the Name, then hit Add... > Lab Deployment > OK > then head to References
Check to box the Use this boundary group for site assignment, then click Add... > SO1 > OK > Apply > and OK
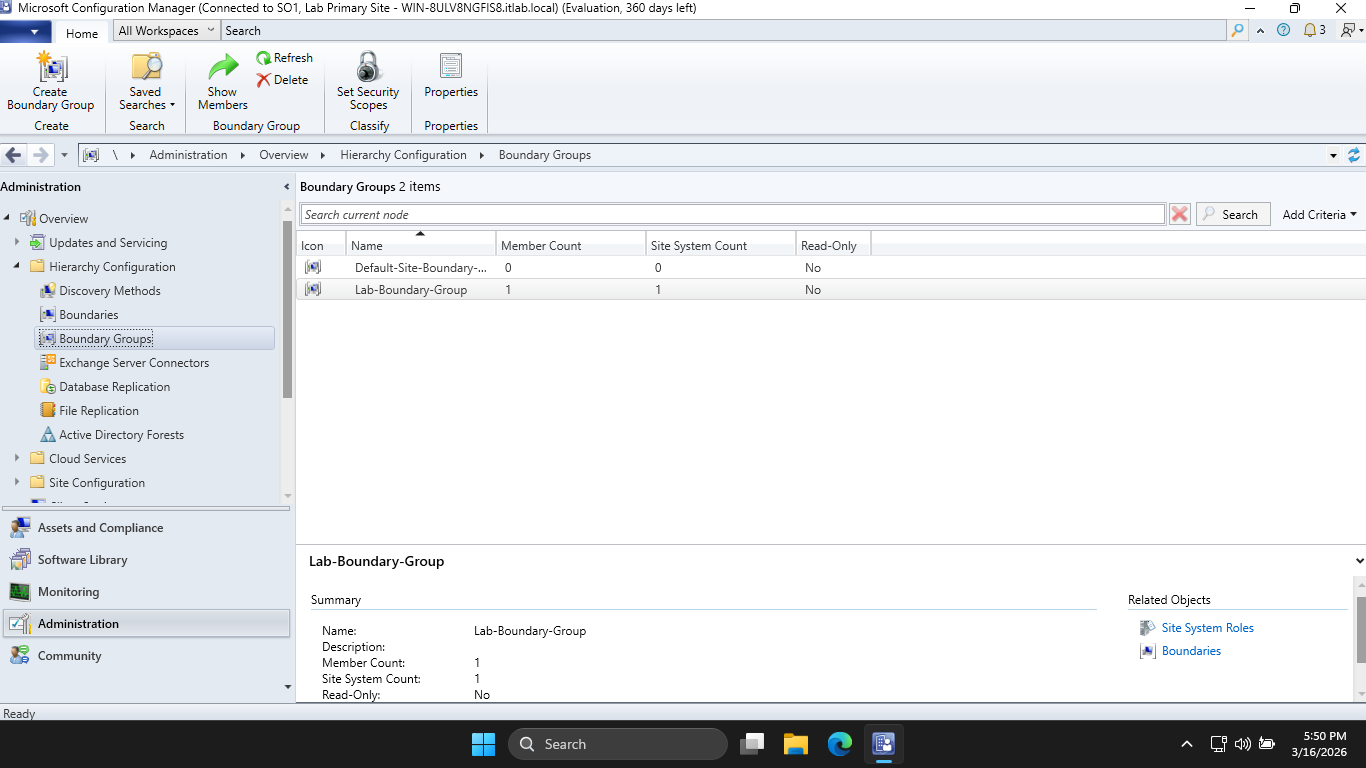
MECM will not manage a client unless it known the client is within a boundary, we have created this now
Expand Site Configuration and head to Sites, then right-click SO1 > and hover Client Installation Settings
Hit Client Push Installation > Accounts > Star Icon > New Account and enter in the following information:
• User Name: ITLAB\Administrator
• Password: Password!23 / Your Set Password
Now hit Apply > OK to set our push installation account. This account is needed for administrator rights
The server needs to install its agent (CcmExec.exe) onto the Windows 11 Endpoint to manage deployments
Head to Discovery Methods at the left and right-click Active Directory System Discover > and Properties
Check the box to Enable Active Directory System Discovery > Star Icon > Browse... > itlab.local > and OK
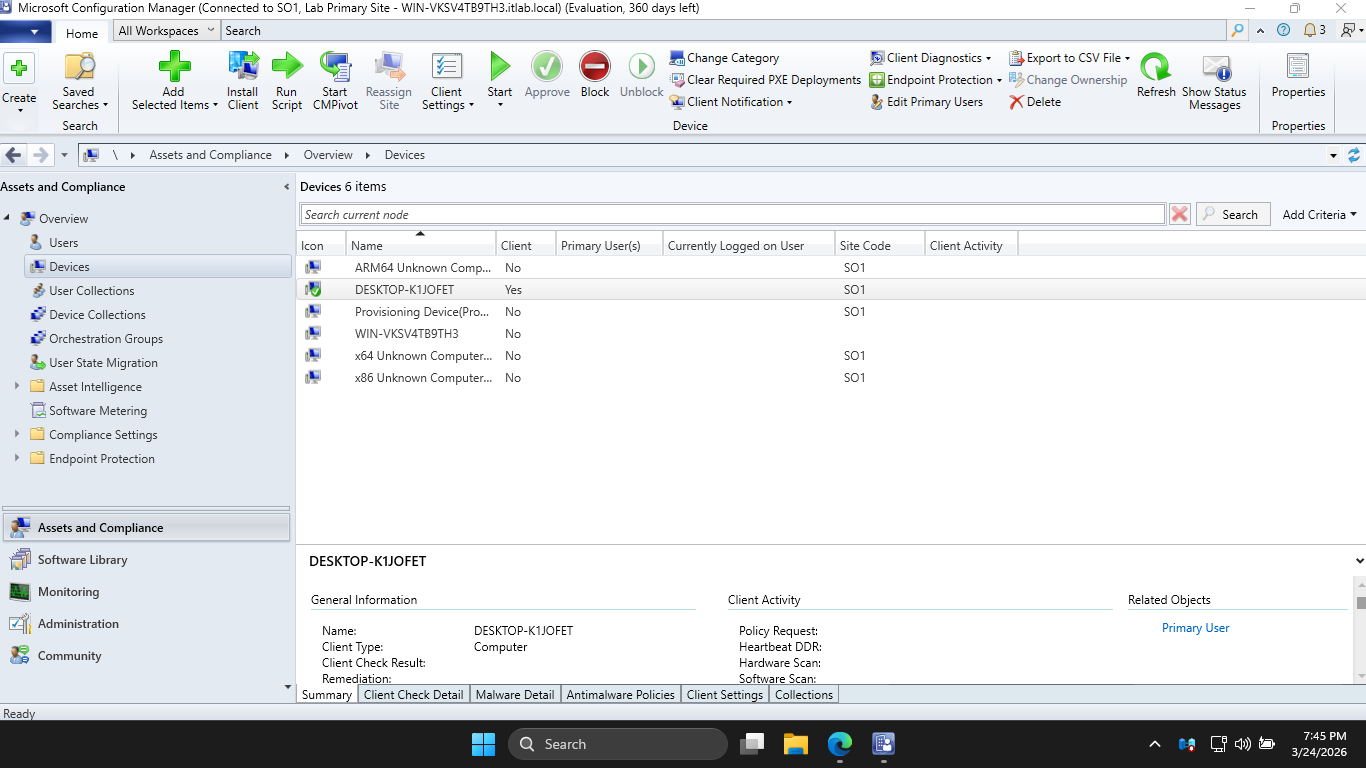
Now hit Apply > OK. Then head to Assets and Compliance > Devices and we can see that our endpoint is listed

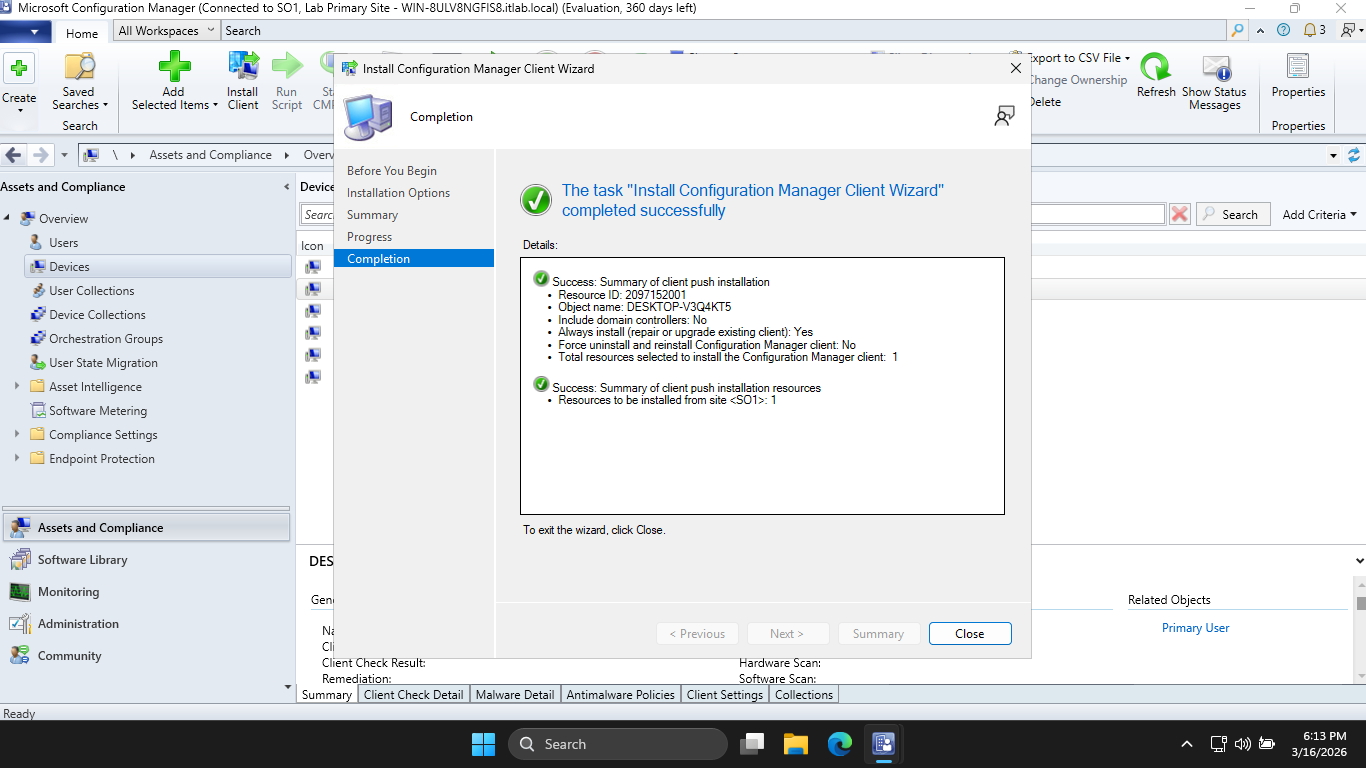
Right-click our Windows 11 endpoint and hit Install Client > Next > and check the two boxes listed below
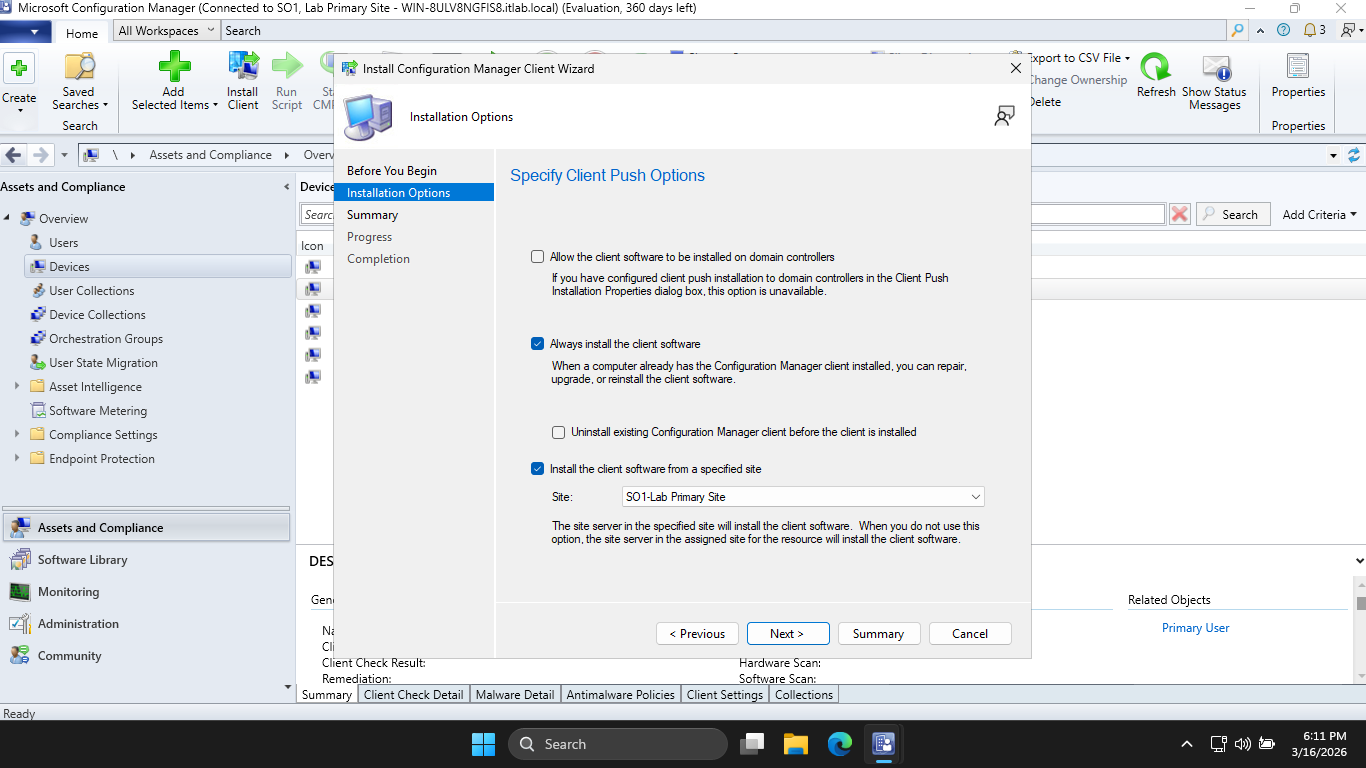
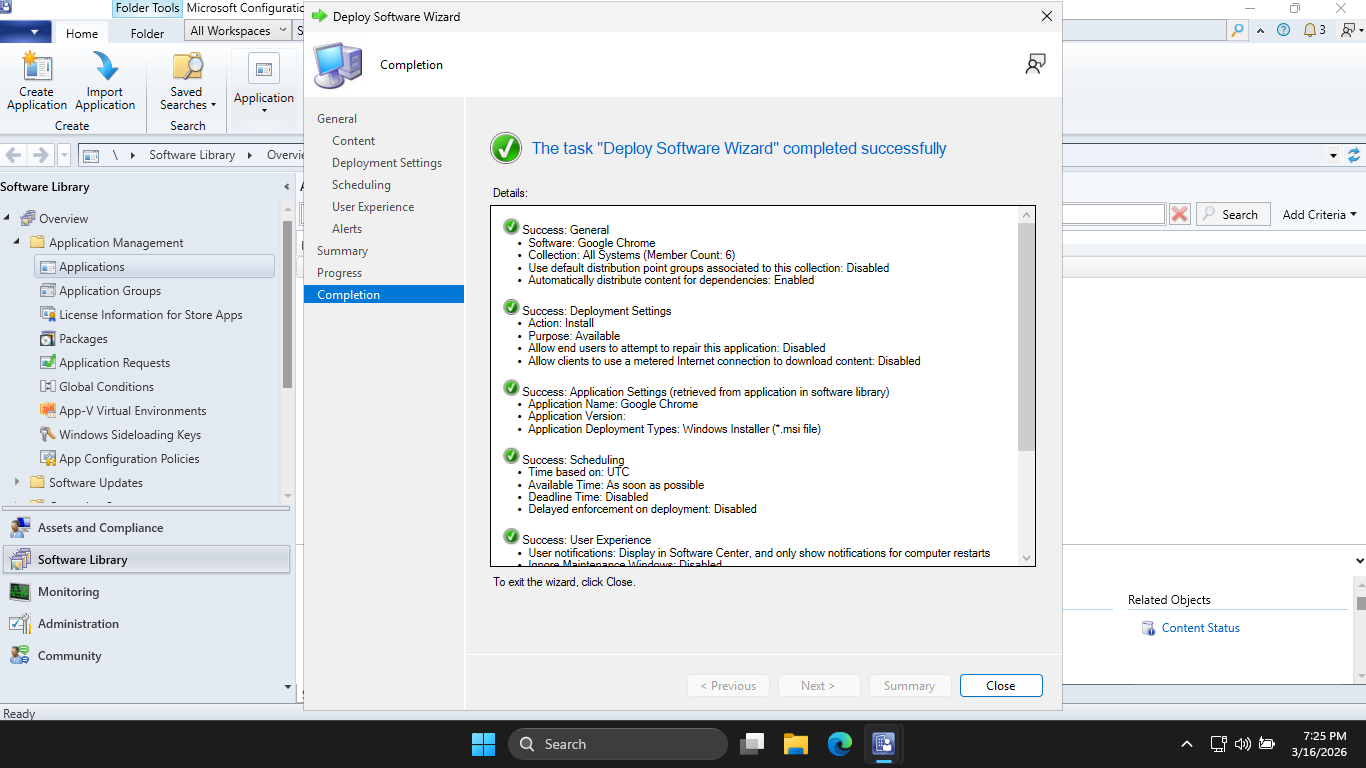
Now hit Next > Next, and you should see a screen indicating successful completion of the deployment task
Run the following commands from the Endpoints Administrator PowerShell to open the Task Manager program
PS C:\Windows\system32> taskmgr
We should first see ccmsetup.exe running, and after some time this will change to the CcmExec.exe program
From SCCM select our Endpoint then hit Approve at the top, now from the workstation run control smscfgrc
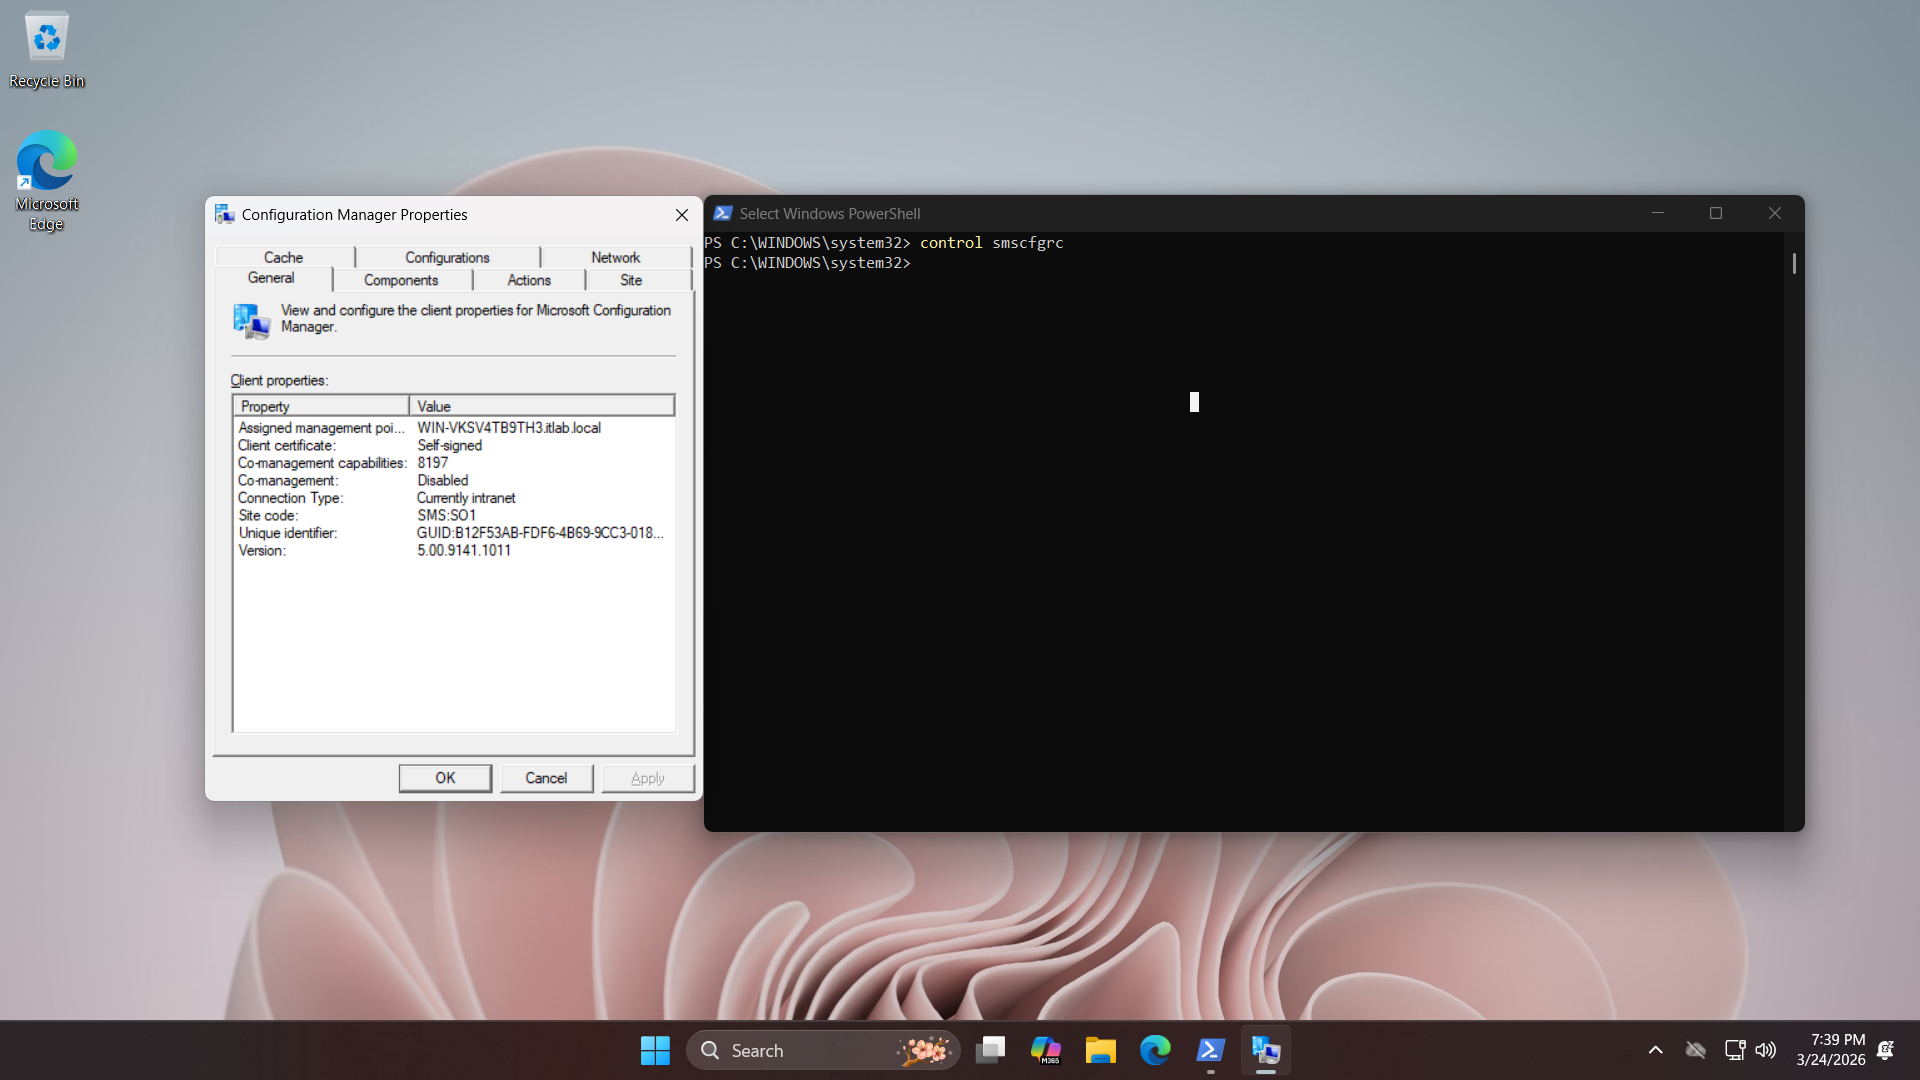
Now hit Actions > Machine Policy Retreival and Evaluation Cycle > Run Now to configure the endpoint client
Now we are able to push applications. From the server download the enterprise version of google chrome:
Google Chrome Enterprise: googlechromestandaloneenterprise64.msi
Run the following command from the Servers Administrator PowerShell to create a shared deployment folder
PS C:\Windows\system32> mkdir C:\Sources\Apps\Chrome
PS C:\Windows\system32> New-SmbShare -Name "ChromeDeployment" -Path "C:\Sources\Apps\Chrome" -FullAccess "Everyone"
PS C:\Windows\system32> Move-Item -Path "C:\Users\ITLab_Center\Downloads\googlechromestandaloneenterprise64.msi" -Destination "C:\Sources\Apps\Chrome\chromeinstaller.msi"
Back to MECM now, head to Software Library > Application Management > Applications > Create Application
In the location bar, type in \\SERVERNAME\ChromeDeployment\chromeinstaller.msi then click Next to create
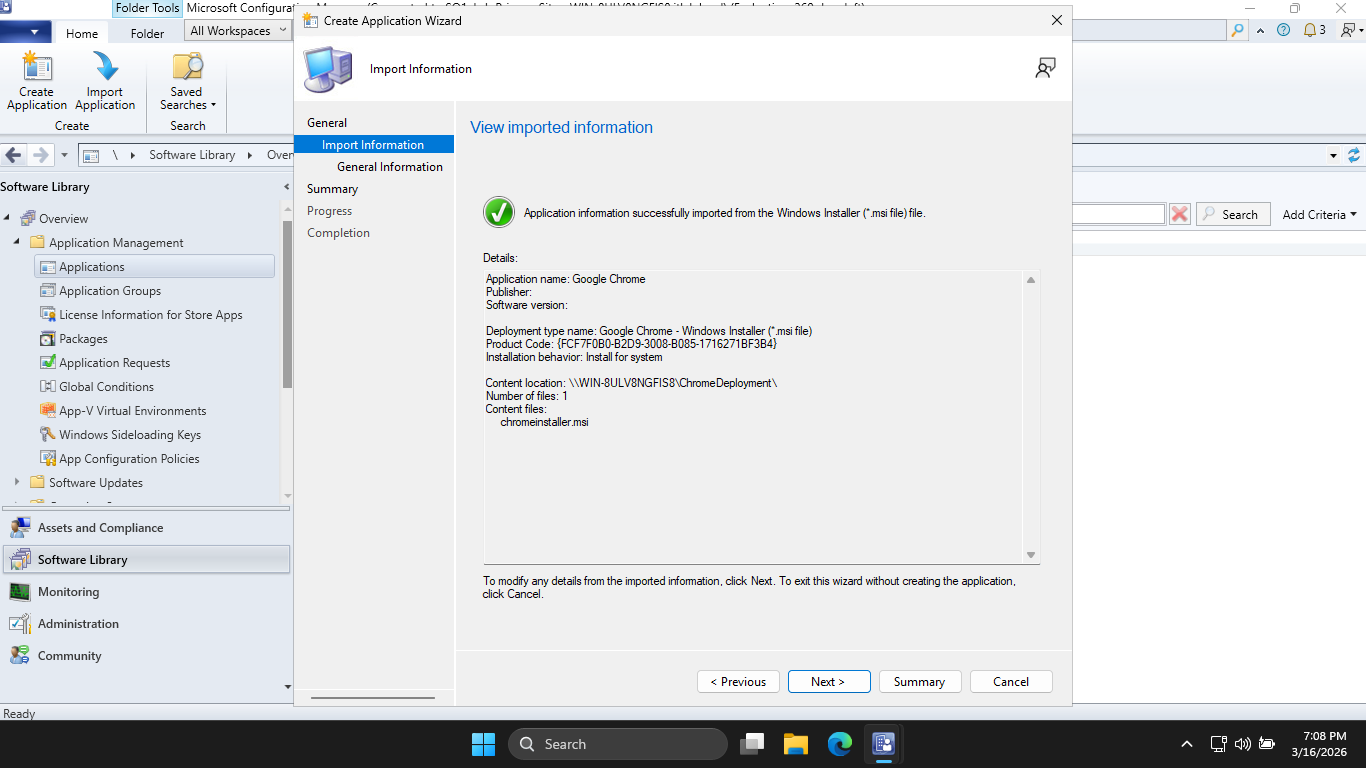
Now hit Next > Next > Next and our Application will be create for MECM to make available to the endpoint
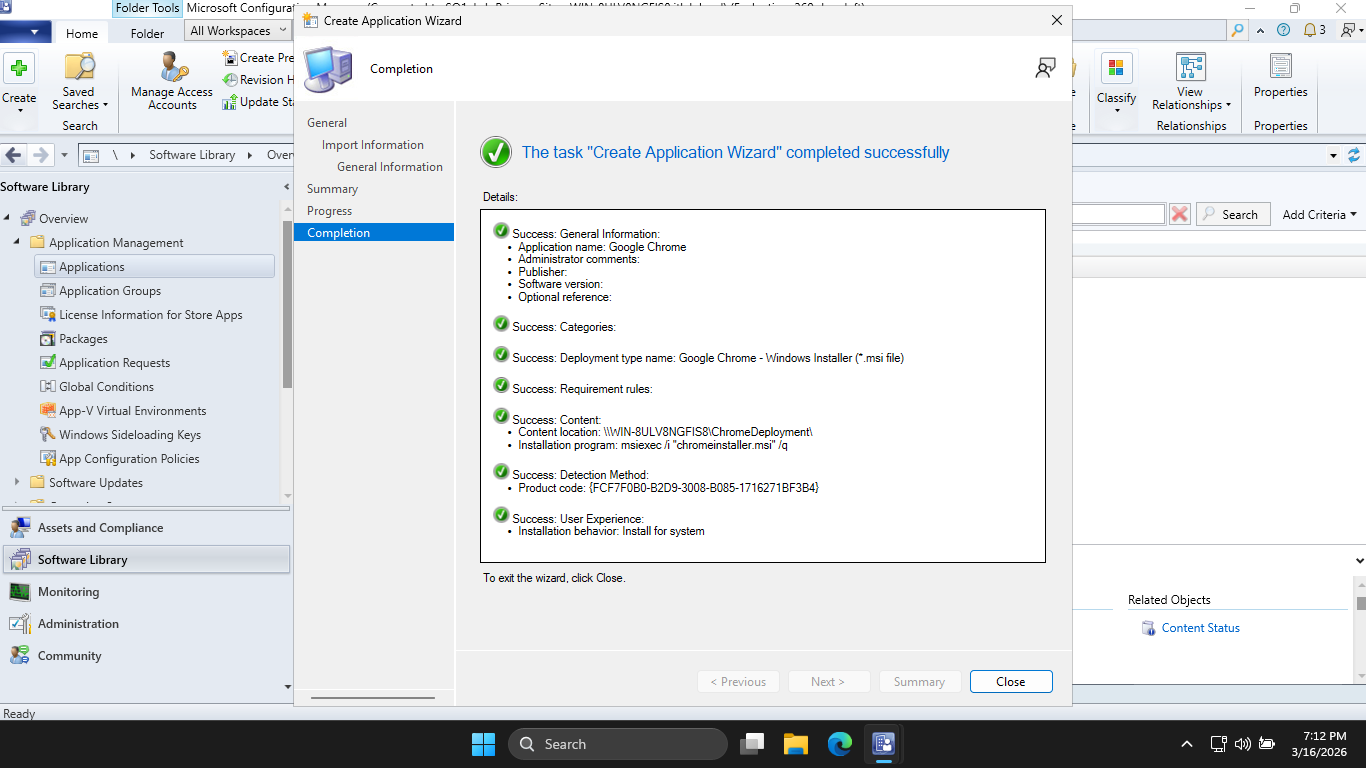
Now click Close, and you should see your application listed. Right-click Google Chrome > Distribute Content
Hit Next > Next > Add > Distribution Point, and check the MECM Server box. Now hit OK > Next > and Next
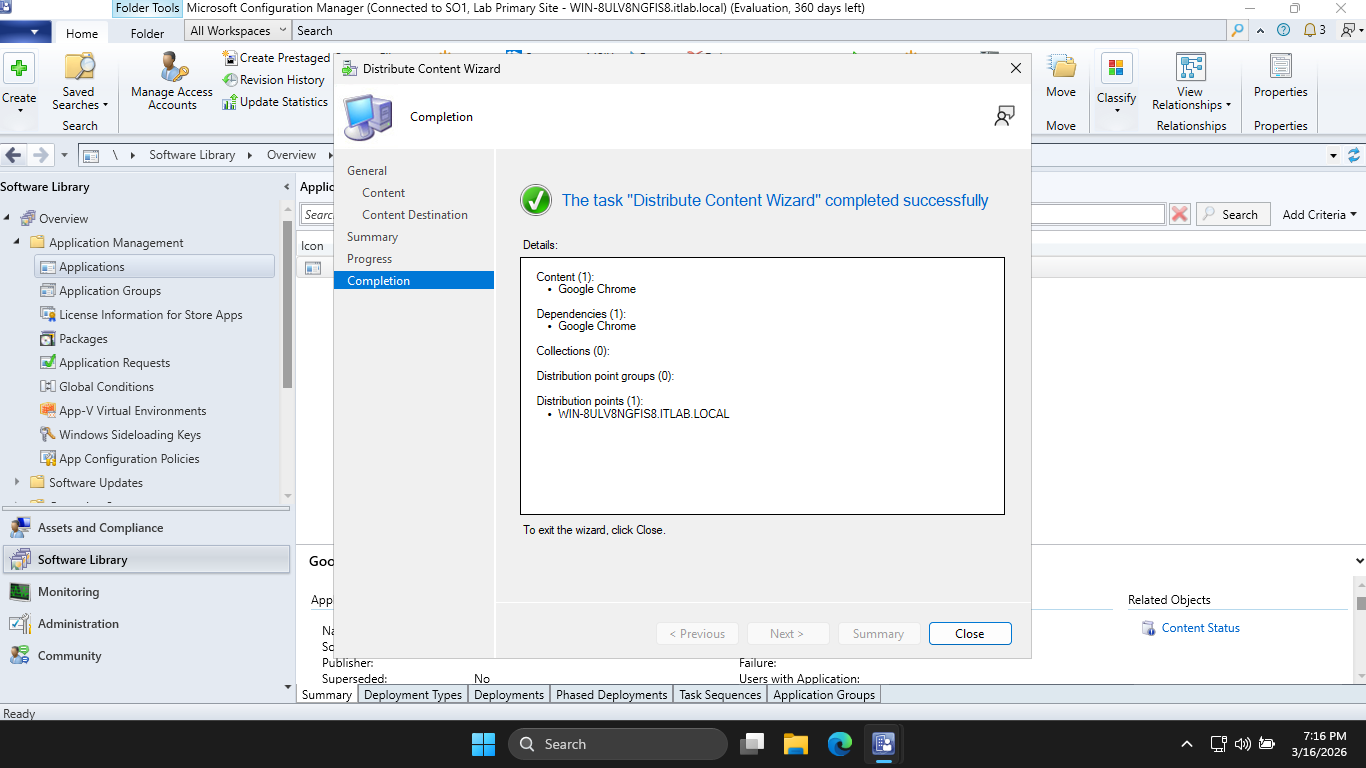
Now hit close, and right-click Google Chrome > Deploy, then by Collection hit Browse > Device Collections
Select All Systems > OK > Next > Next > Next > Next > Next > Next > Next, and our application is deployed
Now our part as the Engineer is done, let's switch back over to the workstation and play the users part
From the Configuration Manager Properties window, under Actions, run the Application Deployment Evaluation
From the Windows Search bar, type in Software Center and open the application to see our available download
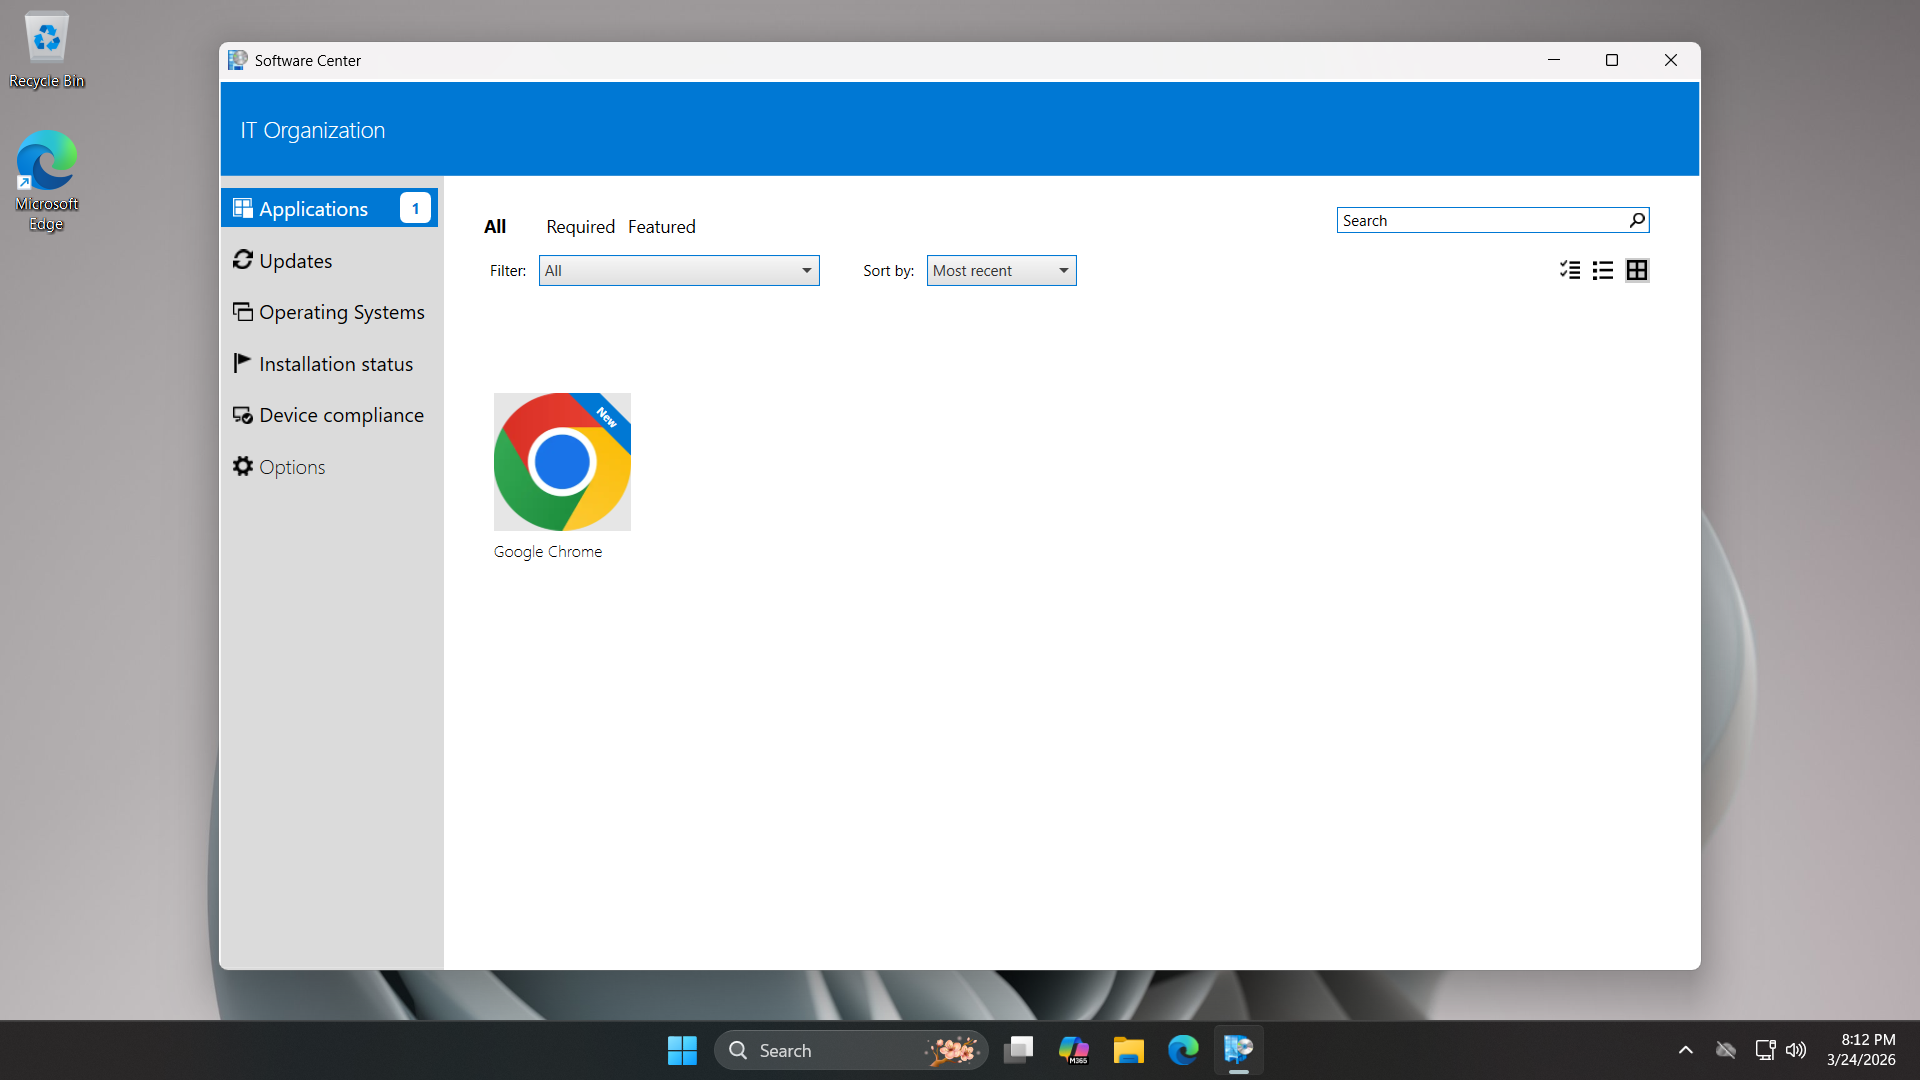
Now click on Google Chrome and select Install, once complete we can run the Application from the Desktop
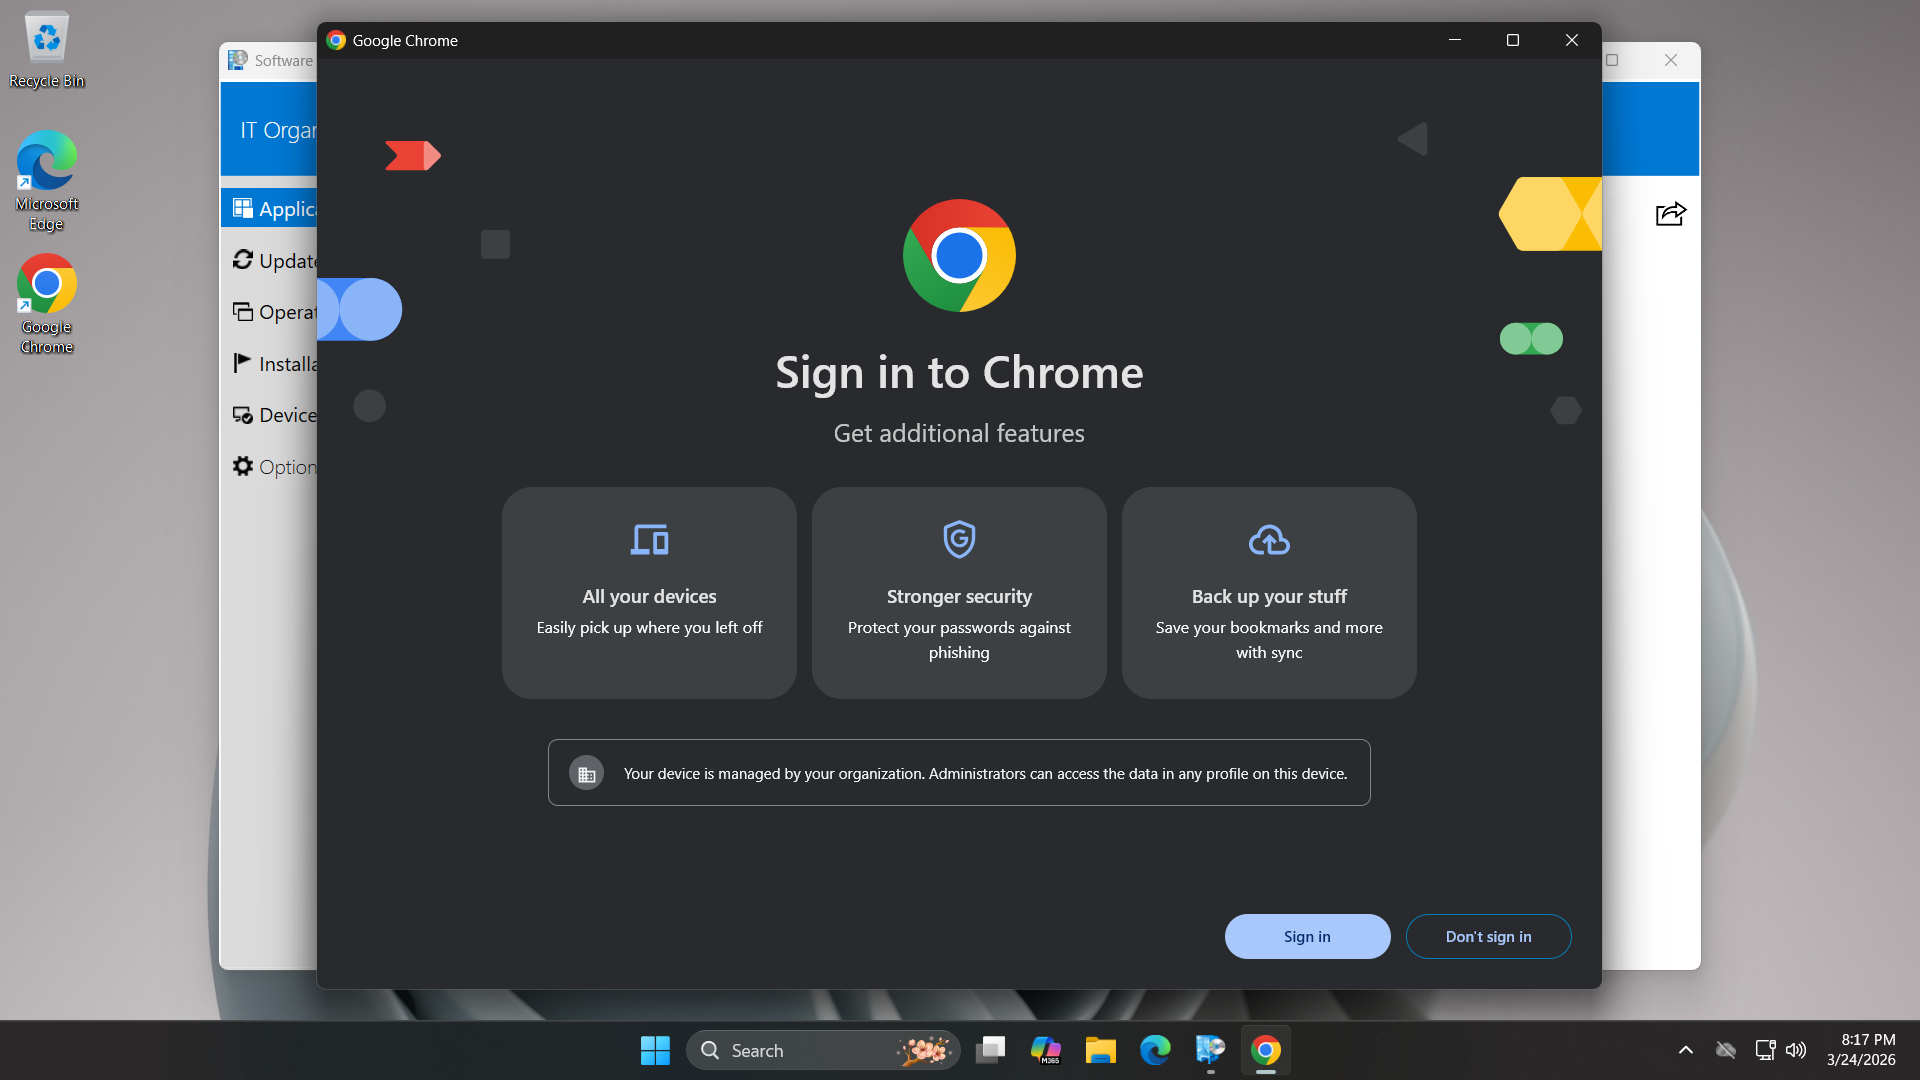
The security of the distribution starts at the distribution point, where SCCM calculates a hash of packages
Before the endpoint begins the installation, it verifies the hash of the downloaded content against that
policy which it received from the Management Point. If a single bit was altered then the install is ended
This empowers users to only install approved, vetted software from a walled garden and reduces shadow IT
6. Install MX Linux
MX Linux is a Midweight Linux distribution focused on a powerful user experience and Debian based packages
Being based on Debian Stable repositories, this will allow us to use the apt package manager powerfully
MX Linux also includes the MX Repo Manager, which is a fantastic graphical wrapper for managing mirros
This aligns well with our goals of performing controlled and managed software updates to our linux system
We will use an outdate version of MX Linux in this lab exercise to demonstrate a controlled linux update
You can download the previous unpatched version of the Distro along with the disk imaging software below
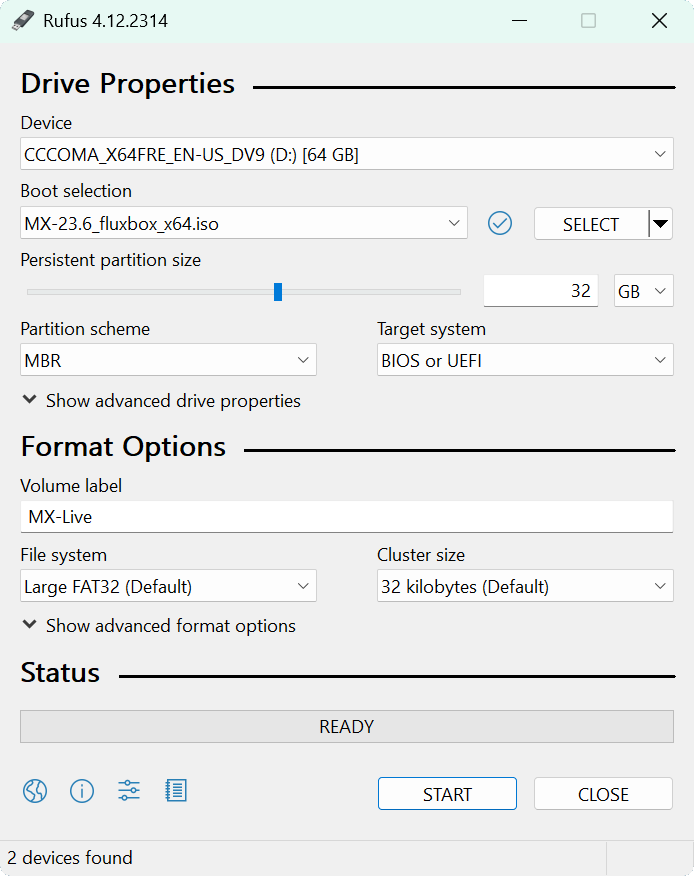
Download MX Linux 23.6 ISO: MX-23.6_fluxbox_x64.iso
Download Rufus Disk Imaging Software: Rufus Official Download
Insert USB Flash Drive, run rufus.exe, select target drive, select the MX Linux ISO Image, then hit start:
Remove the USB Flash Drive and Insert into unused PC. Start PC and press the hotboot key at the startup:
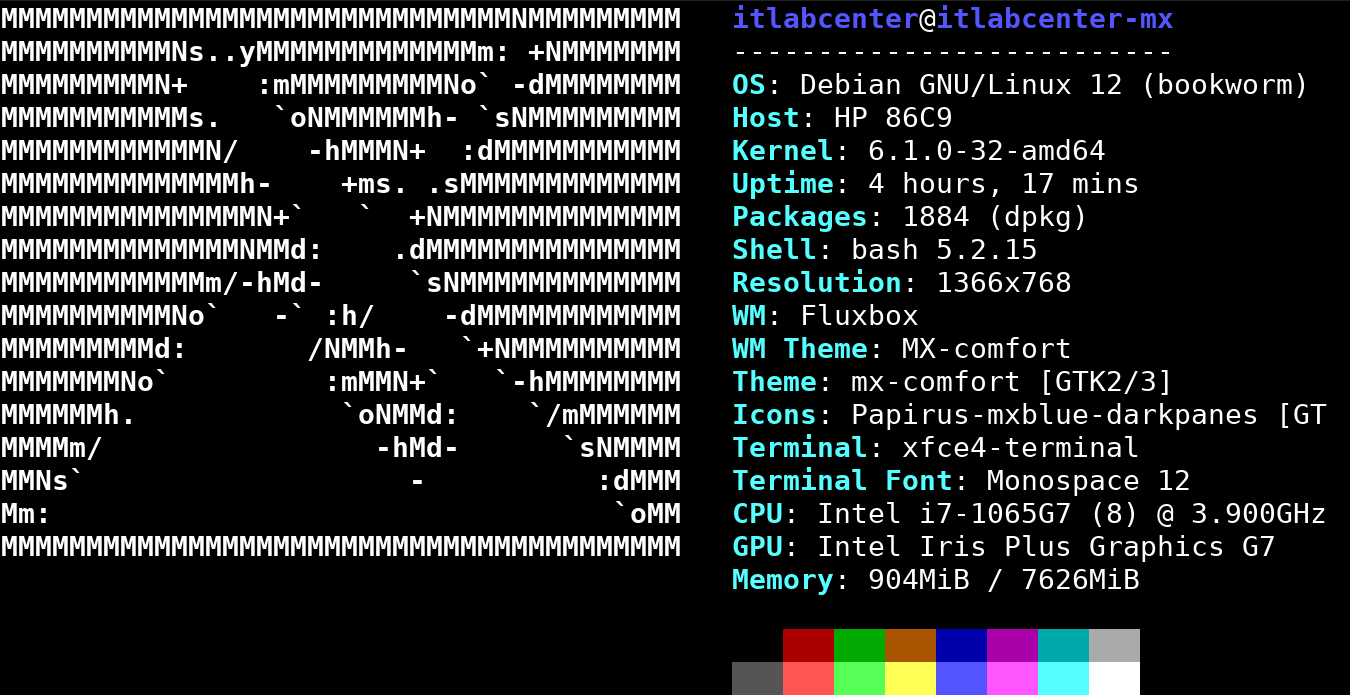
Once our live operating system boots, you will be taken to the dektop environment for MX Linux Live OS
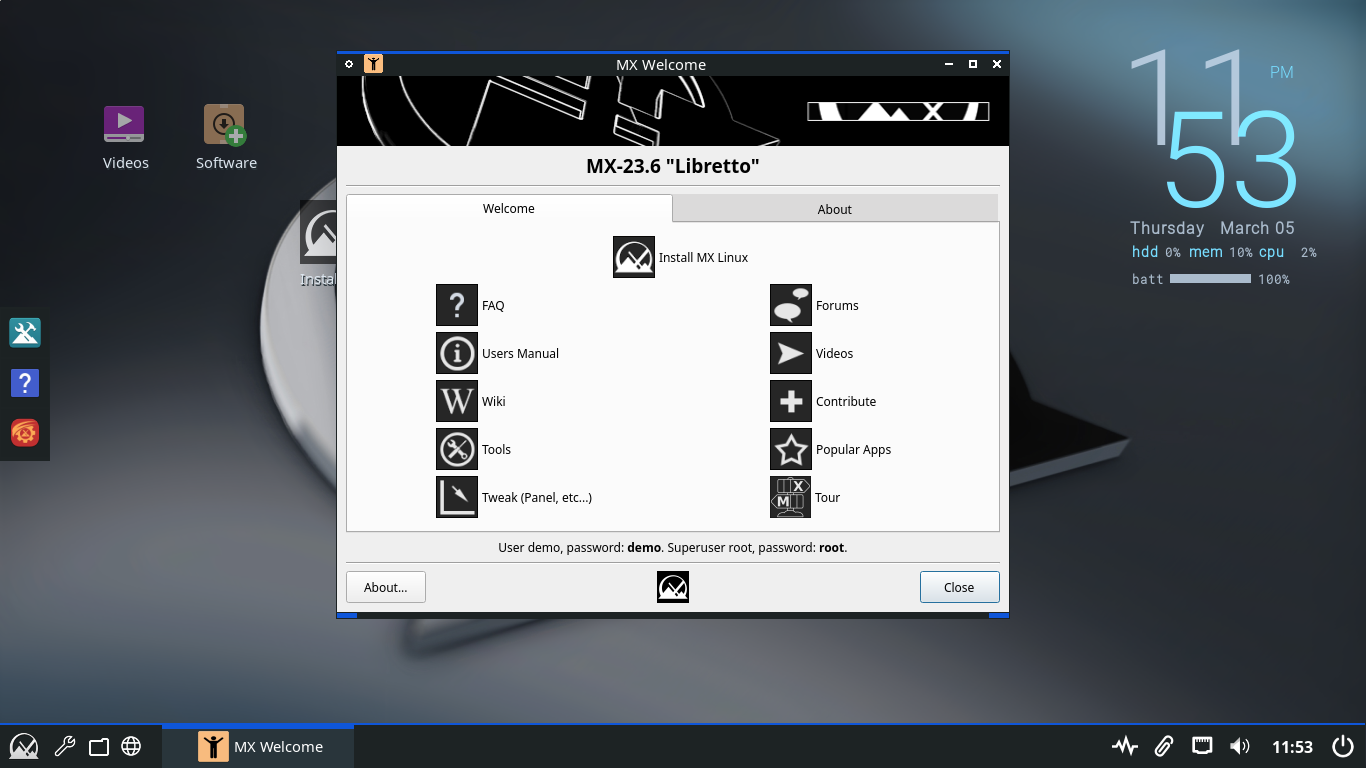
Click the option to Install MX Linux > Next > Regular Install using the entire disk > Next > and hit Start
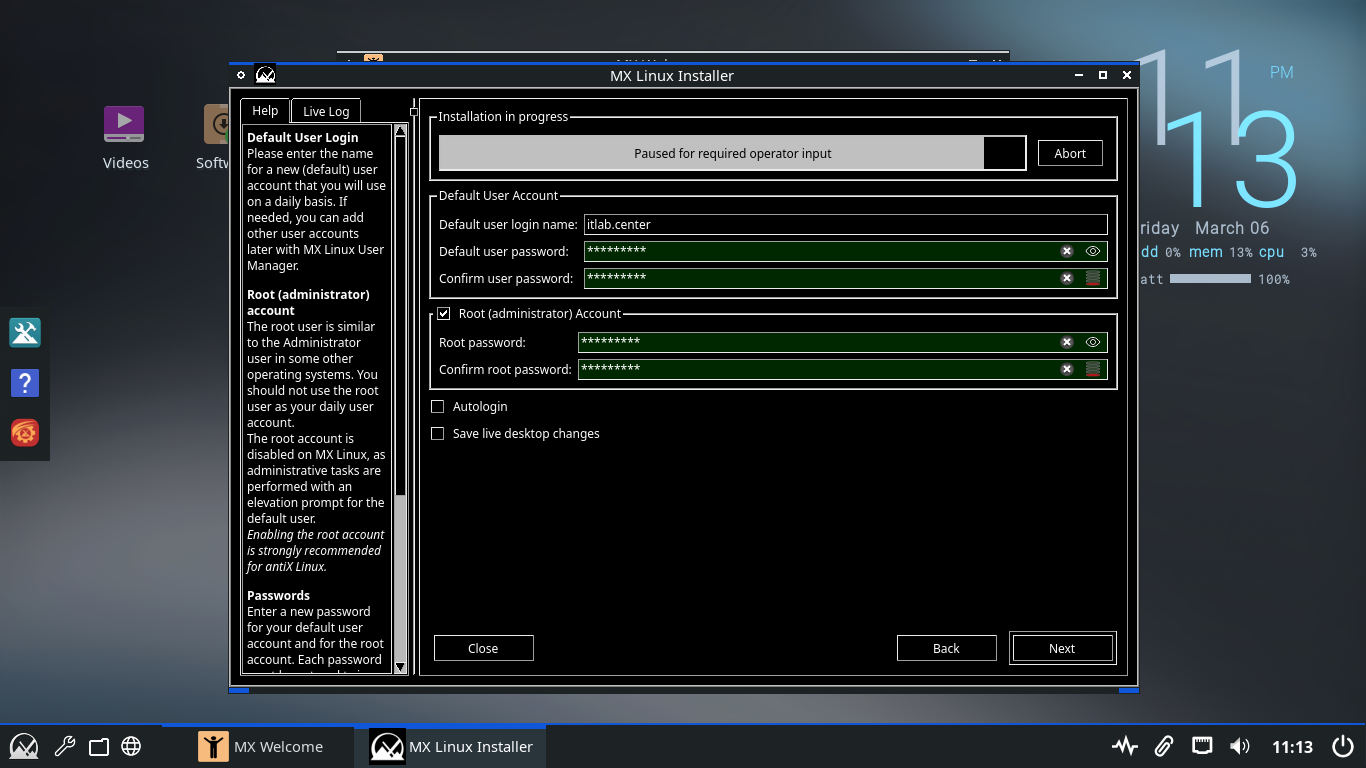
Click Next > Next > then set the username as itlab.center and set the user and root account passwords up
Now click Next > Next > Finish > MX 23.6 Libretto and you will be taken to our newly installed Desktop
We will use this unpatched environment to demostrate how enterprise patch management in Linux is handled
7. Patch a Linux System
Here we will perform the same basic principle of Patch Management on a Linux system using repositories
Since linux does not have a single vendor like windows does, all patches are distributed through these
Click the MX Linux icon at the lower left and search for Terminal, then open the XFCE Terminal application
Throughout this lab exercise, we will work primarily from the terminal so be sure to keep this window open
In the next steps we will be using the apt command to review and manage updates on this MX Linux Endpoint
The apt command is part of the Advanced Packaging Tool, which is used for installing and upgrading packages
Run the following command from the MX Linux Terminal to update the available software package repositories
itlabcenter@itlabcenter-mx:~
$ sudo apt update
Resulting Output:
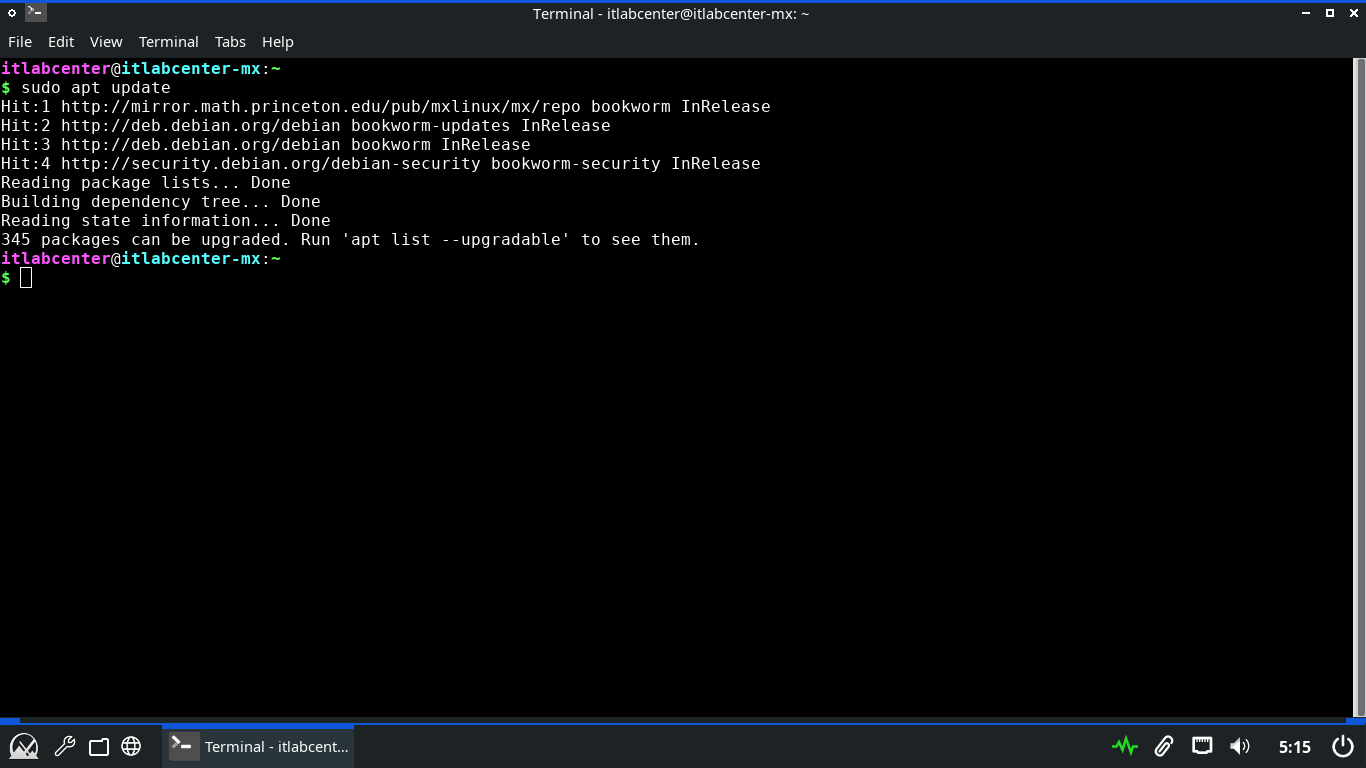
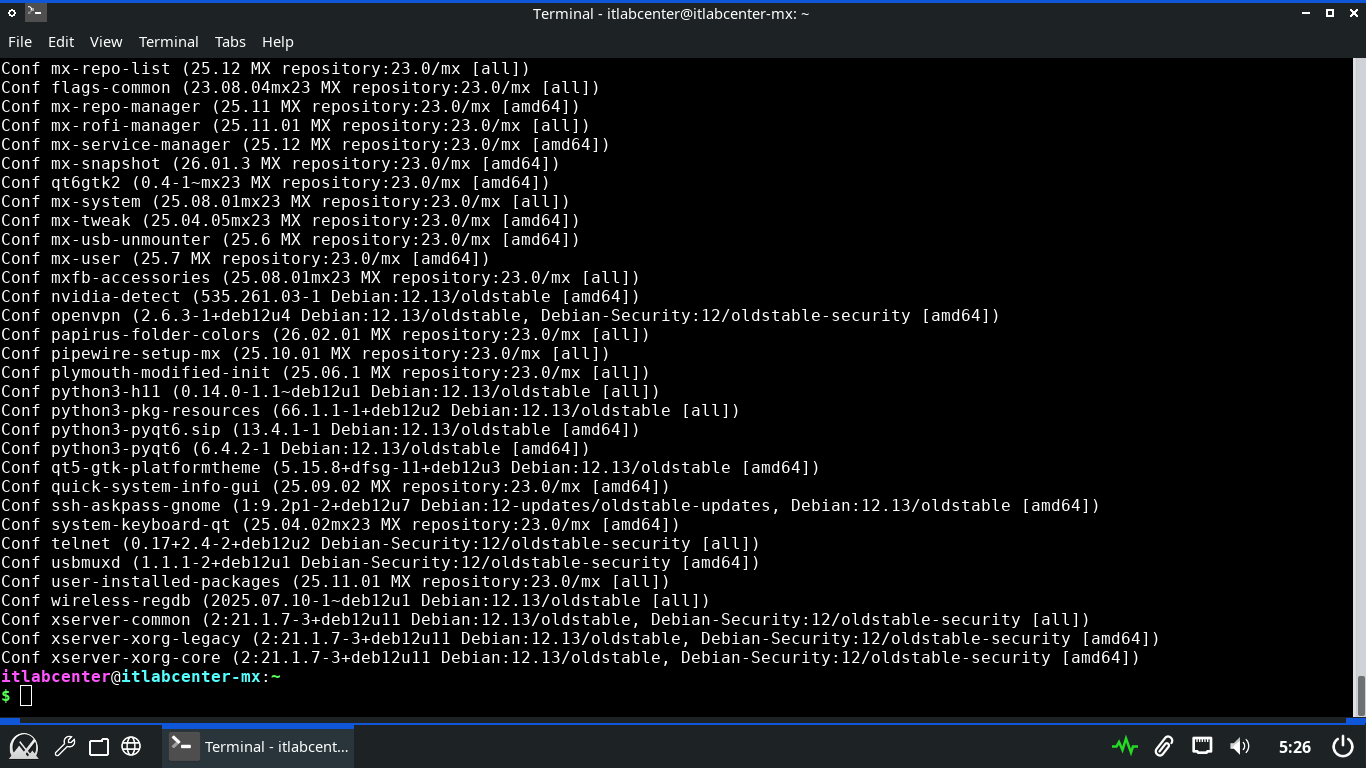
We can see here that there are four package repositories pre-configured for our linux distribution listed
Run the following command from the MX Linux Terminal to display all the upgradeable installed packages
itlabcenter@itlabcenter-mx:~
$ sudo apt list --upgradable | more
Resulting Output:
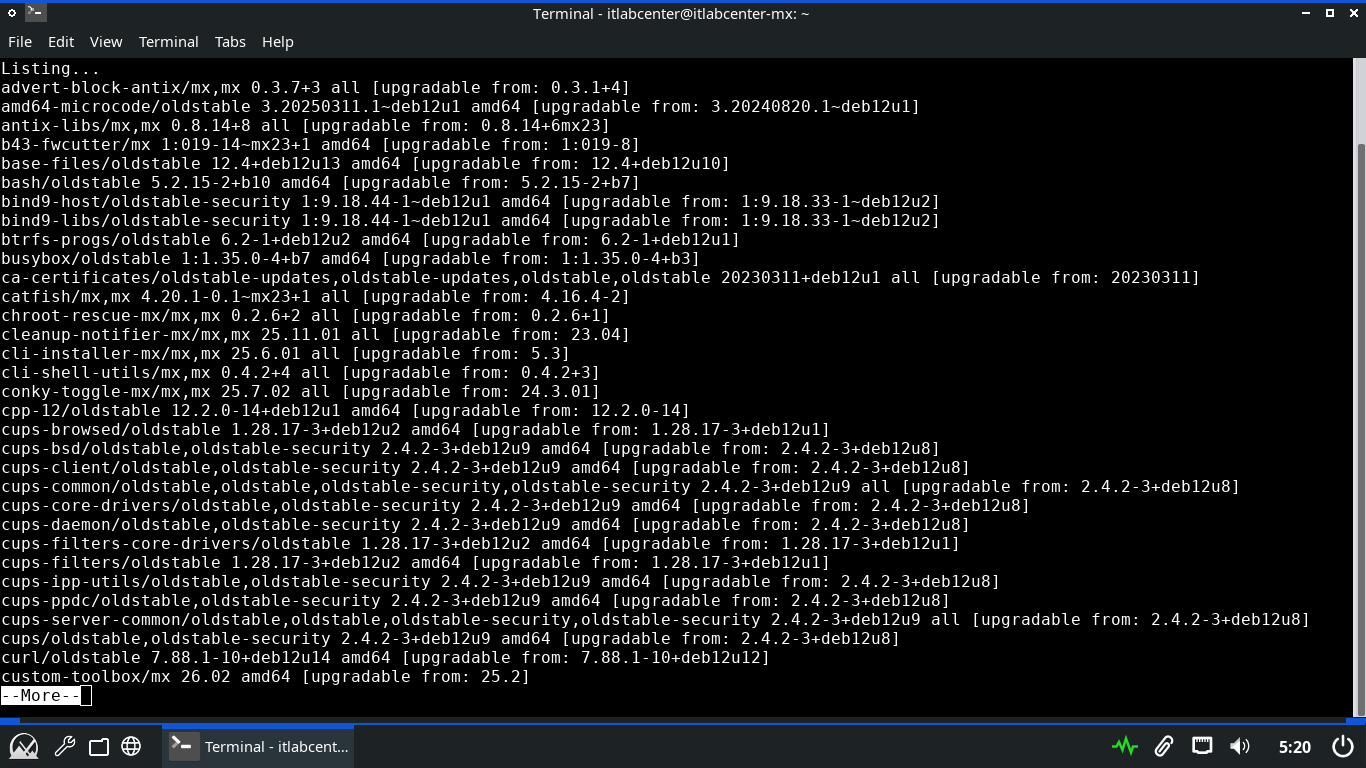
Press Enter a few times to scroll through the output, then press CTRL+Z followed by enter to exit more
Run the following command from the MX Linux Terminal to run a simulated upgrade of all system packages
itlabcenter@itlabcenter-mx:~
$ sudo apt -s upgrade
Resulting Output:
You can use this technique to see if errors will be thrown during the upgrade process before going live
Typically the output is redirected to a file where it can be examined (sudo apt -s upgrade > upgrade.txt)
Next, we will outline the commands used to install Linux updates. We will save the full upgrade for last
Run the following command from the MX Linux Terminal to upgrade a specific and defined available package
itlabcenter@itlabcenter-mx:~
$ sudo apt install --only-upgrade mx-repo-manager -y
Resulting Output:
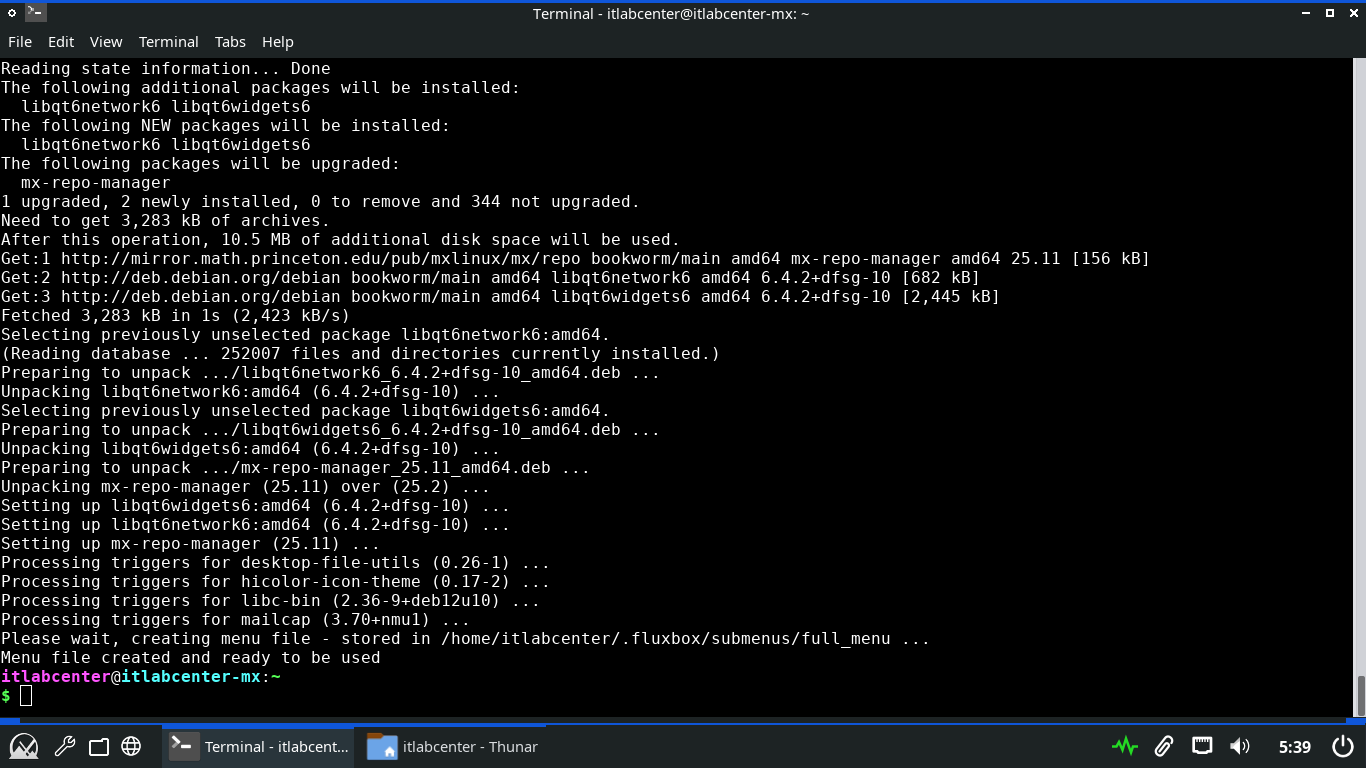
The -y option can be used to auto-accept all prompts. As with Windows, it is possible to exclude a package
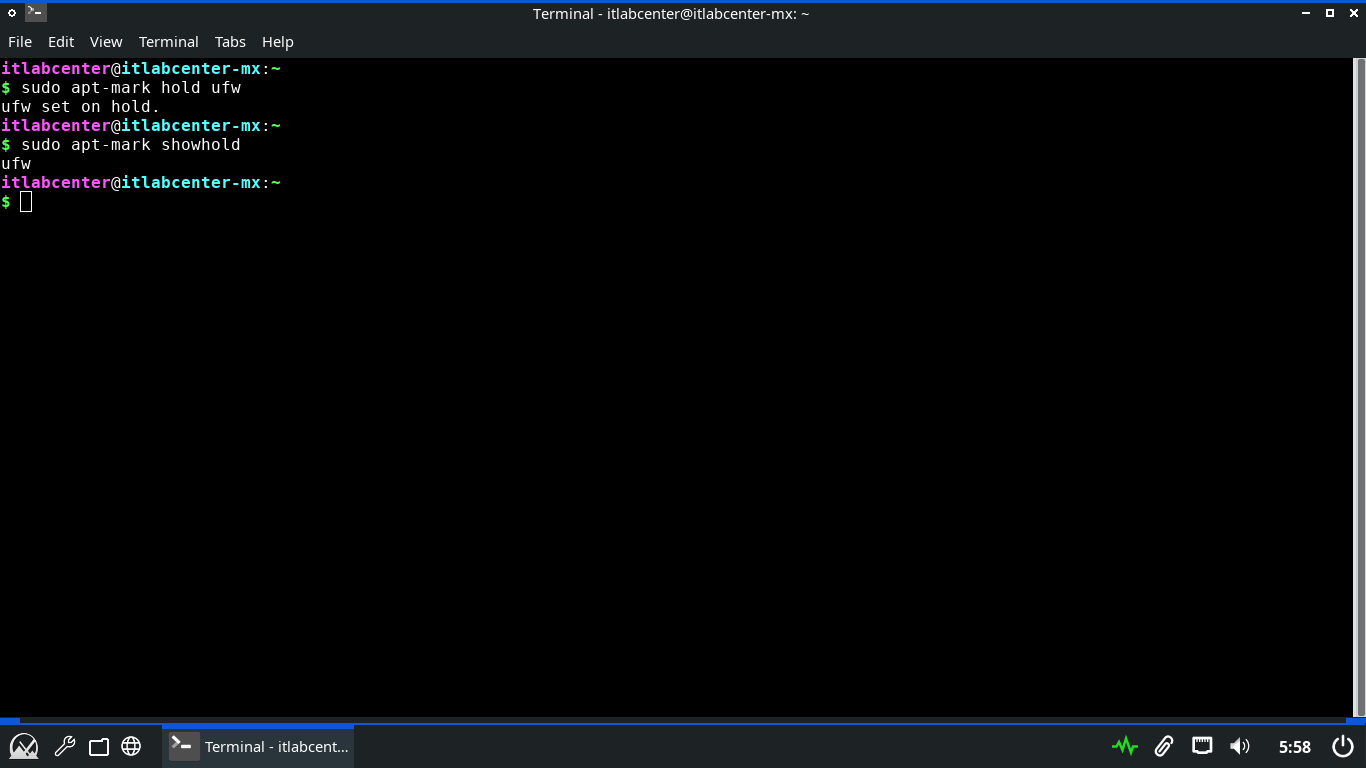
Run the following commands from the MX Linux Terminal to exclude the ufw package from the upgradable list
itlabcenter@itlabcenter-mx:~
$ sudo apt-mark hold ufw
itlabcenter@itlabcenter-mx:~
$ sudo apt-mark showhold
Resulting Output:
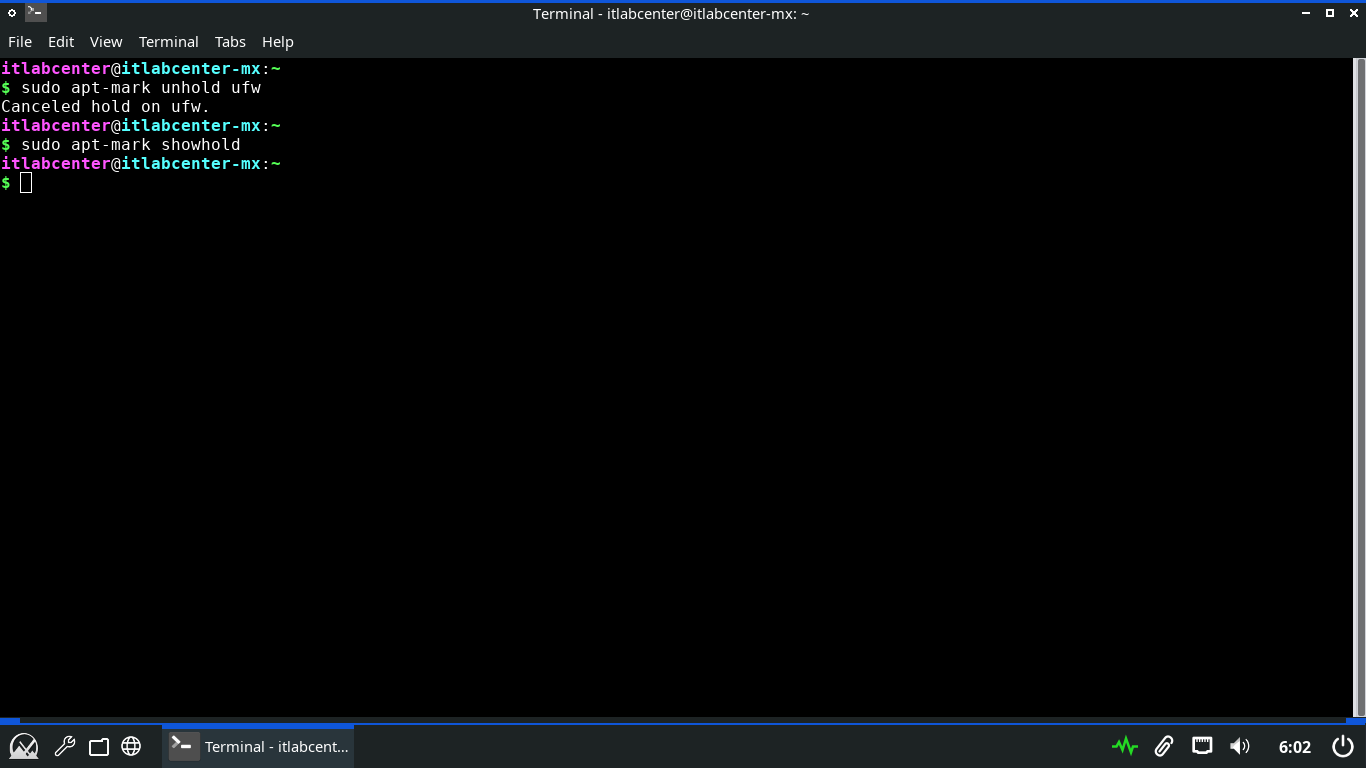
Run the following commands from the MX Linux Terminal to allow the ufw package to be re-added to the list
itlabcenter@itlabcenter-mx:~
$ sudo apt-mark unhold ufw
itlabcenter@itlabcenter-mx:~
$ sudo apt-mark showhold
Resulting Output:
Typically administrators will want to update the package repositories and upgrade the system all at once
Run the following command from the MX Linux Terminal to update the repositories and upgrade all packages
itlabcenter@itlabcenter-mx:~
$ sudo apt-get update && sudo apt-get upgrade -y
Resulting Output:
We have patched our system to include the up to date versions of each available system software package
8. Deploy Local APT Respository
Secure software distribution in Linux is done using repositories, or libraries of pre-compiled packages
The Advance Package Tool is a powerful command-line utility used for managing packages on Debian distros
Setting up a local APT repository allows you to control the software supply chain in a Linux environment
We will use the latest version of MX Linux as the server in this lab exercise to demonstrate this process
Download MX Linux 25.1 ISO: MX-25.1_fluxbox_x64.iso
Download Rufus Disk Imaging Software: Rufus Official Download
Insert USB Flash Drive, run rufus.exe, select target drive, select the MX Linux ISO Image, then hit start:
Remove the USB Flash Drive and Insert into unused PC. Start PC and press the hotboot key at the startup:
Once our live operating system boots, you will be taken to the dektop environment for MX Linux Live OS:
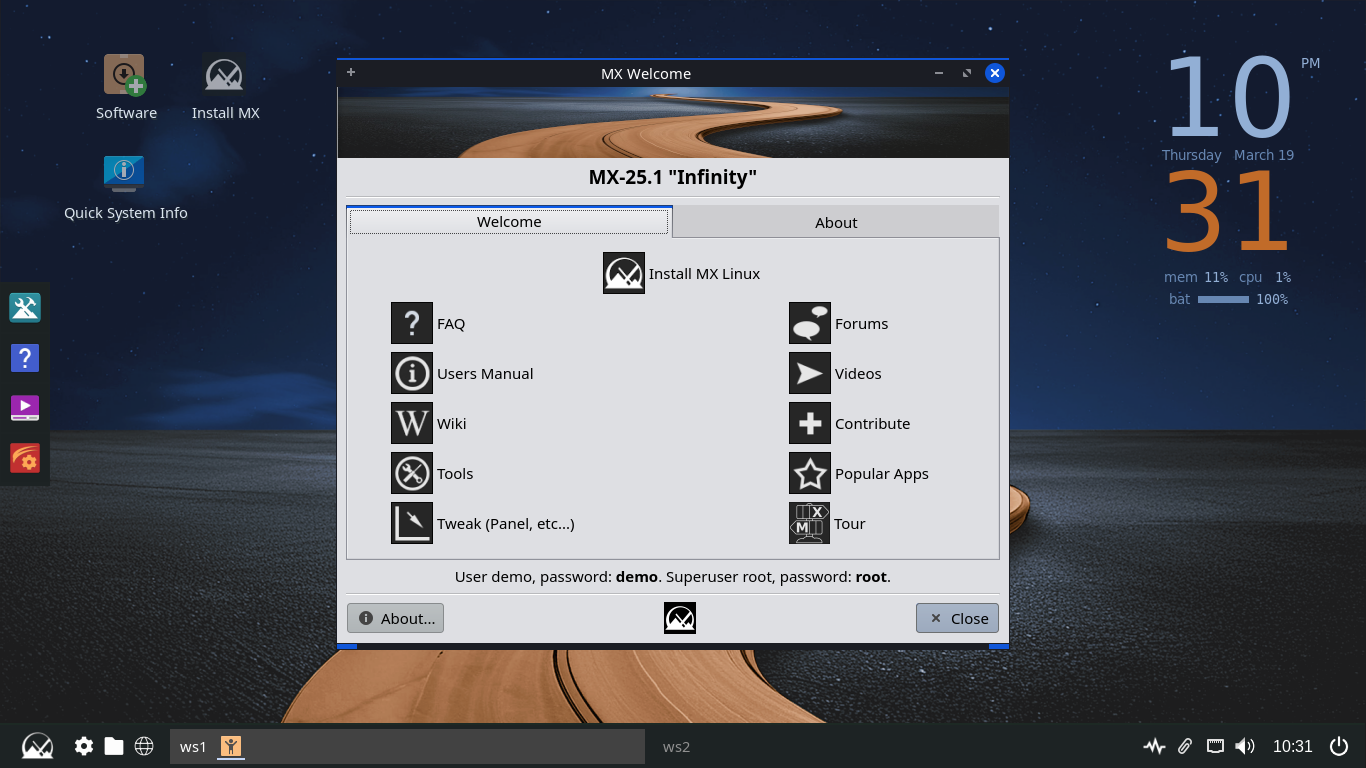
Click the option to Install MX Linux > Next > Regular Install using the entire disk > Next > and hit Start
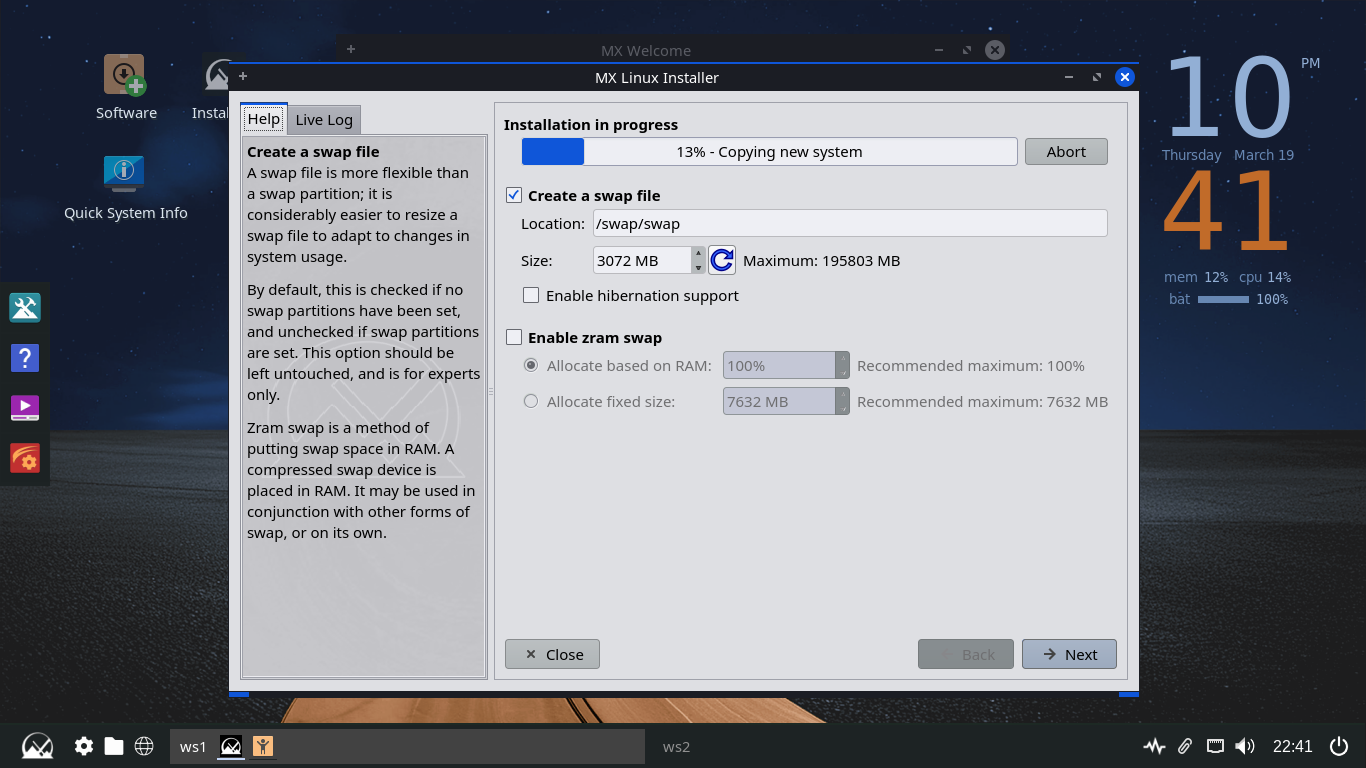
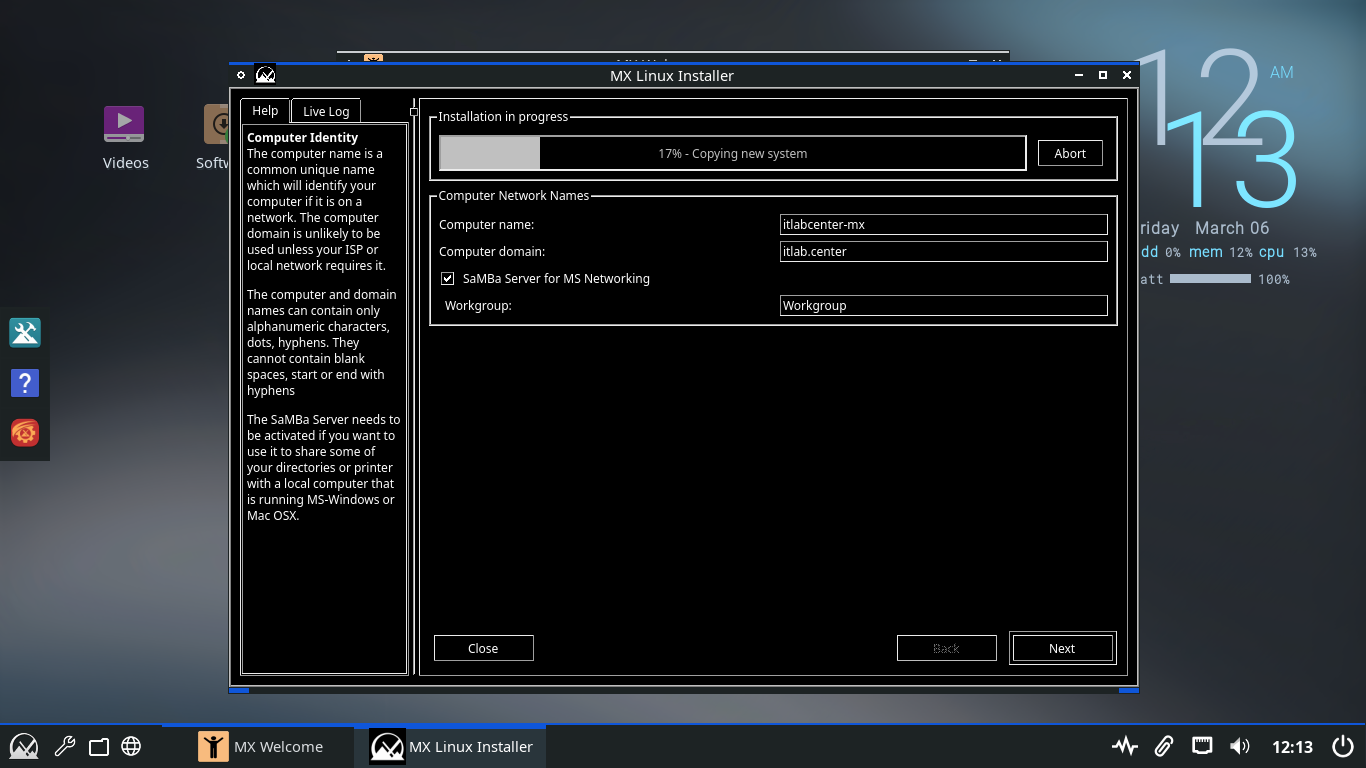
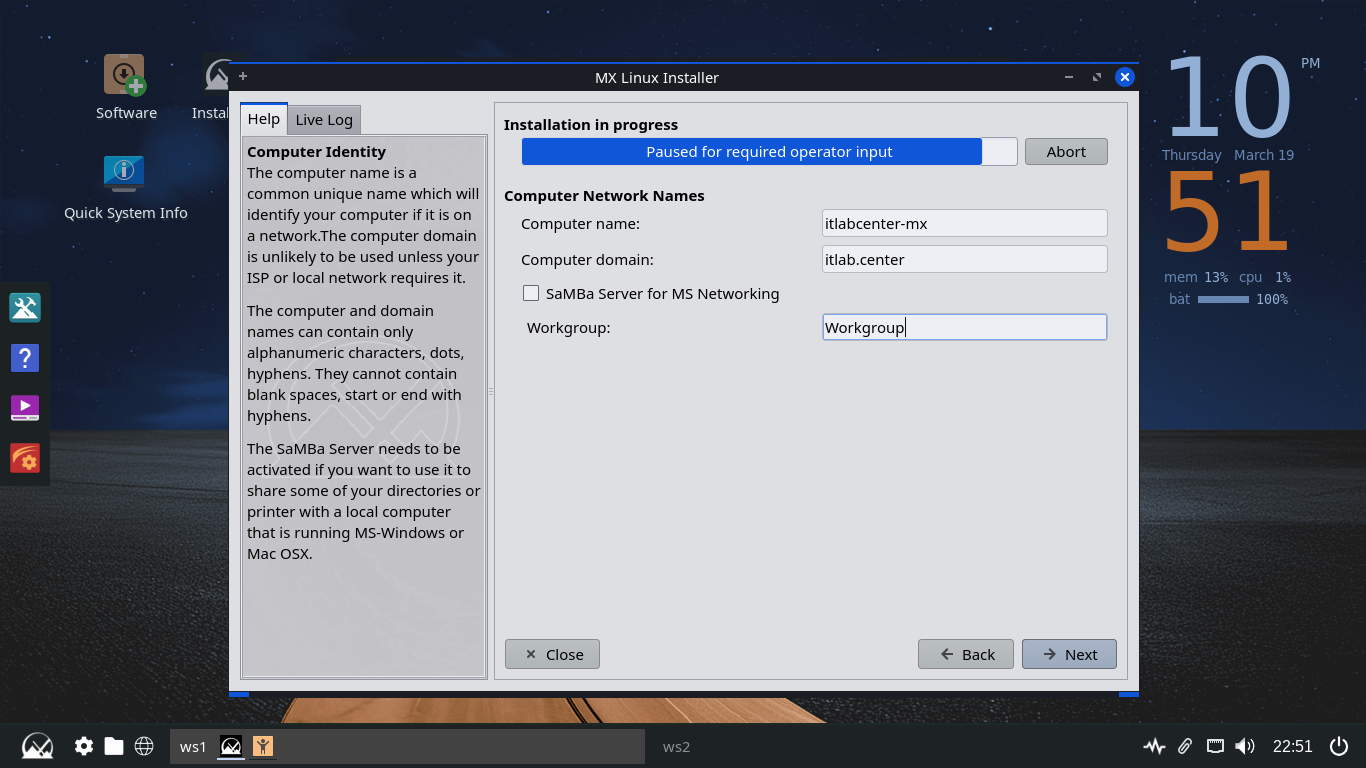
Click Next > then set the computer name and domain below. You can uncheck the option for the Samba Server
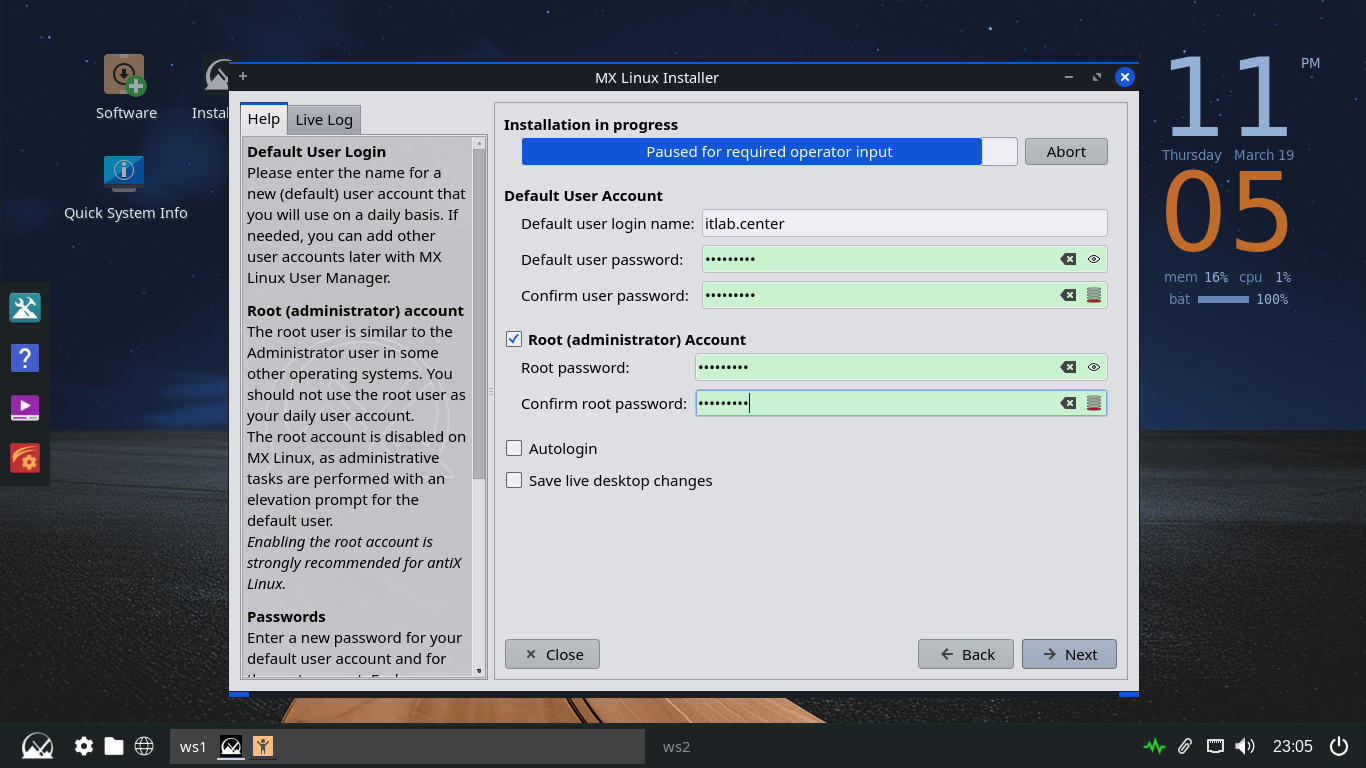
Click Next > Next > then set the username as itlab.center and set the user and root account passwords up
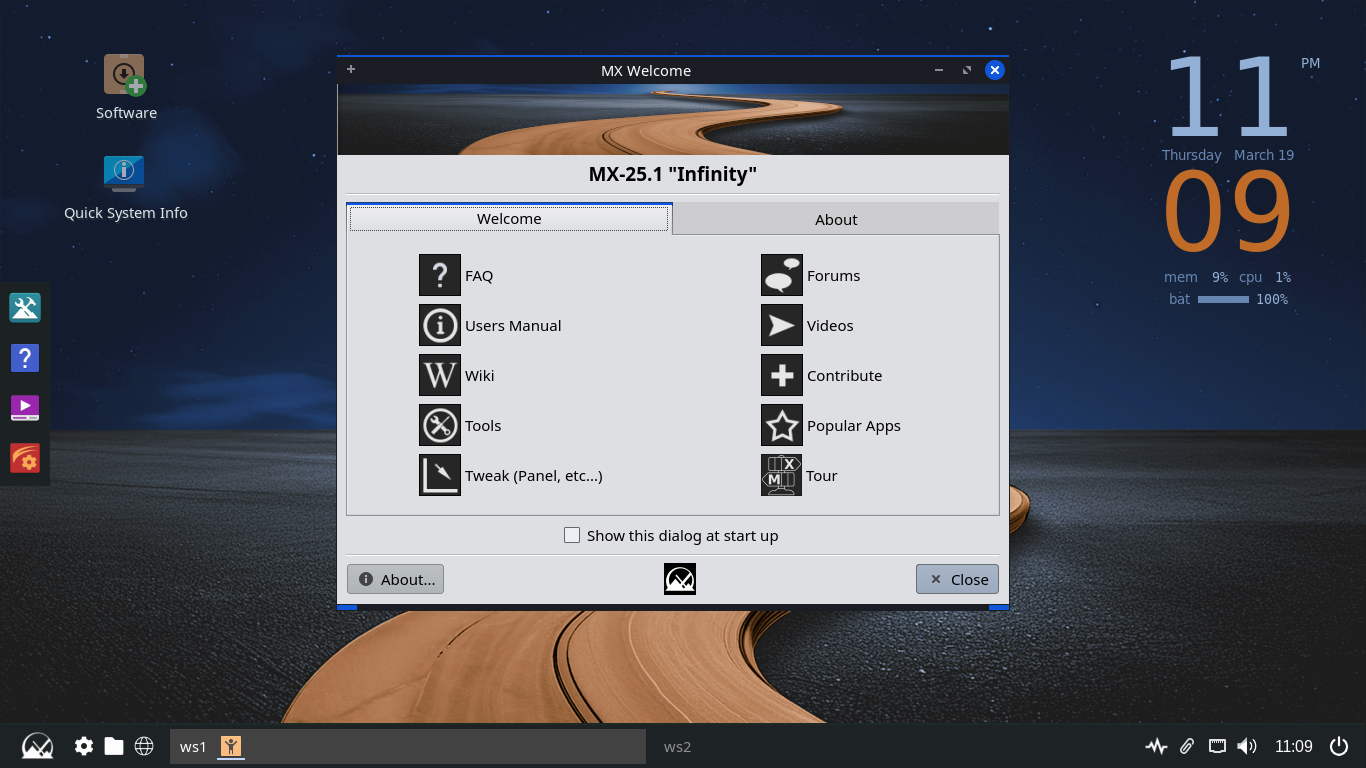
Now click Next > Next > Finish > MX 25.1 Infiniti and you will be taken to our newly installed Desktop
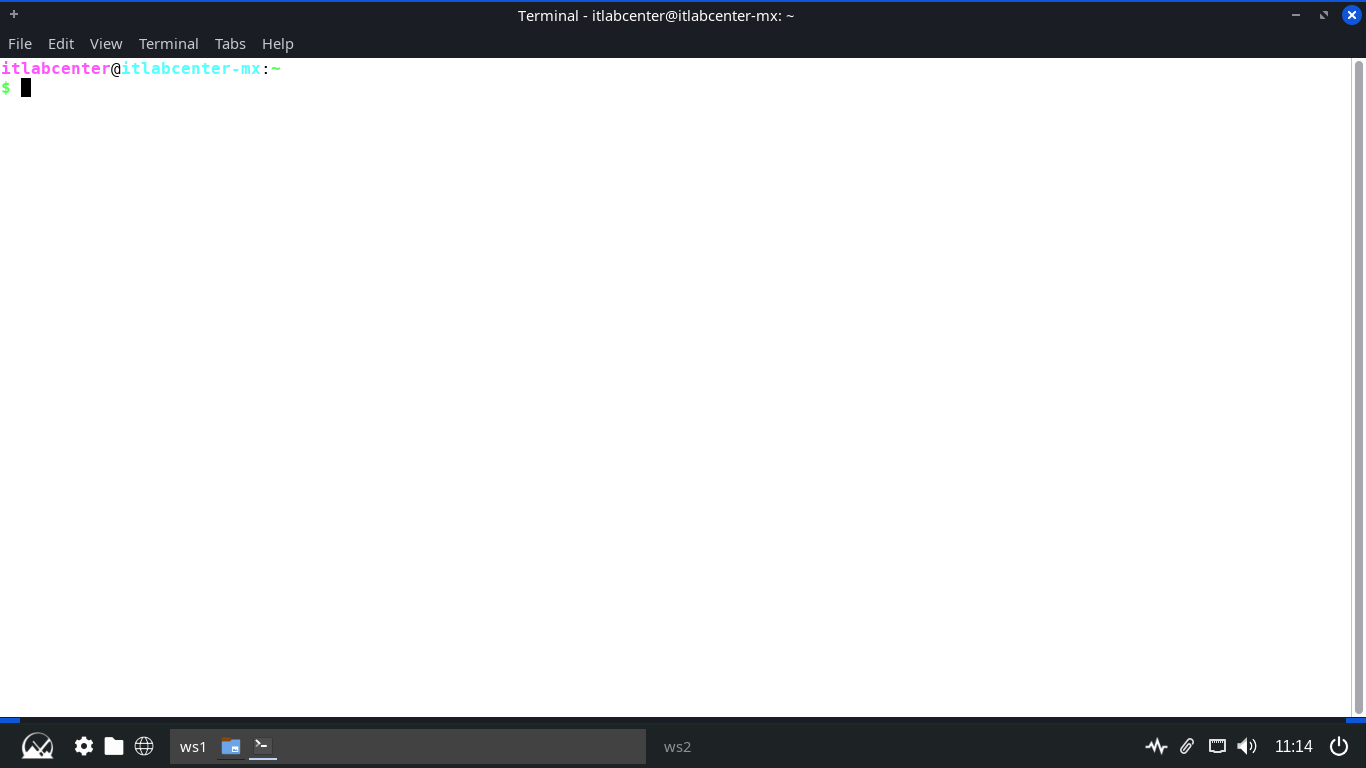
Click the MX Linux icon at the lower left and search for Terminal, then open the XFCE Terminal application
Our repository will be composed of an http server (NGINX) and a repository distrubution tool (reprepro)
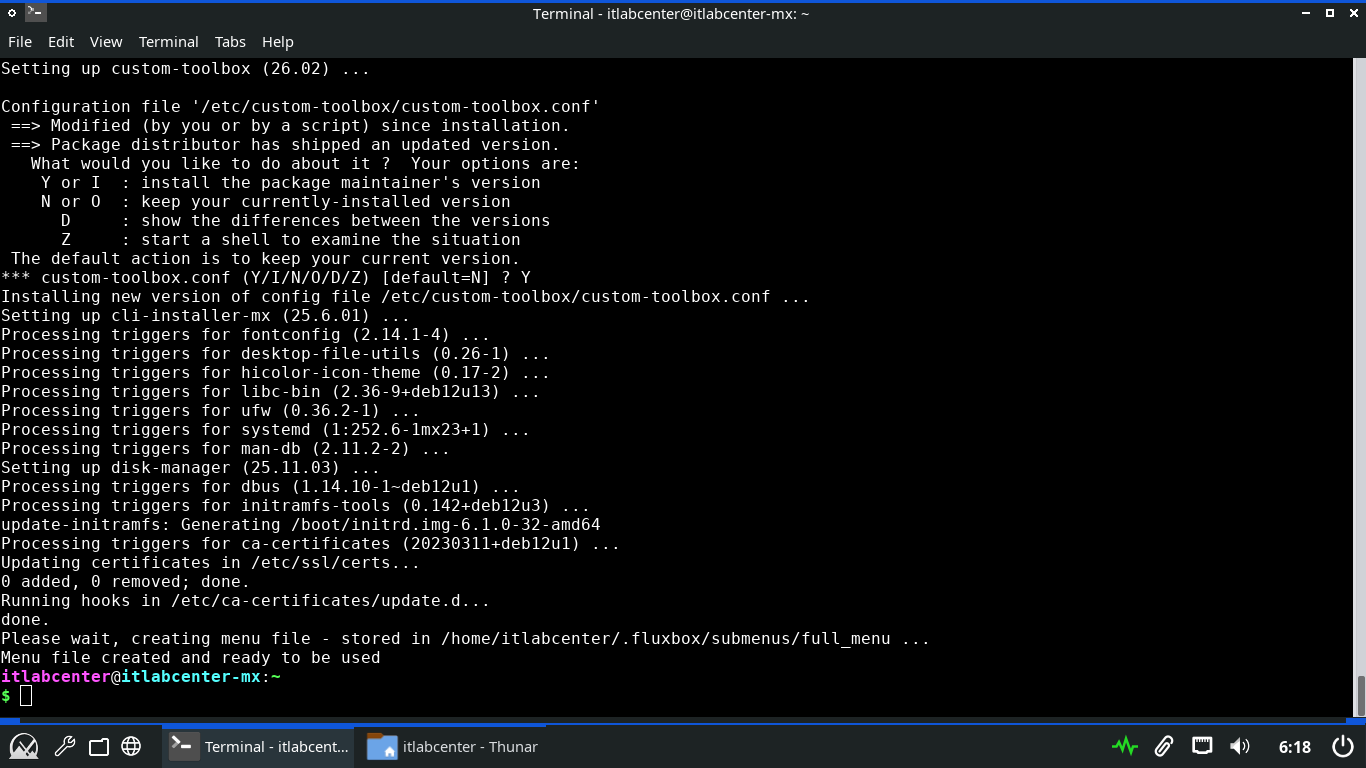
Run the following commands from the Repo Server Terminal to update the system packages and install tools
itlabcenter@itlabcenter-mx:~
$ sudo apt-get update -y
itlabcenter@itlabcenter-mx:~
$ sudo apt-get install reprepro gnupg2 nginx -y
Secure software distrubution in a Linux environment relies on GPG signatures. The client will use your
Public key to verify that the repository metadata hasn't been tampered with or had it's integrity broken
Run the following command from the Repo Server Terminal to begin the process of GPG key pair generation
itlabcenter@itlabcenter-mx:~
$ gpg --full-generate-key
Enter in the following options to generate a suitable and stron encryption key pair for this repository
• Key Type: RSA and RSA (1)
• Key Size: 4096
• Key Expiration: 0, y
• Real Name: Repo Admin
• Email Address: admin@itlab.center
• Comment: Enter, O
• Password: Password!23
Resulting Output:
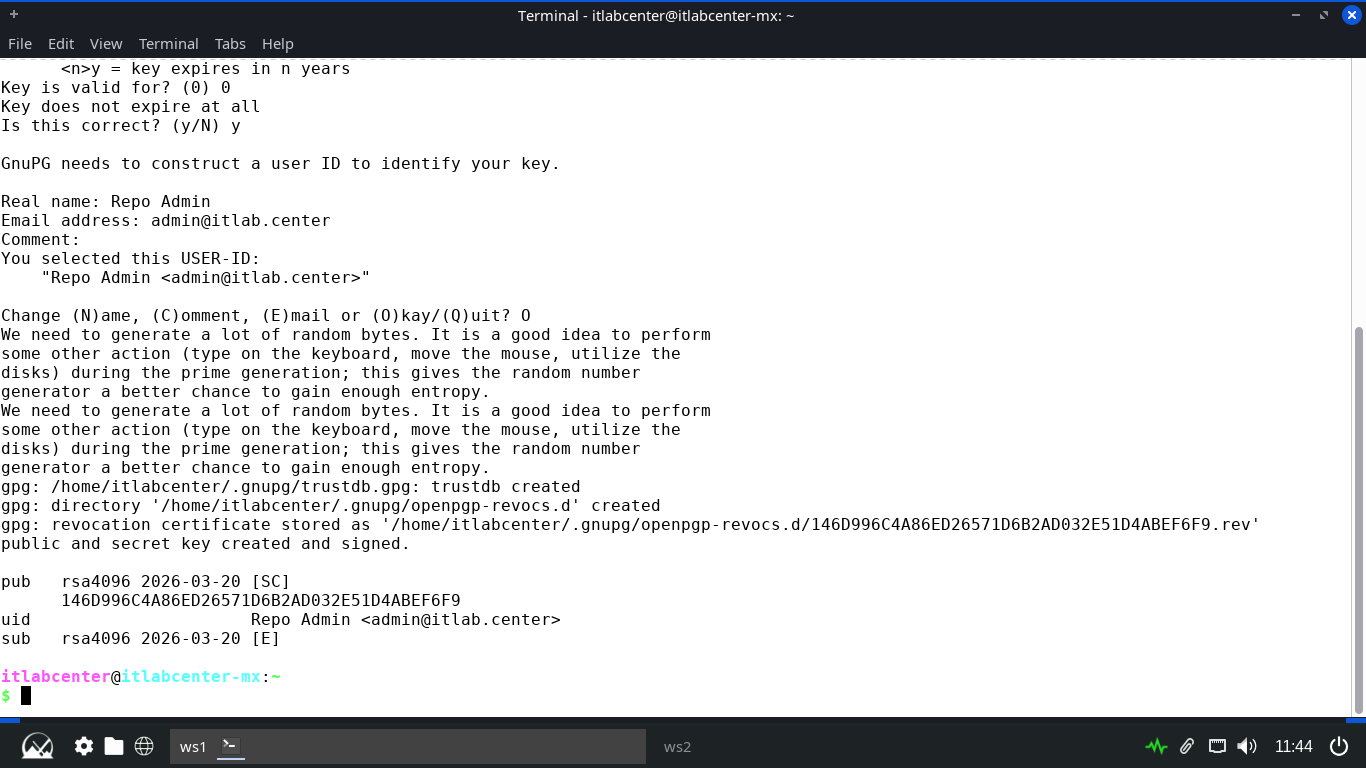
Note the line which starts with pub. The string thereafter is an identifyer, last 8 characters is the ID
Run the following commands from the Repo Server Terminal to create the directory structure for our repo
itlabcenter@itlabcenter-mx:~
$ sudo mkdir -p /var/www/html/repo/conf
itlabcenter@itlabcenter-mx:~
$ sudo chown -R $USER:$USER /var/www/html/repo
Next we must define the distribution settings so reprepro knows how to categorize our software packages
Run the following command from the Repo Server Terminal to create and edit our repository config file:
itlabcenter@itlabcenter-mx:~
$ sudo nano /var/www/html/repo/conf/distributions
Enter the following block to define our repo specifications, then hit CTRL+O to save and CTRL+X to exit
Origin: Itlab-Center-Repo
Label: MX-Local-Chrome
Suite: stable
Codename: bookworm
Architectures: amd64
Components: main
Description: Local APT Repository for Google Chrome
SignWith: KEYID
Run the following commands from the Repo Server Terminal to download Chrome and prepare for distribution
itlabcenter@itlabcenter-mx:~
$ wget https://dl.google.com/linux/direct/google-chrome-stable_current_amd64.deb
itlabcenter@itlabcenter-mx:~
$ cd /var/www/html/repo
itlabcenter@itlabcenter-mx:/var/www/html/repo
reprepro -b . includedeb bookworm ~/google-chrome-stable_current_amd64.deb
Run the following commands from the Repo Server Terminal to export the GPG key clients will use to verify
itlabcenter@itlabcenter-mx:~
$ gpg --armor --export KEYID > /var/www/html/repo/itlab-repo.gpg
itlabcenter@itlabcenter-mx:~
$ sudo chmod 644 /var/www/html/repo/itlab-repo.gpg
Lastly we must configure the NGINX web server to display the key and software files as an indexible option
Run the following command from the Repo Server Teminal to edit the default nginx server configuration file
itlabcenter@itlabcenter-mx:~
$ sudo nano /etc/nginx/sites-available/default
Erase what is there and type out the following server file below, hit CTRL+O to save and CTRL+X to exit
server {
listen 80;
listen [::]:80;
root /var/www/html;
index index.html;
server_name _;
location / {
try_files $uri $uri/ =404;
}
location /repo {
alias /var/www/html/repo;
autoindex on;
autoindex_exact_size off;
autoindex_localtime on;
}
}
Run the following commands from the Repo Server Terminal to reload NGINX and open port 80 on the firewall
itlabcenter@itlabcenter-mx:~
$ sudo systemctl reload nginx
itlabcenter@itlabcenter-mx:~
$ sudo ufw allow 80/tcp
The server is now broadcasting it's repository and key as available and the software is free to download
9. Install Google Chrome From APT Repository
Our configuration on the Server side is completed, now we can assume the role of the user and install it
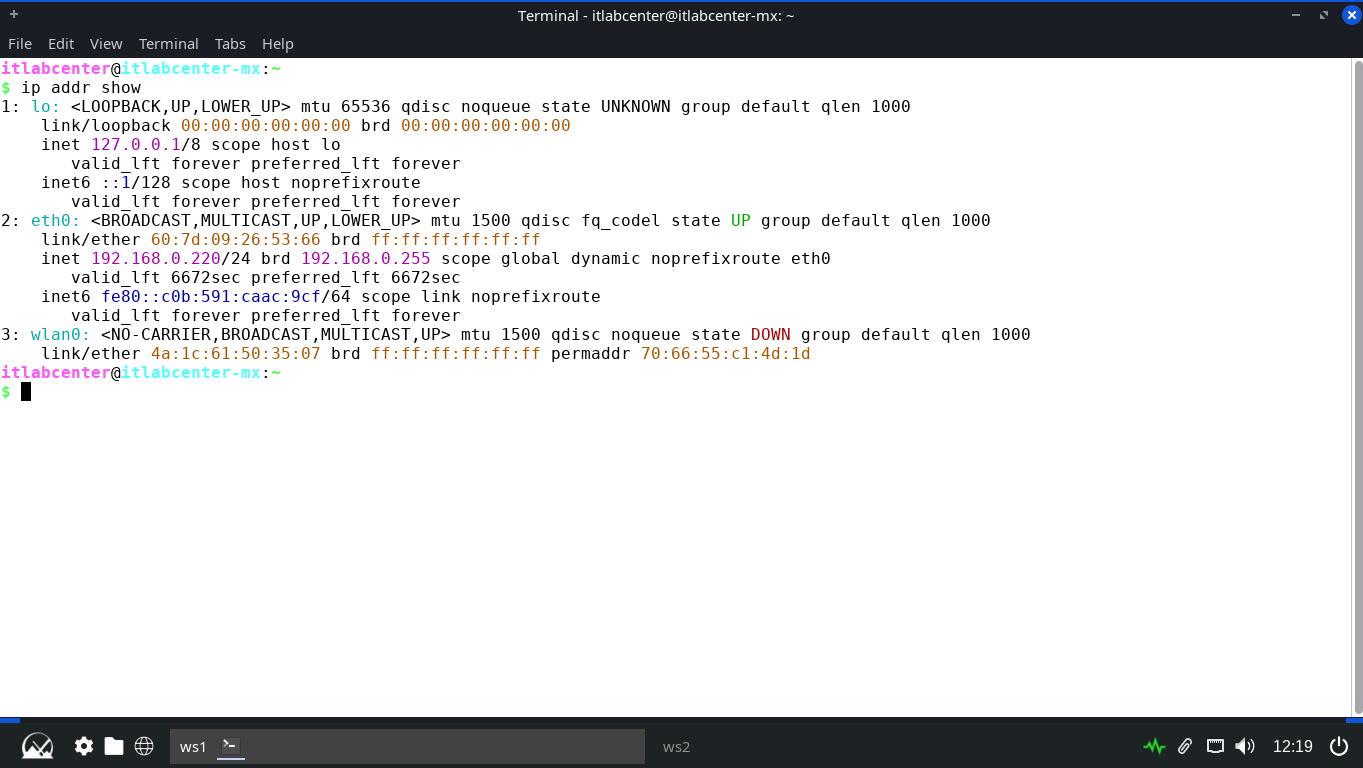
Run the following command from the Repo Server Terminal to display the local IP Address we will need to use
itlabcenter@itlabcenter-mx:~
$ ip addr show
Resulting Output:
On the target MX Linux Workstation, you must instruct APT to trust your server and add it to its sources
Run the following commands from the MX Endpoint Terminal to download and store the GPG key in the key ring
itlabcenter@itlabcenter-mx:~
sudo apt-get update && sudo apt-get install gnupg2 -y
itlabcenter@itlabcenter-mx:~
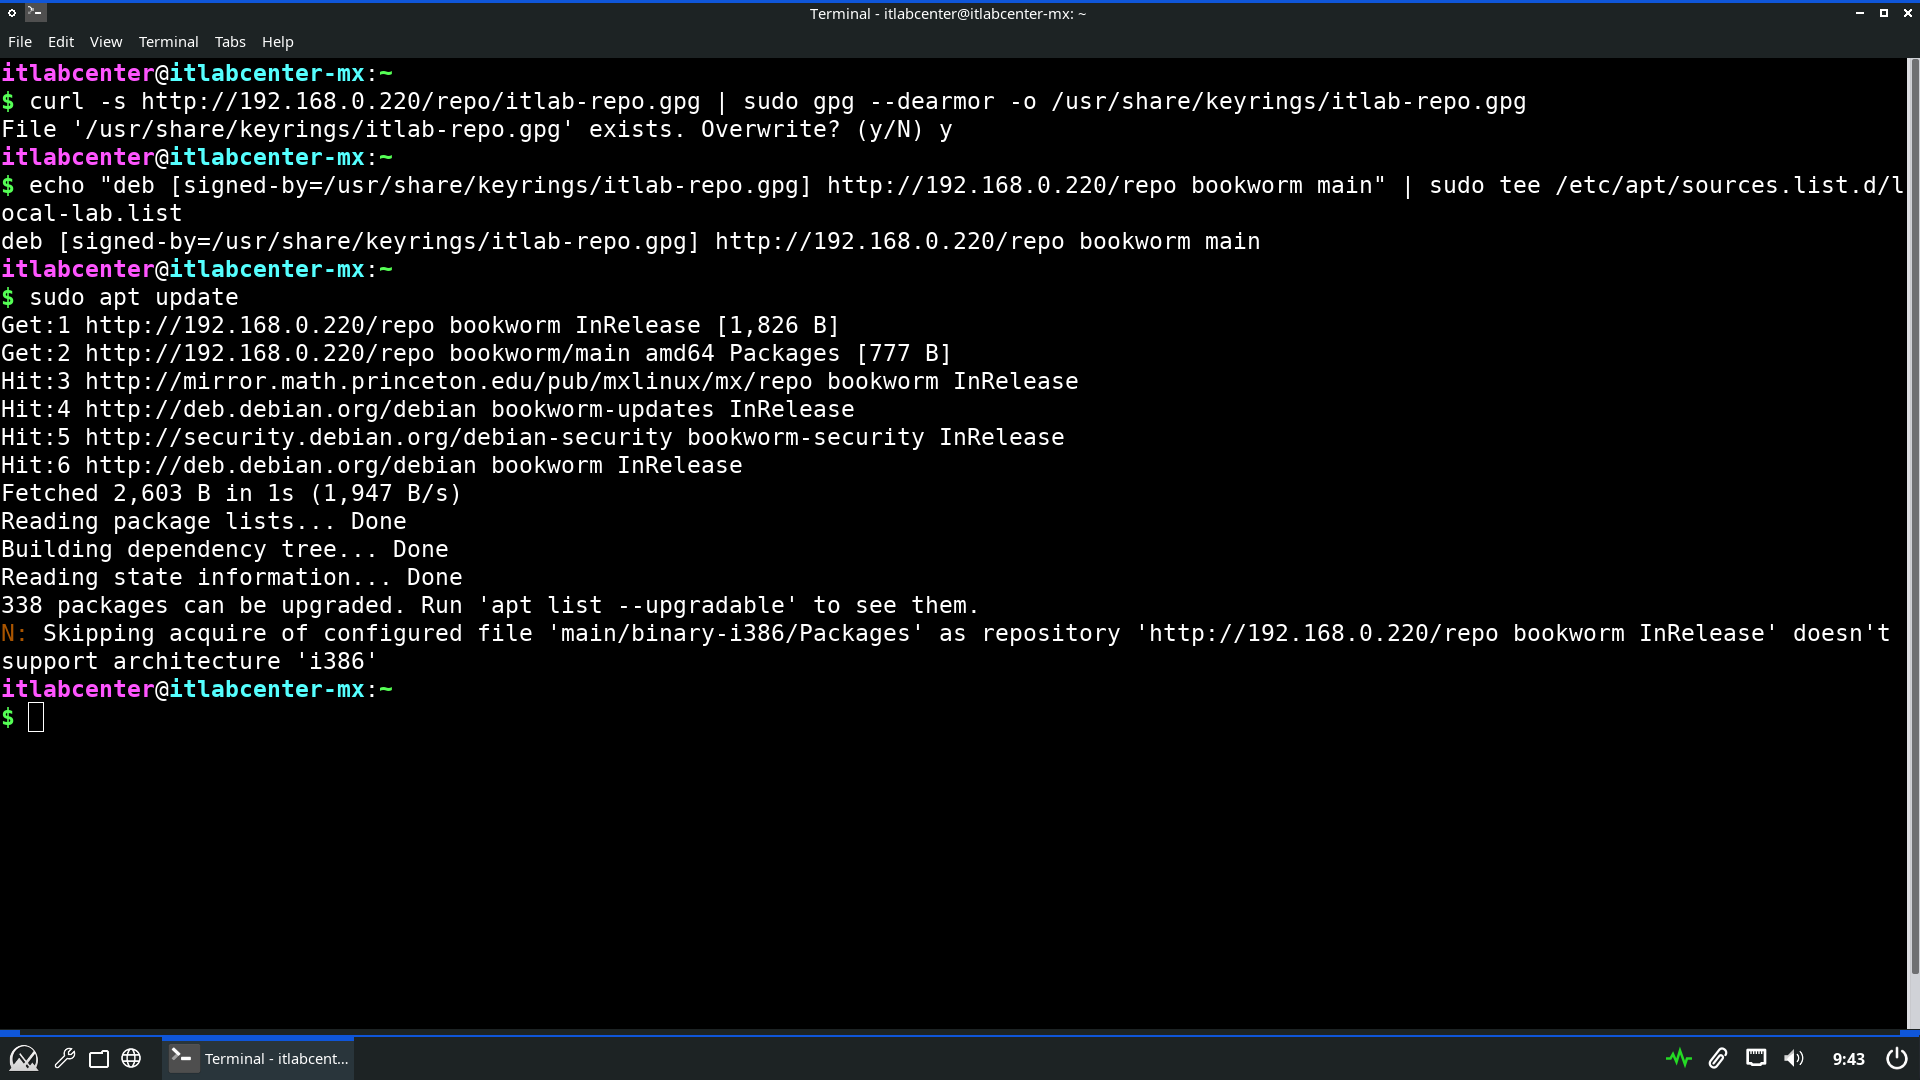
$ curl -s http://SERVERIP/repo/itlab-repo.gpg | sudo gpg --dearmor -o /usr/share/keyrings/itlab-repo.gpg
Run the following command from the MX Endpoint Terminal to add our repository as a source entry in the list
itlabcenter@itlabcenter-mx:~
$ echo "deb [signed-by=/usr/share/keyrings/itlab-repo.gpg] http://SERVERIP/repo bookworm main" | sudo tee /etc/apt/sources.list.d/local-lab.list
Run the following command from the MX Endpoint Terminal to update and diosplay the available repositories
itlabcenter@itlabcenter-mx:~
$ sudo apt update
Resulting Output:
Run the following command from the MX Endpoint Terminal to install the Google Chrome application securely
itlabcenter@itlabcenter-mx:~
$ auso apt-get install google-chrome-stable -y
Resulting Output:

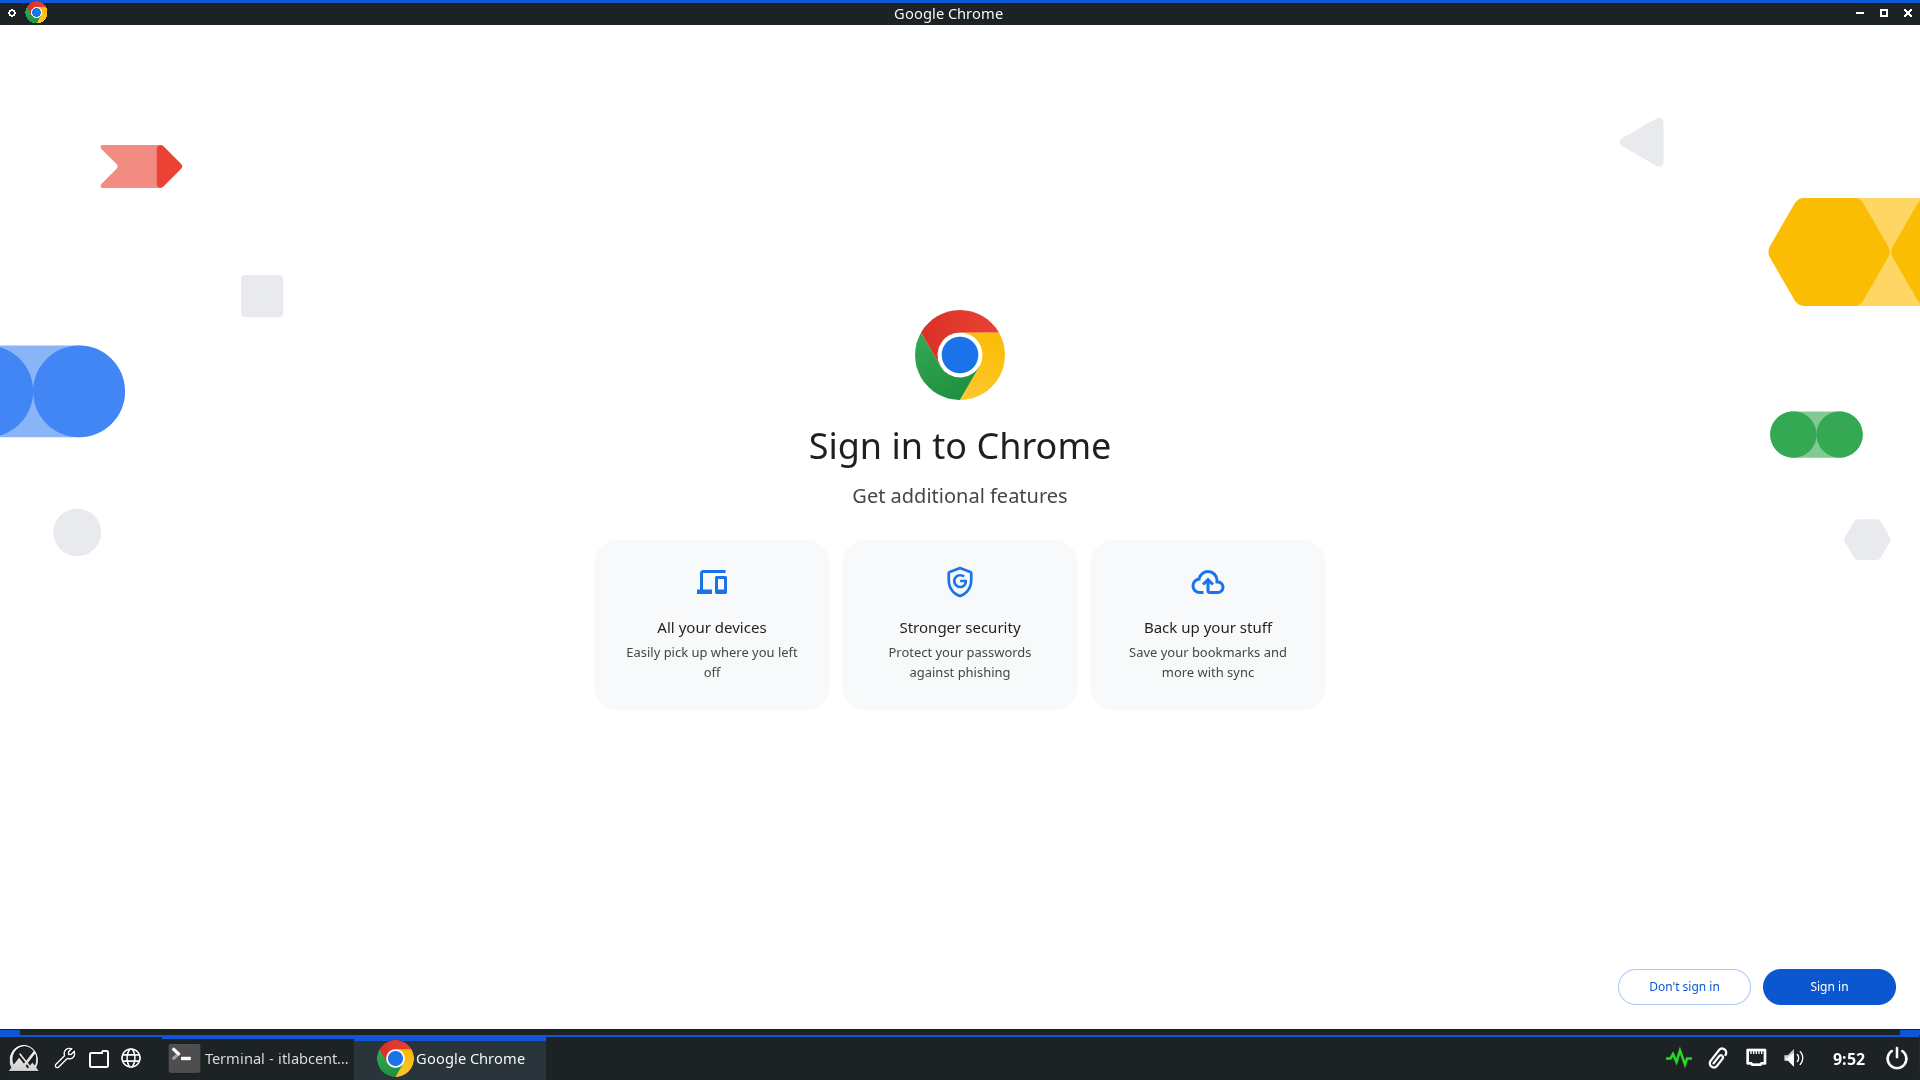
Run the following command from the MX Endpoint Terminal to launch the Google Chrome desktop application
itlabcenter@itlabcenter-mx:~
$ google-chrome
Resulting Output:
Nice work! The secure aspect of this distribution is handled by the public-private keyring Chain of Trust
When you run apt update, the client downloads the Release file and its signature (.gpg), giving Integrity
APT uses the key in /usr/share/keyrings/itlab-repo.gpg to verify that the Release file was signed by server
The Release file contains SHA-256 hashes of the Packages index, which in turn contains the hash of the .deb
10. Deploy a Docker Container
Docker is a container deployment tool which allows you to create custom systems by using containerization
This is very similar to virtualization, expect that containers share a kernel, giving them higher density
Docker has a very large presence and widespread use when it comes to software developement and deployment
Because of this it is very important that we review the specifics involved in patching a Docker container
Run the following command from the MX Linux Terminal to install the Docker tool and the various plugins
itlabcenter@itlabcenter-mx:~
$ sudo apt-get install ca-certificates curl -y
itlabcenter@itlabcenter-mx:~
$ sudo install -m 0755 -d /etc/apt/keyrings
itlabcenter@itlabcenter-mx:~
$ sudo curl -fsSL https://download.docker.com/linux/debian/gpg -o /etc/apt/keyrings/docker.asc
itlabcenter@itlabcenter-mx:~
$ sudo chmod a+r /etc/apt/keyrings/docker.asc
itlabcenter@itlabcenter-mx:~
$ sudo tee /etc/apt/sources.list.d/docker.sources <<EOF
> Types: deb
> URIs: https://download.docker.com/linux/debian
> Suites: $(. /etc/os-release && echo "$VERSION_CODENAME")
> Components: stable
> Signed-By: /etc/apt/keyrings/docker.asc
> EOF
itlabcenter@itlabcenter-mx:~
$ sudo apt-get update
itlabcenter@itlabcenter-mx:~
$ sudo apt-get install docker-ce docker-ce-cli containerd.io docker-buildx-plugin docker-compose-plugin -y
Run the following command from the MX Linux Terminal to enable the docker service reboot the Linux system
itlabcenter@itlabcenter-mx:~
$ sudo update-rc.d docker defaults
itlabcenter@itlabcenter-mx:~
$ sudo reboot
Docker does not play well with the default init system for MX Linux which is SySVInit, we need systemd
At the bootloader, user the arrow keys to navigate to advanced options for MX 23.6 and select the systemd
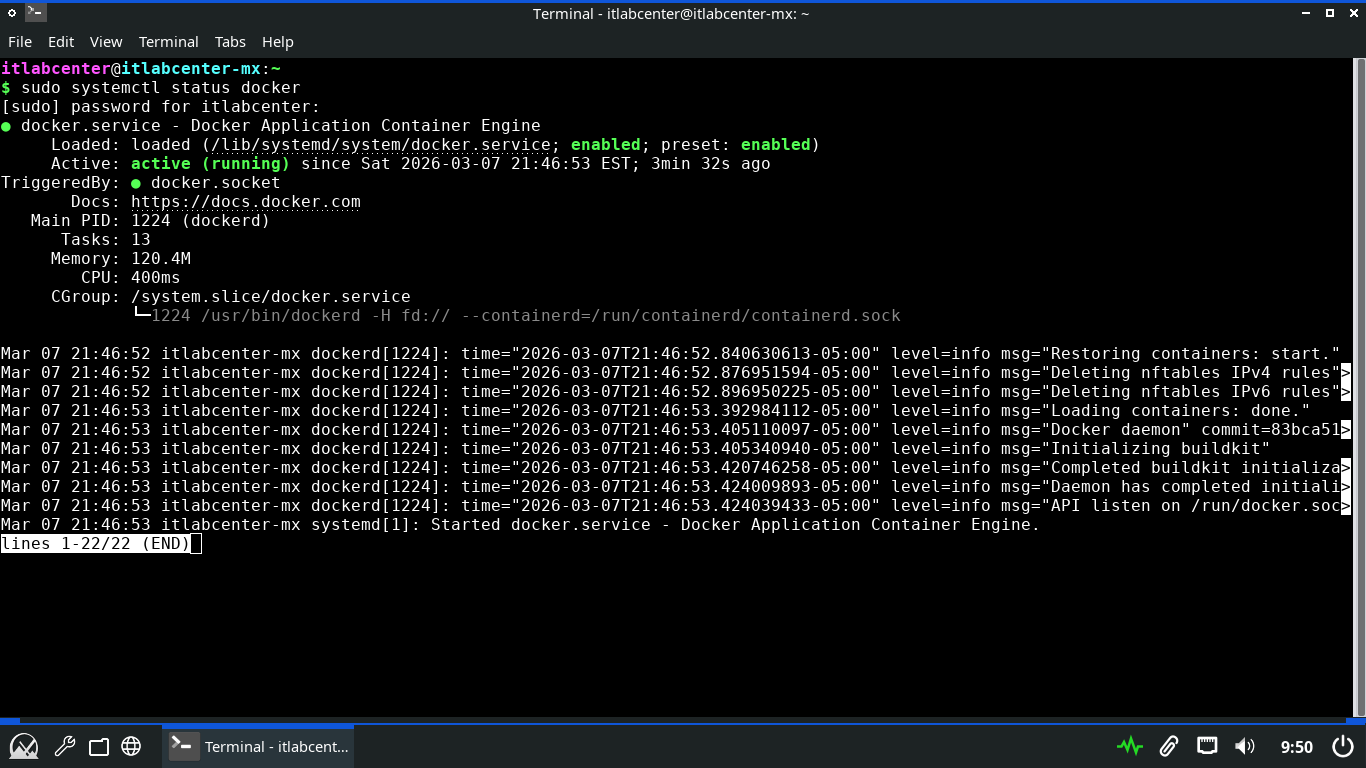
Run the following command from the MX Linux Terminal to check on and display the status of the service
itlabcenter@itlabcenter-mx:~
$ sudo systemctl status docker
Resulting Output:
Now that we have the service running and the tools installed, it is time for us to build our containers
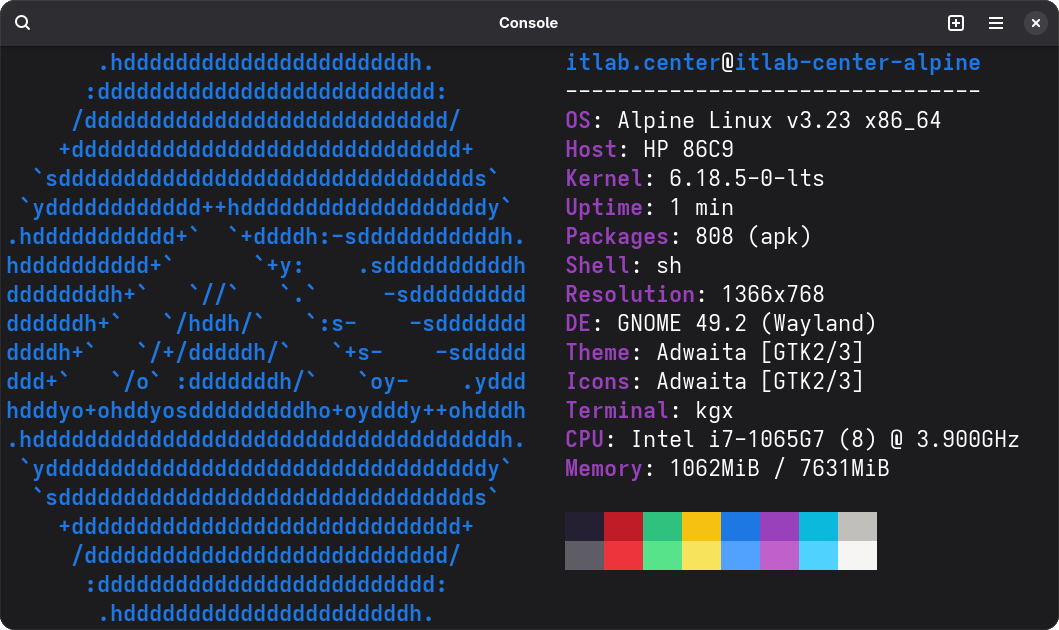
Alpine Linux is a lightweight distribution of Linux which is small and resource efficient as a container
Run the following command from the MX Linux Terminal to create and begin editing our container Dockerfile
itlabcenter@itlabcenter-mx:~
$ nano Dockerfile-Alpine
Our Host device will run Alpine Linux as the OS and include networking testing tools, type this out below:
FROM alpine:3.12
RUN apk update && apk add --no-cache xvfb x11vnc fluxbox xterm bash iproute2
ENV DISPLAY=:0
RUN echo "#!/bin/sh" > /start.sh && \
echo "rm -f /tmp/.X0-lock" >> /start.sh && \
echo "Xvfb :0 -screen 0 1024x768x24 -ac &" >> /start.sh && \
echo "sleep 2" >> /start.sh && \
echo "x11vnc -display :0 -forever -nopw -listen 0.0.0.0 &" >> /start.sh && \
echo "xterm -geometry 73x23+0+0 -bg '#000000' -fg '#00eeee' -fa 'Monospace' -fs 16 -cr '#00eeee' -bc -hold -e /bin/bash" >> /start.sh && \
echo "export PS1='root@itlabcenter-docker:\w\& '" >> /start.sh && \
chmod +x /start.sh
EXPOSE 5900
ENTRYPOINT ["/start.sh"]
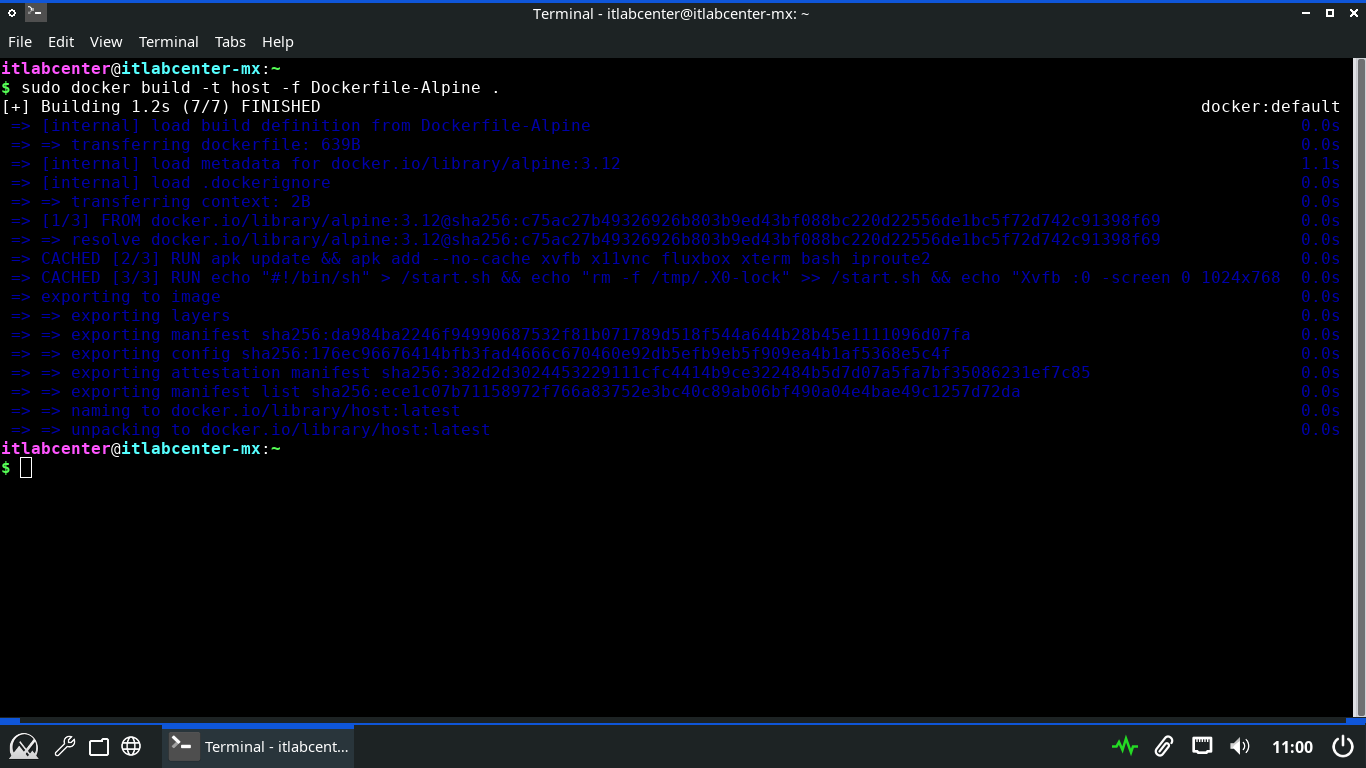
Run the following commands from the MX Linux Terminal to build the Docker containers with our Dockerfile:
itlabcenter@itlabcenter-mx:~
$ sudo docker build -t host -f Dockerfile-Alpine .
Resulting Output:
Run the following command from the MX Linux Terminal to launch the container and connect to the VNC server
itlabcenter@itlabcenter-mx:~
$ sudo docker run -d -p 5900:5900 --name host host
itlabcenter@itlabcenter-mx:~
$ sudo apt-get install tigervnc-viewer -y
itlabcenter@itlabcenter-mx:~
$ vncviewer localhost:5900
Resulting Output:
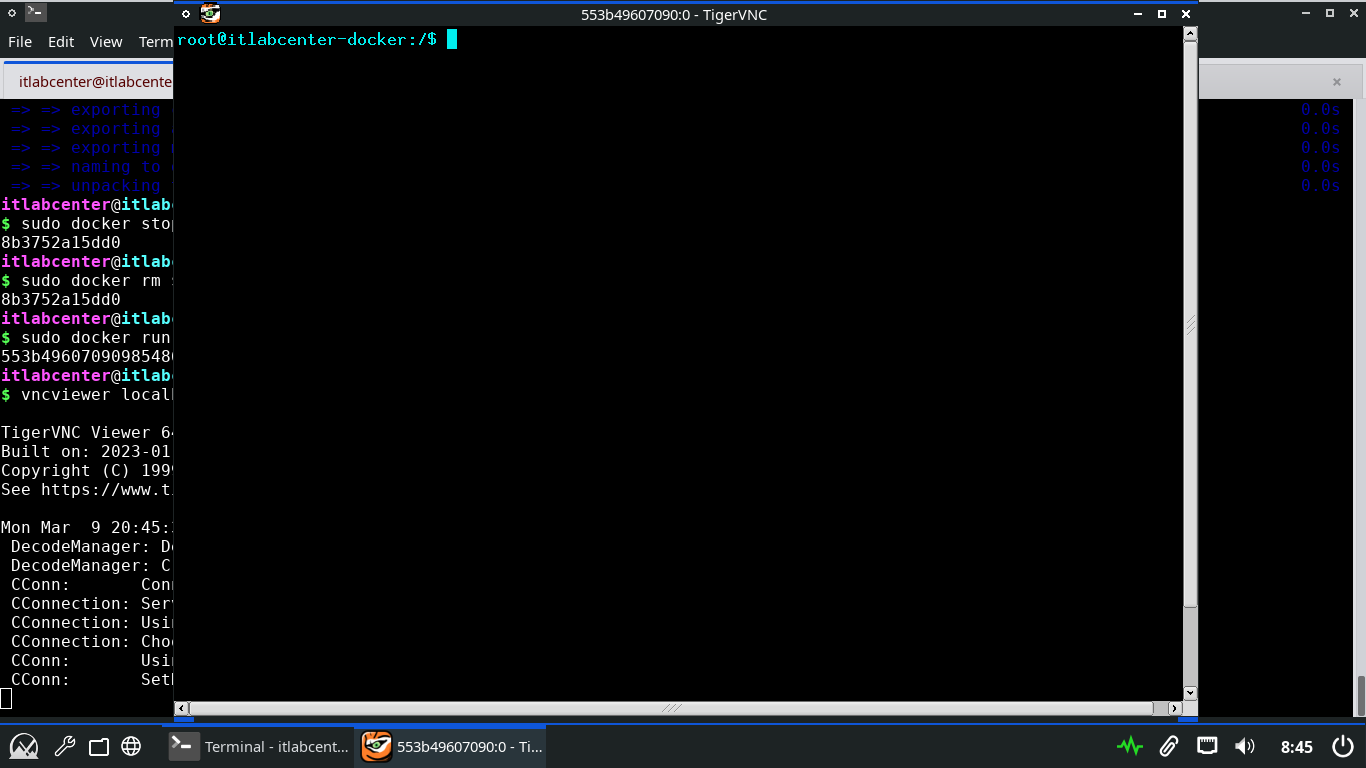
We now have a fully containerized alpine linux system, which behaves exactly as a bare metal install would
11. Patch a Docker Image
Our container is now live, similar to an actual linux system, we can upgrade packages from the terminal
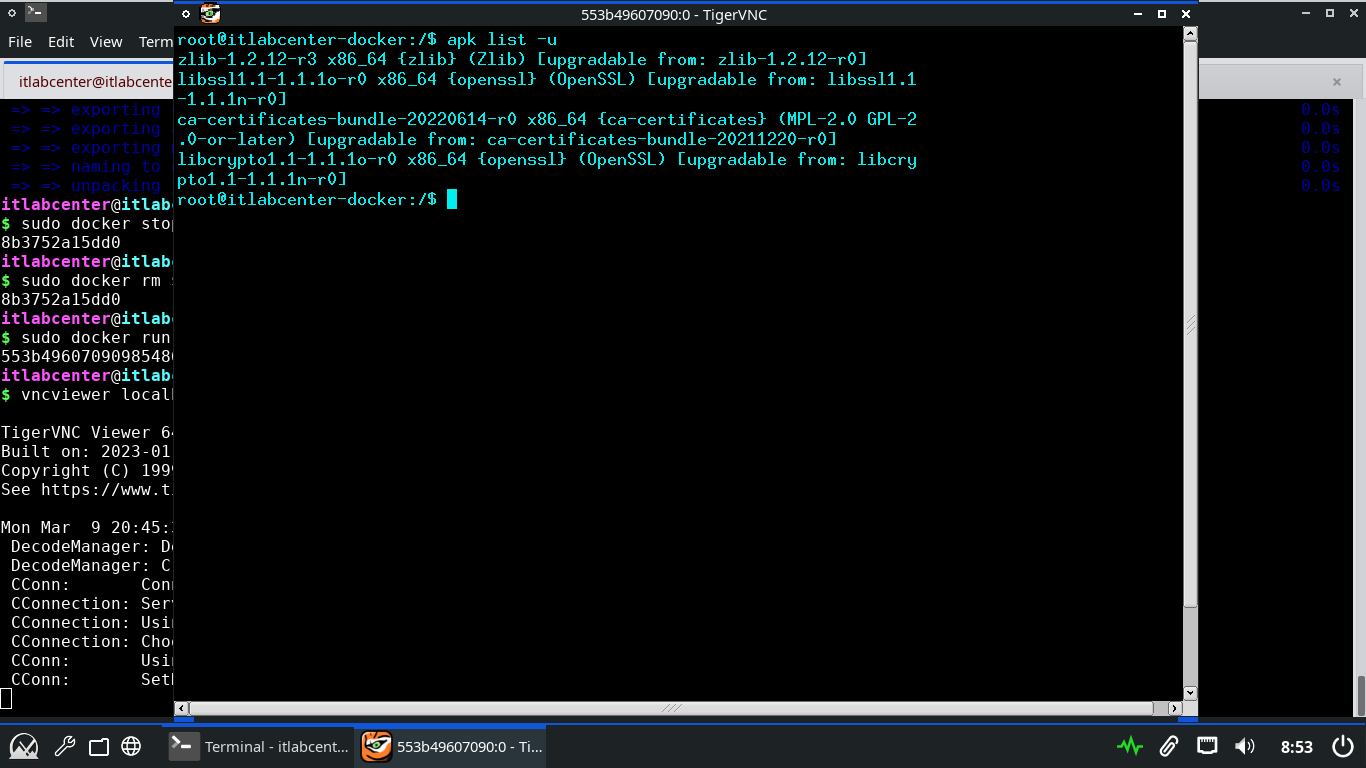
Run the following command from the Alpine Docker Container to list the available upgrades for the system
root@itlabcenter-docker:/$ apk list -u
Resulting Output:
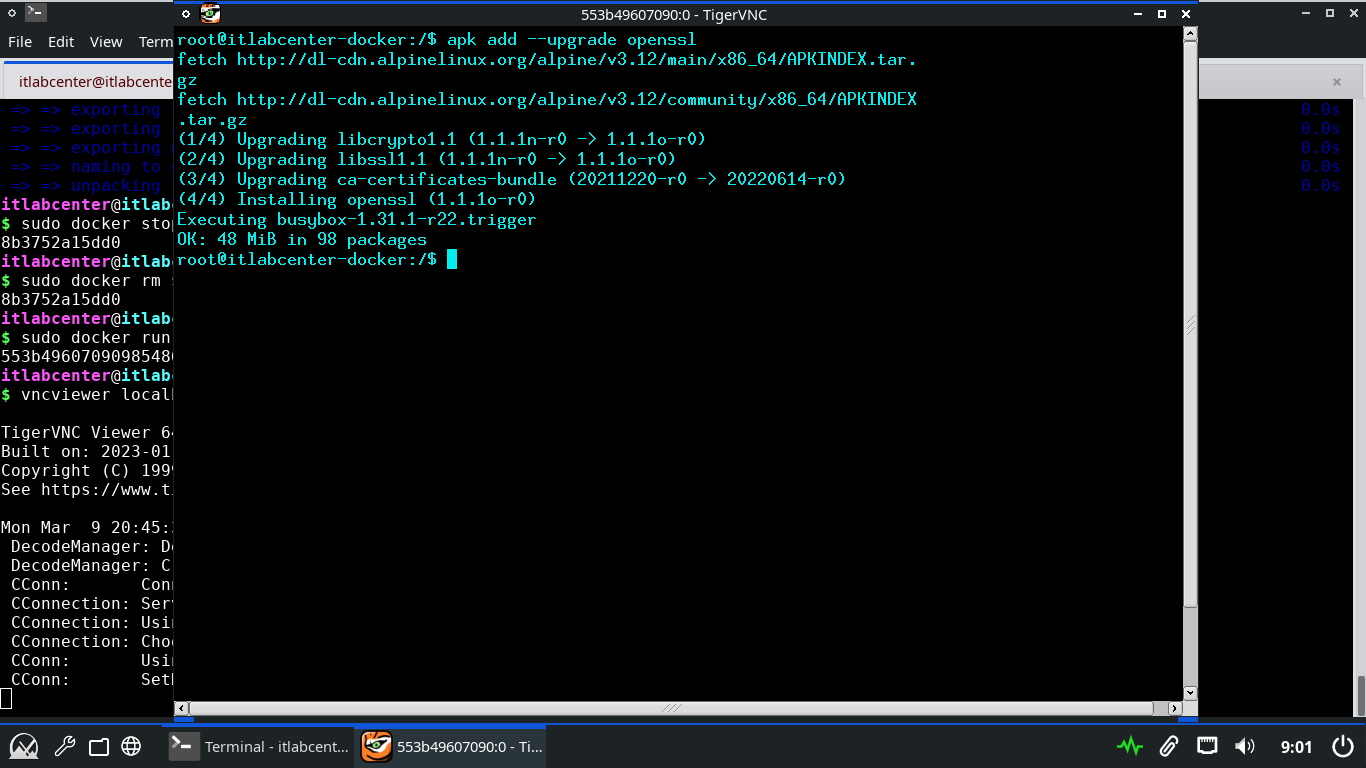
Run the following command from the Alpine Docker Container to upgrade a specifically named system package
root@itlabcenter-docker:/$ apk add --upgrade openssl
Resulting Output:
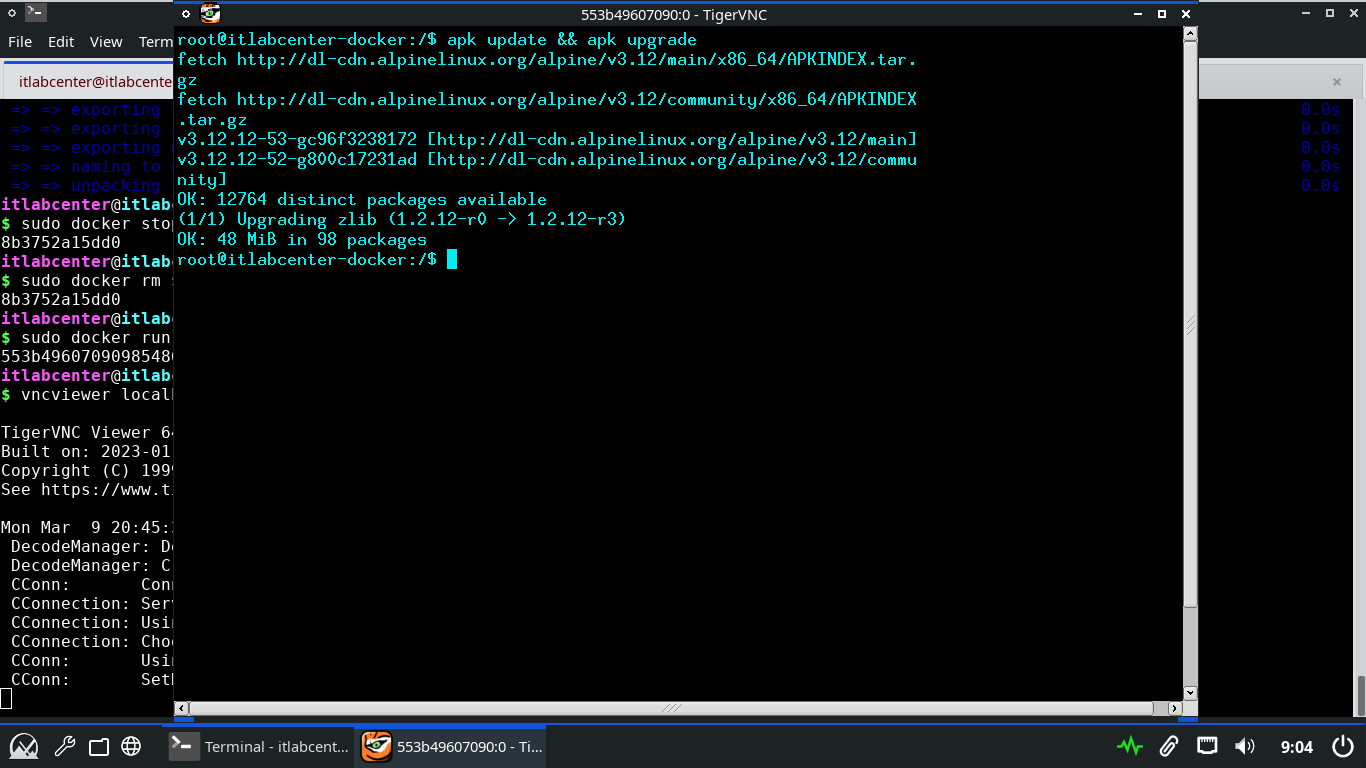
Run the following command from the Alpine Docker Container to upgrade all the available packages at once
root@itlabcenter-docker:/$ apk update && apk upgrade
Resulting Output:
This is great and all, but we are still merely performing OS level patching of the systems package tools
When using docker, it is very common to use pre-compiled container images which have their own patching
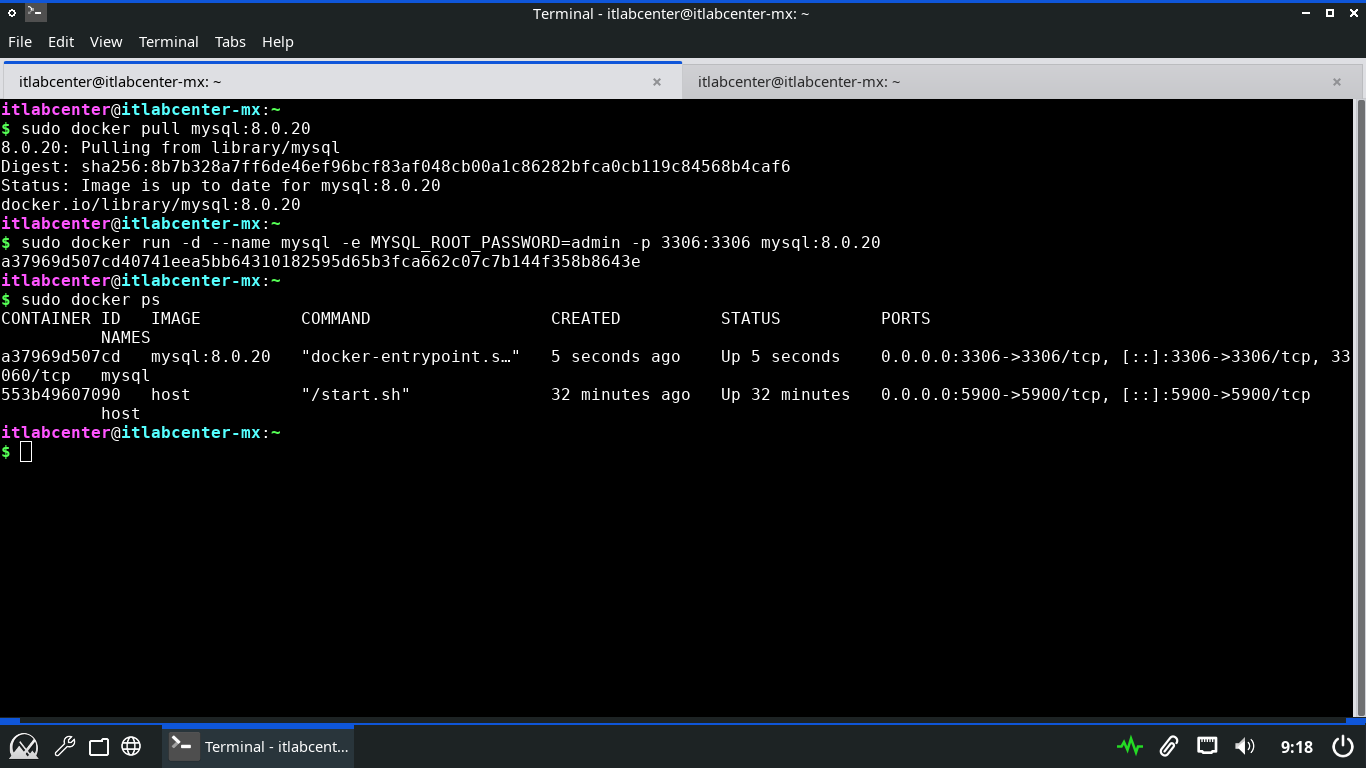
Run the following commands from the MX Linux Terminal to pull an upatched MySQL container and launch it
itlabcenter@itlabcenter-mx:~
$ sudo docker pull mysql:8.0.20
itlabcenter@itlabcenter-mx:~
$ sudo docker run -d --name mysql -e MYSQL_ROOT_PASSWORD=admin -p 3306:3306 mysql:8.0.20
itlabcenter@itlabcenter-mx:~
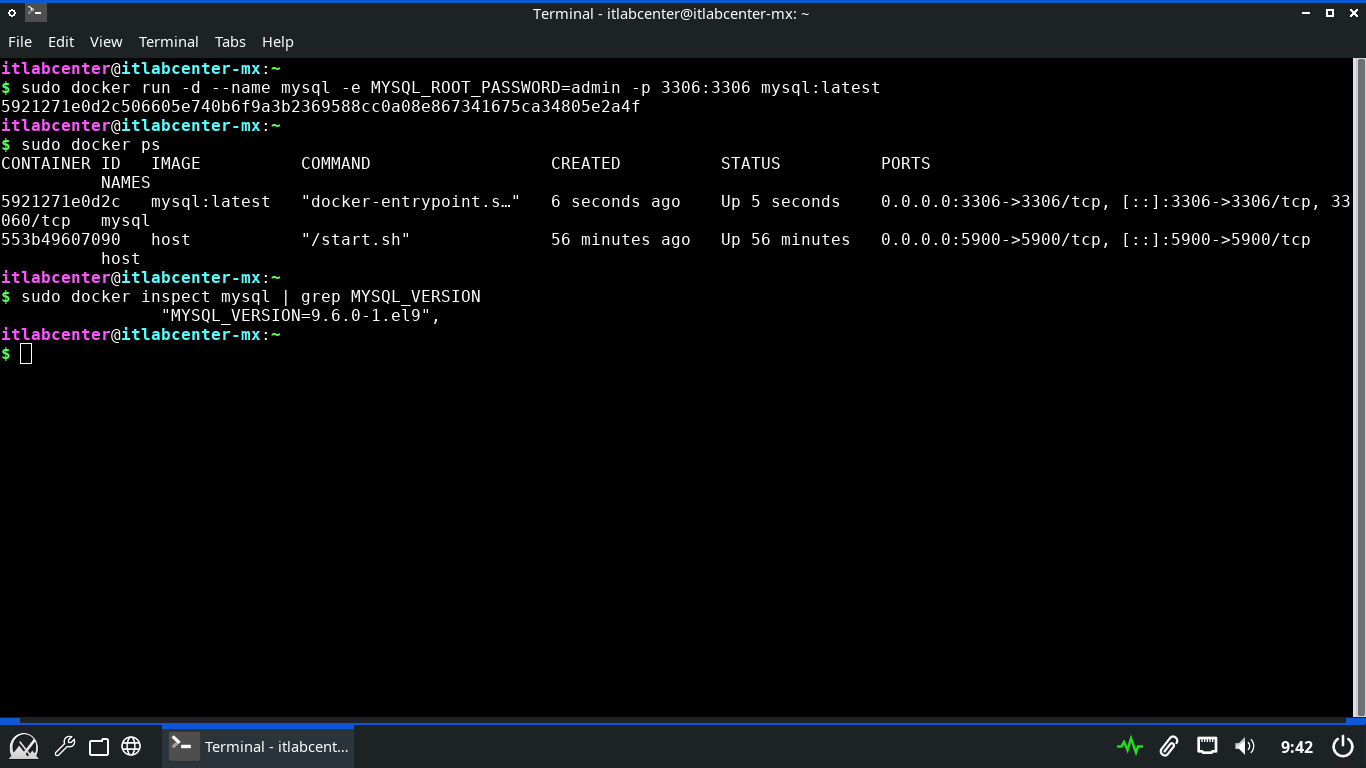
$ sudo docker ps
Resulting Output:
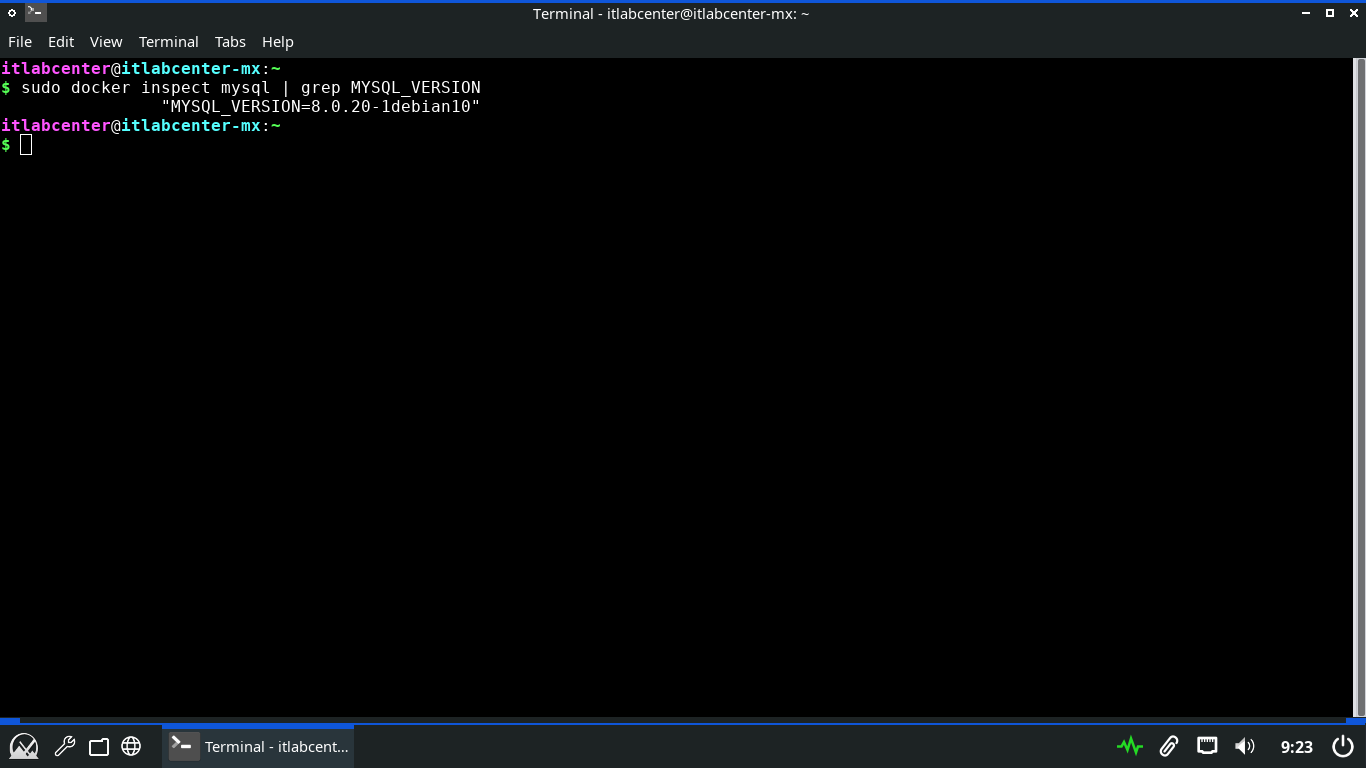
Run the following command from the MX Linux Terminal to validate the version of mysql docker is running
itlabcenter@itlabcenter-mx:~
$ sudo docker inspect mysql | grep MYSQL_VERSION
Resulting Output:
Run the following commands from the MX Linux Terminal to stop the container and patch the containers image
itlabcenter@itlabcenter-mx:~
$ sudo docker stop mysql
itlabcenter@itlabcenter-mx:~
$ sudo docker rm mysql
itlabcenter@itlabcenter-mx:~
$ sudo docker pull mysql
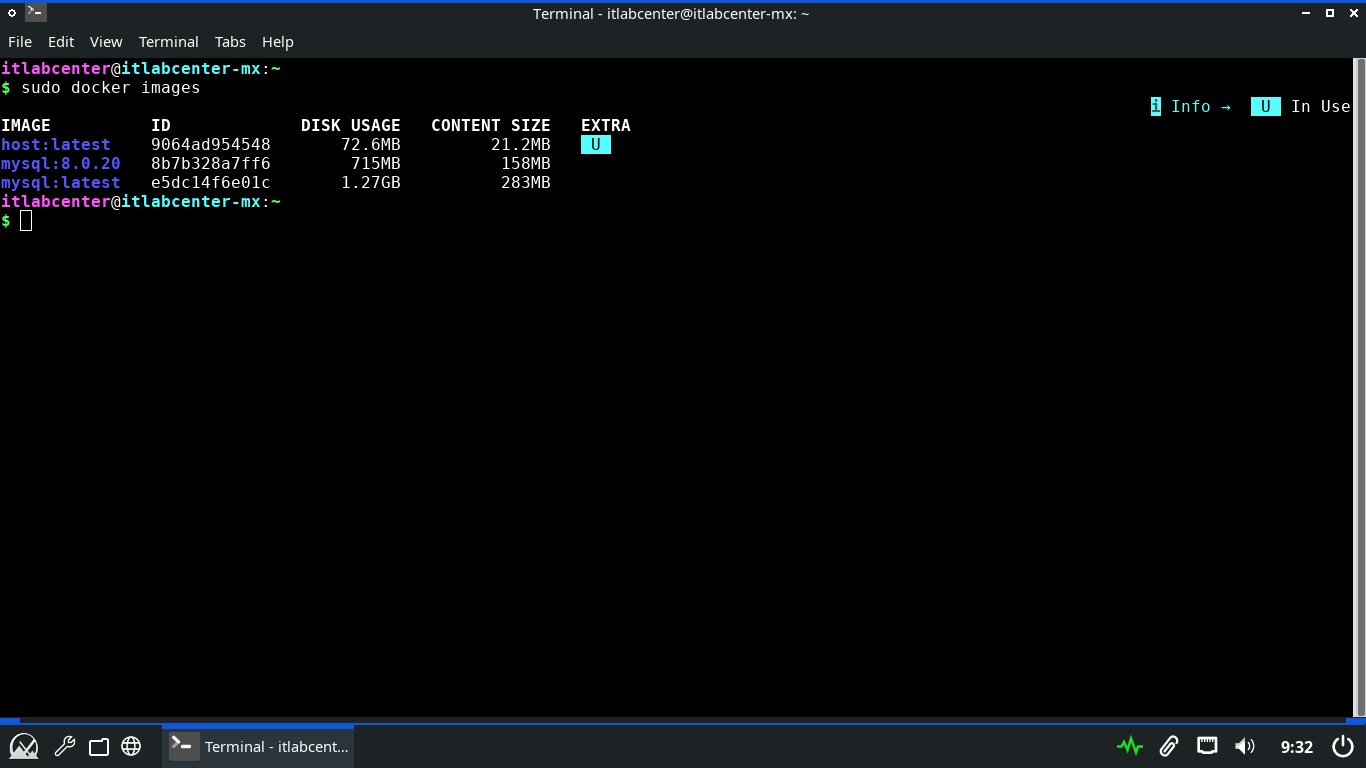
Run the following command from the MX Linux Terminal to list all of the available docker container images
itlabcenter@itlabcenter-mx:~
$ sudo docker images
Resulting Output:
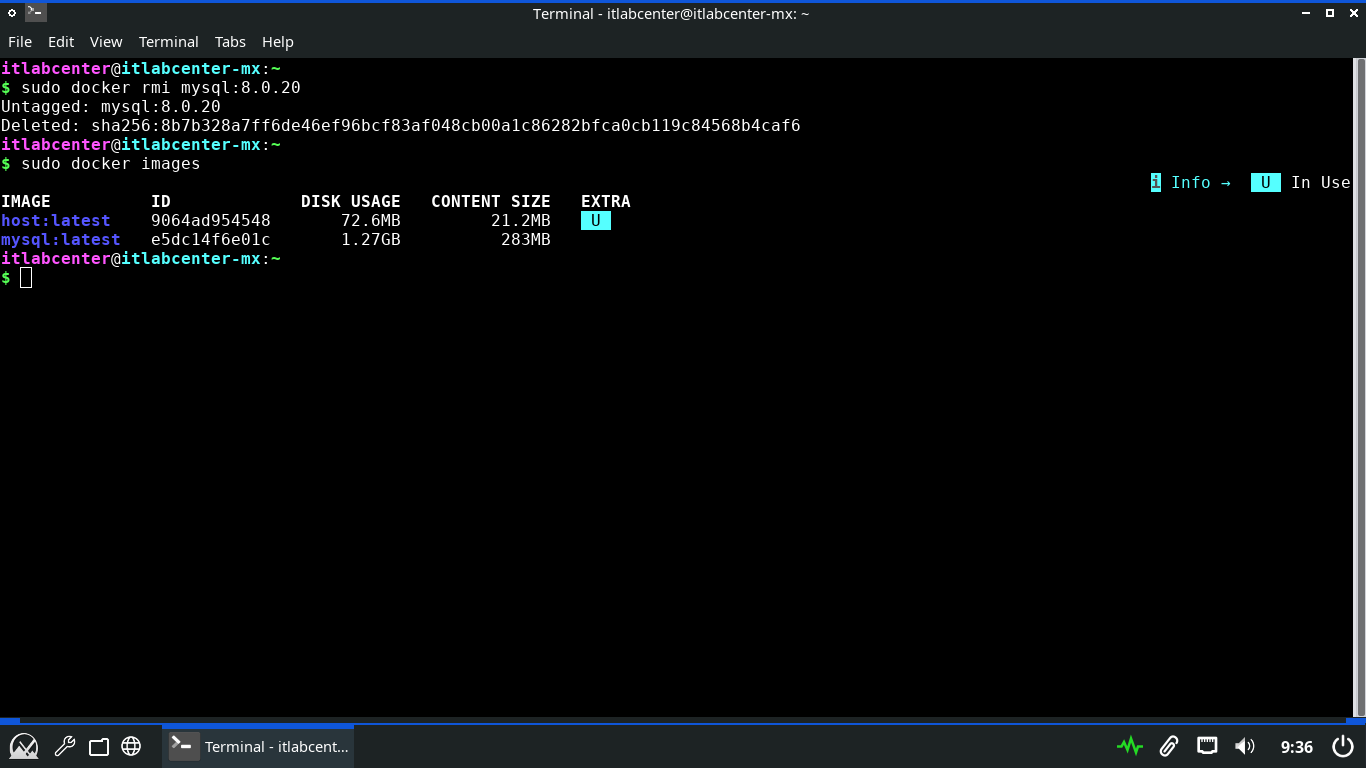
Run the following commands from the MX Linux Terminal to remove the out of date image and re-list images
itlabcenter@itlabcenter-mx:~
$ sudo docker rmi mysql:8.0.20
itlabcenter@itlabcenter-mx:~
$ sudo docker images
Resulting Output:
Run the following commands from the MX Linux Terminal to restart the container and inspect it's version
itlabcenter@itlabcenter-mx:~
$ sudo docker run -d --name mysql -e MYSQL_ROOT_PASSWORD=admin -p 3306:3306 mysql:latest
itlabcenter@itlabcenter-mx:~
$ sudo docker ps
itlabcenter@itlabcenter-mx:~
$ sudo docker inspect mysql | grep MYSQL_VERSION
Resulting Output:
Nice work, you have successfully updated not only the systems packages, but the container image itself
12. Configure a Private Docker Registry
We have already utilized APT to demonstrate secure software distribution on Linux at the package level
Docker allows us to demonstrate secure distribution ath the image level, in a containerized environment
Secure distribution here means ensuring that the image being run is exactly the one the developer built
We will build upon our NGINX experience by setting up a Private Docker Registry for both pushing software
Run the following commands from the Repo Server Terminal to install openssl and create the PKI directory
itlabcenter@itlabcenter-mx:~
$ sudo apt-get install openssl -y
itlabcenter@itlabcenter-mx:~
$ mkdir -p ~/pki && cd ~/pki
Run the following command from the Repo Server Terminal to configure openssl to use SANS for cert creation
itlabcenter@itlabcenter-mx:~/pki
$ cat <<EOF > server.ext
authorityKeyIdentifier=keyid,issuer
basicConstraints=CA:FALSE
keyUsage = digitalSignature, nonRepudiation, keyEncipherment, dataEncipherment
subjectAltName = @alt_names
[alt_names]
IP.1 = 192.168.0.220
EOF
Run the following commands from the Repo Server Terminal to create the CA Key and Certificate with openssl
itlabcenter@itlabcenter-mx:~/pki
$ openssl genrsa -out ca.key 4096
itlabcenter@itlabcenter-mx:~/pki
$ openssl req -x509 -new -nodes -key ca.key -sha256 -days 365 -subj "/C=US/ST=Lab/L=Lab/O=ITLabCenter/CN=ITLab-CA" -out ca.crt
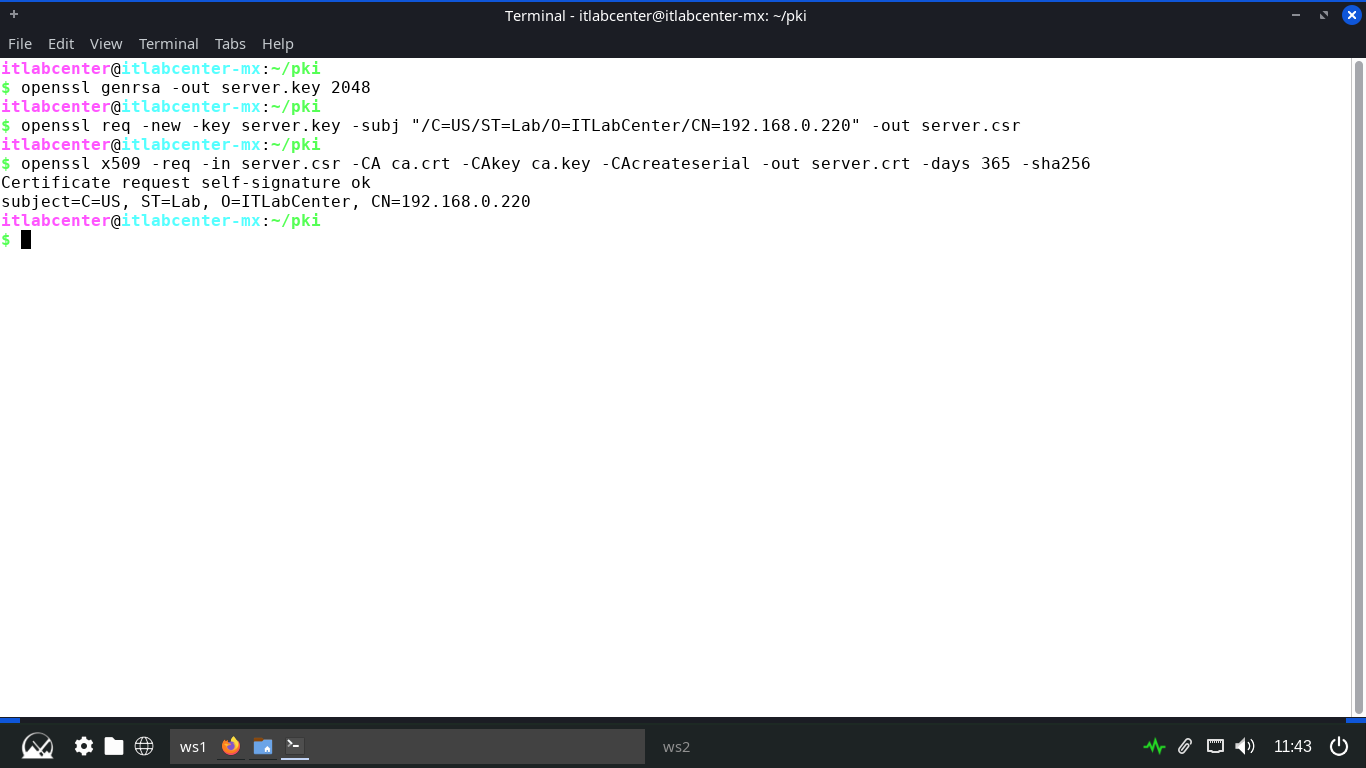
Run the following commands from the Repo Server Terminal to create the server certificate for our NGINX
itlabcenter@itlabcenter-mx:~/pki
$ openssl genrsa -out server.key 2048
itlabcenter@itlabcenter-mx:~/pki
$ openssl req -new -key server.key -subj "/C=US/ST=Lab/O=ITLabCenter/CN=SERVERIP" -out server.csr
itlabcenter@itlabcenter-mx:~/pki
$ openssl x509 -req -in server.csr -CA ca.crt -CAkey ca.key -CAcreateserial -out server.crt -days 365 -sha256 -extfile server.ext
Resulting Output:
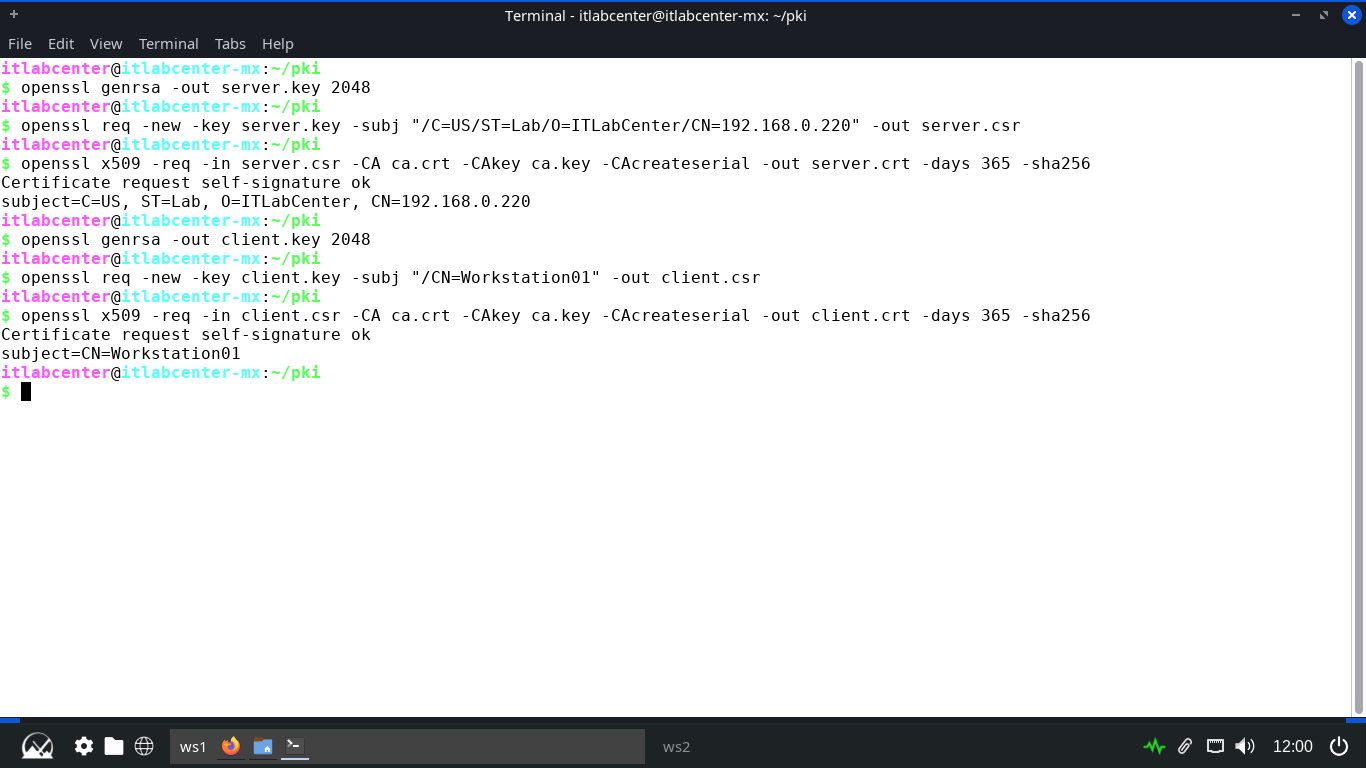
Run the following commands from the Repo Server Terminal to create the client certificate for the endpoint
itlabcenter@itlabcenter-mx:~/pki
$ openssl genrsa -out client.key 2048
itlabcenter@itlabcenter-mx:~/pki
$ openssl req -new -key client.key -subj "/CN=Workstation01" -out client.csr
itlabcenter@itlabcenter-mx:~/pki
$ openssl x509 -req -in client.csr -CA ca.crt -CAkey ca.key -CAcreateserial -out client.crt -days 365 -sha256
Resulting Output:
Now, thell NGINX to require a valid client certificate signed by your ca.crt for access to the registery
Run the following commands from the Repo Server Terminal to move the certificates to a standard location
itlabcenter@itlabcenter-mx:~/pki
$ sudo mkdir -p /etc/nginx/certs/
itlabcenter@itlabcenter-mx:~/pki
$ sudo cp ca.crt server.crt server.key /etc/nginx/certs
Run the following command from the Repo Server Terminal to create and edit the NGINX registry config file
itlabcenter@itlabcenter-mx:~/pki
$ sudo nano /etc/nginx/sites-available/docker-registry
Type out the following server file below, then hit CTRL+O to save and CTRL+X to exit the nano text editor
server {
listen 443 ssl;
server_name SERVERIP;
ssl_certificate /etc/nginx/certs/server.crt;
ssl_certificate_key /etc/nginx/certs/server.key;
ssl_client_certificate /etc/nginx/certs/ca.crt;
ssl_verify_client on;
client_max_body_size 0;
location / {
proxy_pass http://localhost:5000;
proxy_set_header Host $host;
proxy_set_header X-Real-IP $remote_addr;
proxy_set_header X-Forwarded-For $proxy_add_x_forwarded_for;
proxy_set_header X-Forwarded-Proto $scheme;
}
}
Run the following commands from the Repo Server Teminal to link the configuration and restart our NGINX
itlabcenter@itlabcenter-mx:~/pki
$ sudo ln -s /etc/nginx/sites-available/docker-registry /etc/nginx/sites-enabled/
itlabcenter@itlabcenter-mx:~/pki
$ sudo ufw allow 443/tcp
itlabcenter@itlabcenter-mx:~/pki
$ sudo ufw allow 5000/tcp
itlabcenter@itlabcenter-mx:~/pki
$ sudo ufw allow 22/tcp
itlabcenter@itlabcenter-mx:~/pki
$ sudo systemctl reload nginx
itlabcenter@itlabcenter-mx:~/pki
$ cd ~
Our NGINX server is now configured as a secure proxy and is broadcasting our registry to those with keys
13. Perform Secure Docker Image Push & Pull
Now we must configure a Docker container on the server side to handle the requests to the image registry
Docker looks for certificates in a specifice directory structure based on the server's hostname or IPv4
Run the following commands from the Repo Server Terminal to install the Docker tool and the many plugins
itlabcenter@itlabcenter-mx:~
$ sudo apt-get install ca-certificates curl -y
itlabcenter@itlabcenter-mx:~
$ sudo install -m 0755 -d /etc/apt/keyrings
itlabcenter@itlabcenter-mx:~
$ sudo curl -fsSL https://download.docker.com/linux/debian/gpg -o /etc/apt/keyrings/docker.asc
itlabcenter@itlabcenter-mx:~
$ sudo chmod a+r /etc/apt/keyrings/docker.asc
itlabcenter@itlabcenter-mx:~
$ sudo tee /etc/apt/sources.list.d/docker.sources <<EOF
> Types: deb
> URIs: https://download.docker.com/linux/debian
> Suites: $(. /etc/os-release && echo "$VERSION_CODENAME")
> Components: stable
> Signed-By: /etc/apt/keyrings/docker.asc
> EOF
itlabcenter@itlabcenter-mx:~
$ sudo apt-get update
itlabcenter@itlabcenter-mx:~
$ sudo apt-get install docker-ce docker-ce-cli containerd.io docker-buildx-plugin docker-compose-plugin openssh-server -y
Run the following command from the Repo Server Terminal to enable the docker service reboot the Linux system
itlabcenter@itlabcenter-mx:~
$ sudo update-rc.d docker defaults
itlabcenter@itlabcenter-mx:~
$ sudo reboot
Docker does not play well with the default init system for MX Linux which is SySVInit, we need systemd
At the bootloader, user the arrow keys to navigate to advanced options for MX 25.1 and select the systemd
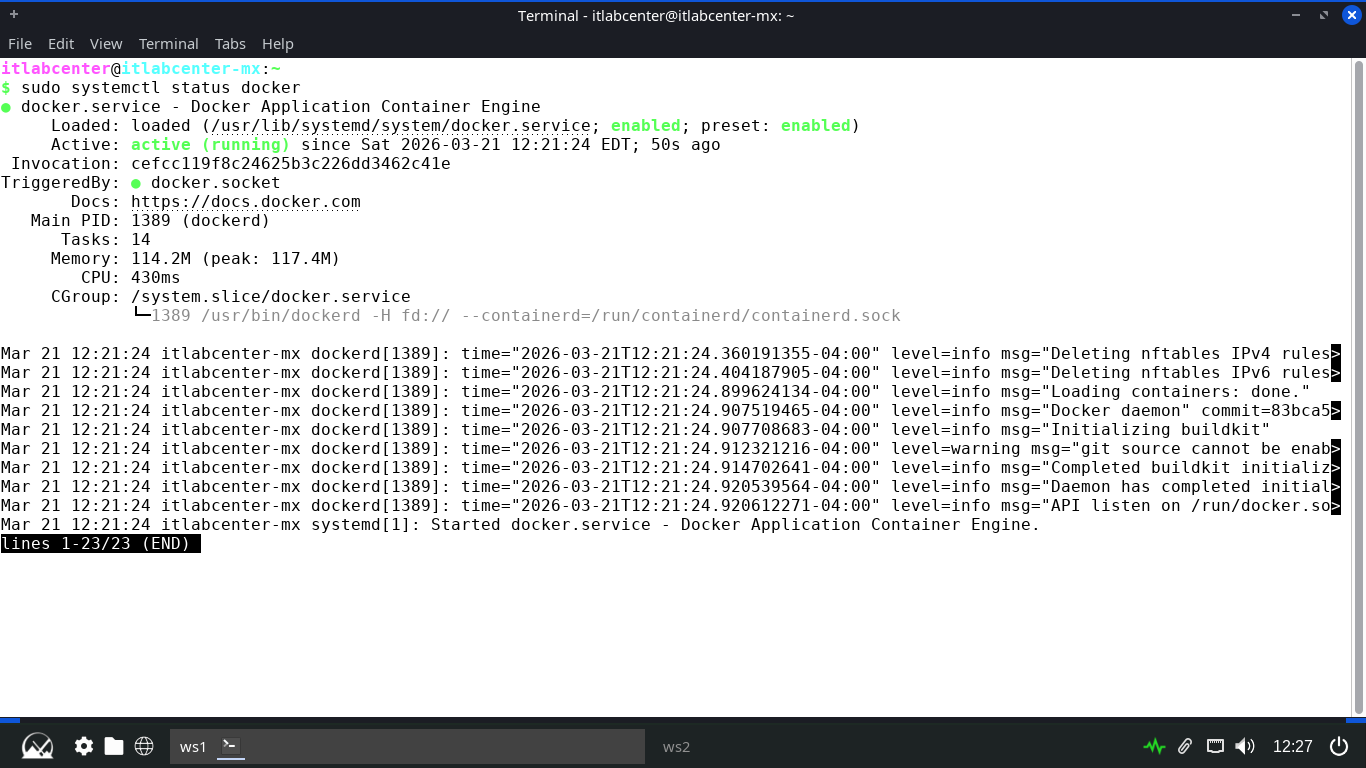
Run the following command from the MRepo Server Teminal to check on and display the status of the service
itlabcenter@itlabcenter-mx:~
$ sudo systemctl status docker
Resulting Output:
Run the following commands from the Repo Server Terminal to configure and place the client certificates
itlabcenter@itlabcenter-mx:~
$ sudo mkdir -p /etc/docker/certs.d/192.168.0.220/
itlabcenter@itlabcenter-mx:~
$ sudo cp ~/pki/ca.crt /etc/docker/certs.d/192.168.220/ca.crt
itlabcenter@itlabcenter-mx:~
$ sudo cp ~/pki/client.crt /etc/docker/certs.d/192.168.0.220/client.cert
itlabcenter@itlabcenter-mx:~
$ sudo cp ~/pki/client.key /etc/docker/certs.d/192.168.0.220/client.key
itlabcenter@itlabcenter-mx:~
$ sudo systemctl restart docker
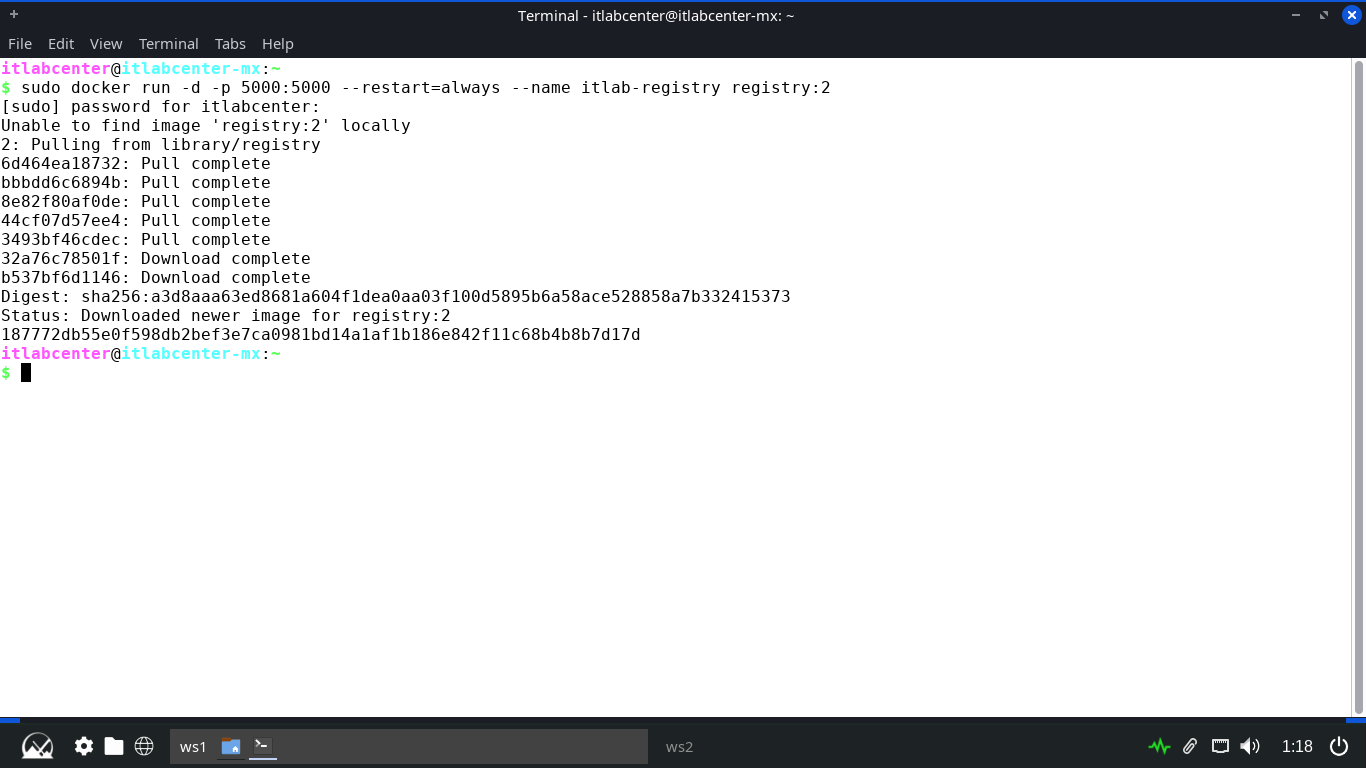
Run the following command from the Repo Server Terminal to start the registry service docker container
itlabcenter@itlabcenter-mx:~
$ sudo docker run -d -p 5000:5000 --restart=always --name itlab-registry registry:2
Resulting Output:
Run the following command from the Repo Server Terminal to create and edit our new container Dockerfile
itlabcenter@itlabcenter-mx:~
$ sudo nano Dockerfile-Alpine
Type out the following dockerfile to package our system securely, save with CTRL+O and exit with CTRL+X
FROM alpine:3.12
RUN apk update && apk add --no-cache xvfb dbus dbus-x11 ttf-dejavu font-noto x11vnc fluxbox bash iproute2 chromium
ENV DISPLAY=:0
RUN echo "#!/bin/sh" > /start.sh && \
echo "rm -f /tmp/.X0-lock" >> /start.sh && \
echo "dbus-uuidgen > /var/lib/dbus/machine-id" >> /start.sh && \
echo "Xvfb :0 -screen 0 1024x768x24 -ac &" >> /start.sh && \
echo "sleep 2" >> /start.sh && \
echo "x11vnc -display :0 -forever -nopw -listen 0.0.0.0 &" >> /start.sh && \
echo "sleep 2" >> /start.sh && \
echo "fluxbox &" >> /start.sh && \
echo "sleep 1" >> /start.sh && \
echo "exec dbus-run-session -- chromium-browser --window-size 1024,768 --no-sandbox" >> /start.sh && \
chmod +x /start.sh
EXPOSE 5900
ENTRYPOINT ["/start.sh"]
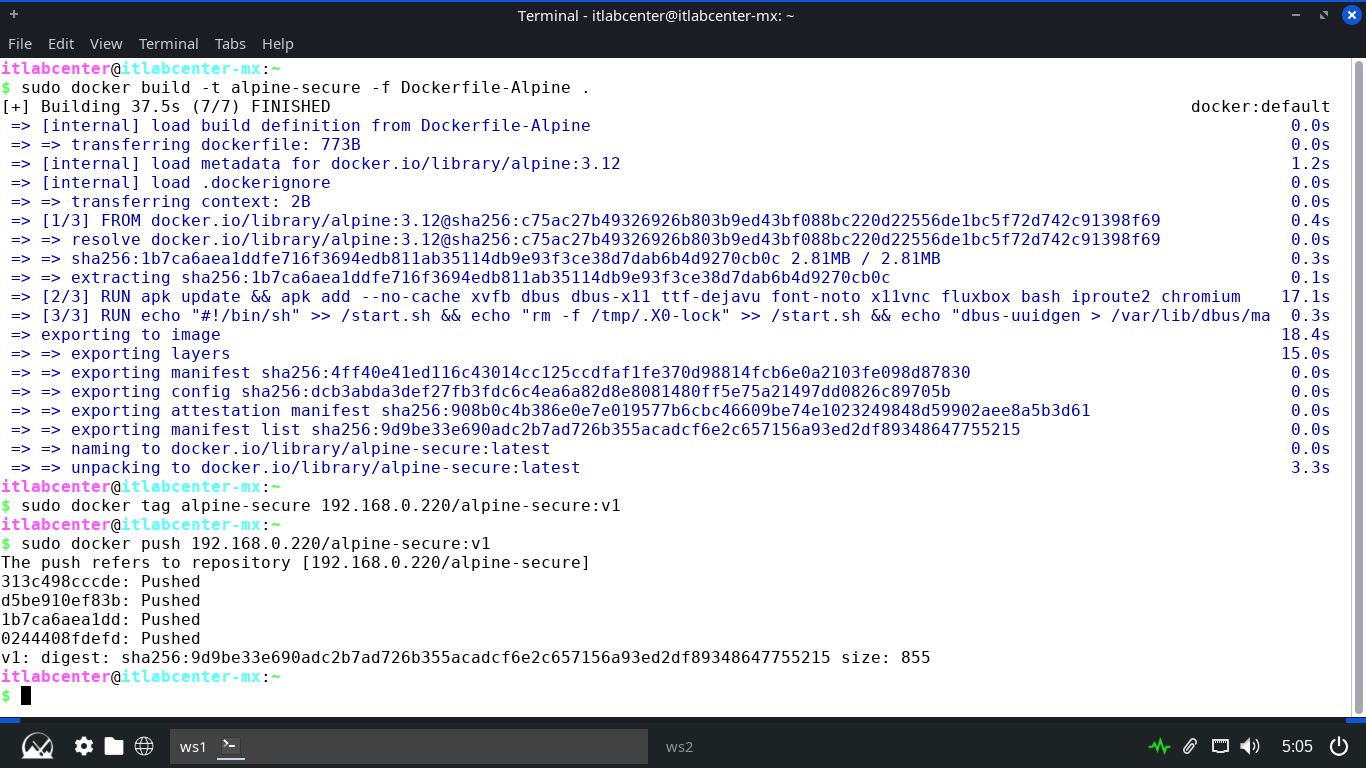
Run the following commands from the Repo Server Terminal to build our Alpine container securely and tag it
itlabcenter@itlabcenter-mx:~
$ sudo docker build -t alpine-secure -f Dockerfile-Alpine .
itlabcenter@itlabcenter-mx:~
$ sudo docker tag alpine-secure 192.168.0.220/alpine-secure:v1
itlabcenter@itlabcenter-mx:~
$ sudo docker push 192.168.0.220/alpine-secure:v1
Resulting Output:
Run the following commands from the MX Endpoint Terminal to configure the slient side registry certificates
itlabcenter@itlabcenter-mx:~
$ sudo mkdir -p /etc/docker/certs.d/192.168.0.220/
itlabcenter@itlabcenter-mx:~
$ sudo scp itlabcenter@192.168.0.220:~/pki/ca.crt /etc/docker/certs.d/192.168.220/ca.crt
itlabcenter@itlabcenter-mx:~
$ sudo scp itlabcenter@192.168.0.220:~/pki/client.crt /etc/docker/certs.d/192.168.0.220/client.cert
itlabcenter@itlabcenter-mx:~
$ sudo scp itlabcenter@192.168.0.220:~/pki/client.key /etc/docker/certs.d/192.168.0.220/client.key
itlabcenter@itlabcenter-mx:~
$ sudo systemctl restart docker
Run the following command from the MX Endpoint Terminal to securely pull the image from the registry server
itlabcenter@itlabcenter-mx:~
$ sudo docker pull 192.168.0.220/alpine-secure:v1
Resulting Output:

Run the following commands from the MX Endpoint Terminal to launch the container and remote in with VNC
itlabcenter@itlabcenter-mx:~
$ sudo docker run -d -p 5900:5900 --name alpine-secure 192.168.0.220/alpine-secure:v1
itlabcenter@itlabcenter-mx:~
$ vncviewer localhost:5900
Resulting Output:
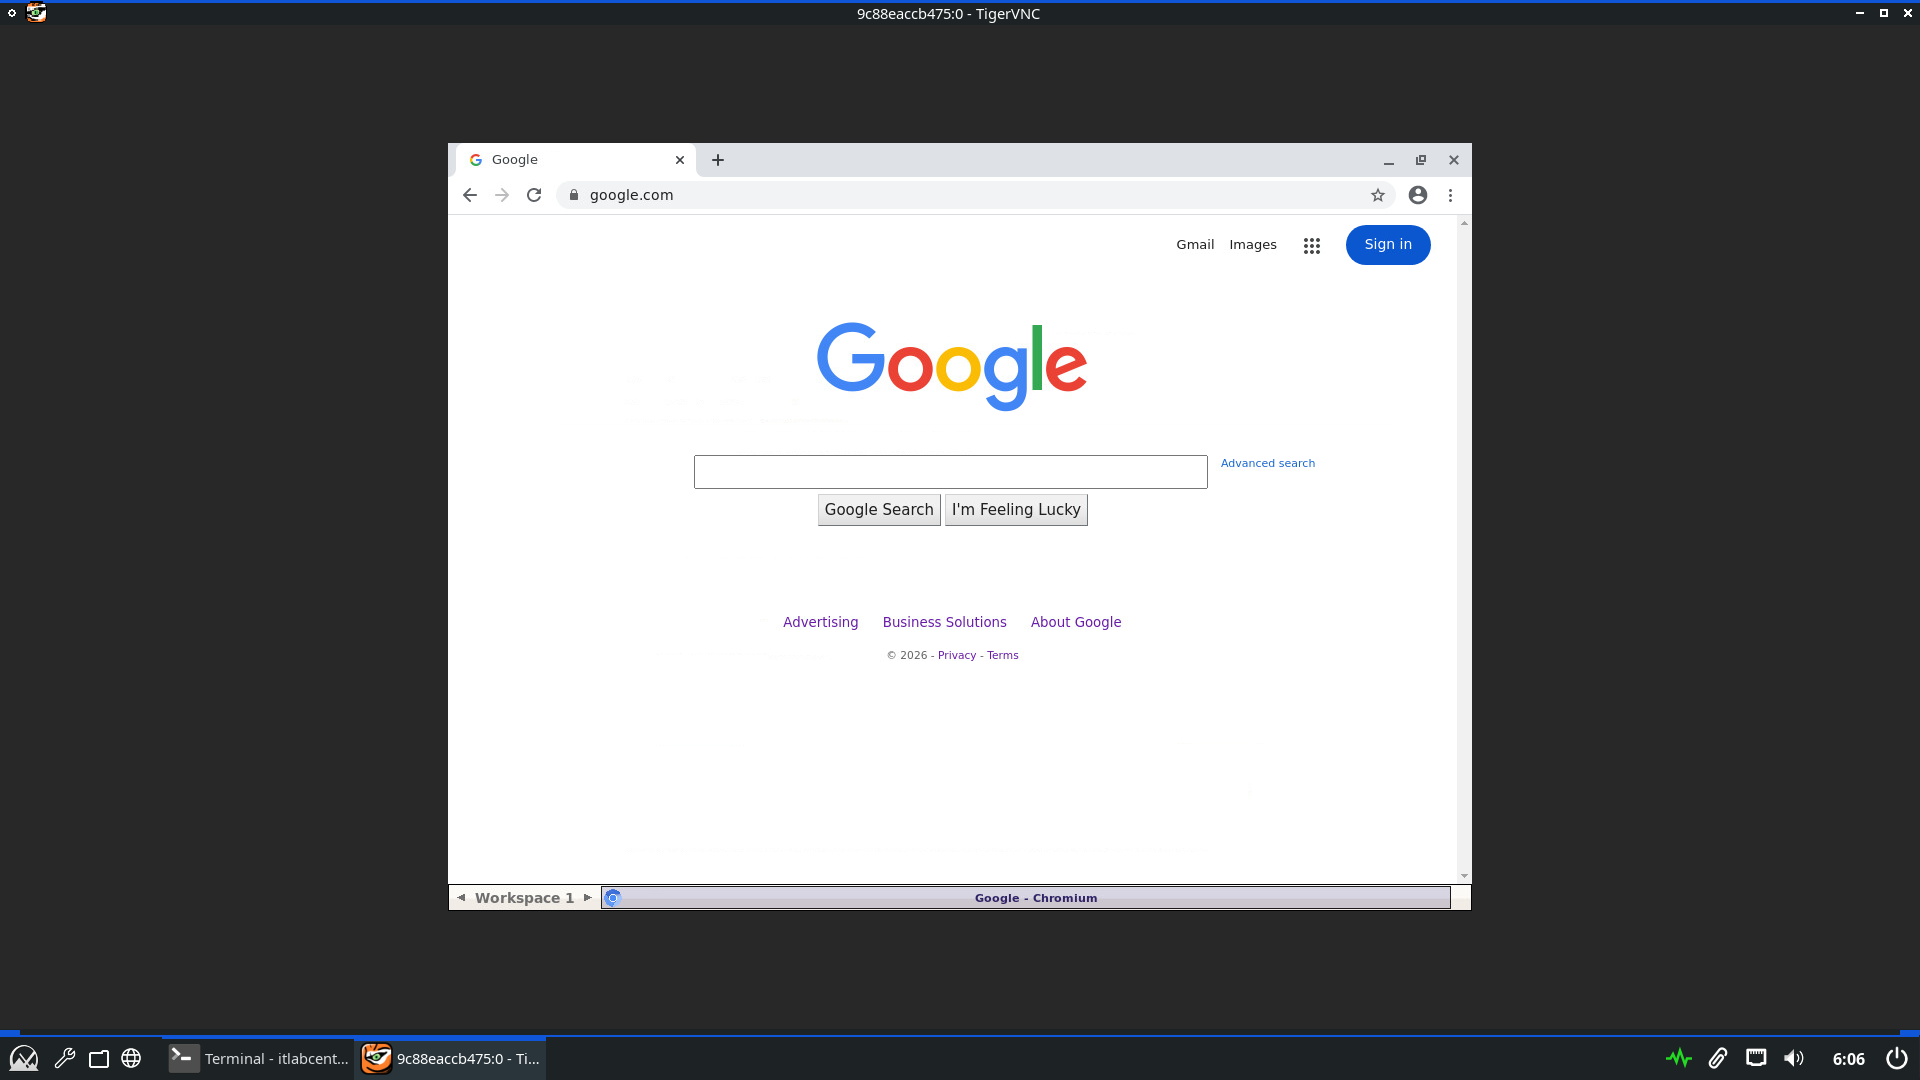
In this setup, the containers image is compiled locally and store in our registry rather than the internet
Mutual TLS ensures that only machines with the client.key can pull the image from our NGINX image server
The entire transfer is encrypted by the server.crt when in transit, which ensures full confidentiality
Congratulations, in this lab we took things a step further by tackling real engineering taks, great work